Imagine cruising down the street at night with your wheels glowing in vibrant colors—turning heads at every stoplight and drawing attention at car shows or meetups. Wheel lights aren’t just a flashy accessory; they’re also a visibility booster, enhancing safety by making your vehicle more noticeable, especially in low-light conditions.

Whether you’re upgrading for style, safety, or a bit of both, installing wheel lights is one of the most rewarding vehicle mods out there. Best of all, it’s a project that you can absolutely do yourself with a little patience and the right tools.
In this guide, we’ll walk you through everything you need to know how to mount wheel lights on your car, truck, or motorcycle. From choosing the right kit to wiring, mounting, and troubleshooting, this article will help you get it done right.
Choosing the Right Wheel Light Kit
Before you start tearing into your tool kit, you’ll need the right wheel lights. There are several types, and each suits different styles and setups.
Types of Wheel Lights
- LED Ring Lights: Mounted around brake rotors, these offer a uniform glow and are great for trucks and larger wheels.
- LED Strip Lights: These flexible strips mount inside the wheel well, casting light outward to give a halo effect.
- Spoke or Rim Lights: These mount directly on the spokes or rims and are often motion-activated or battery-operated.
Key Features to Look For
- Waterproof rating: Look for IP67 or higher to handle rain, mud, and washes.
- Control type: Choose between remote control, Bluetooth/app control, or both.
- Color options: RGB kits offer multicolor choices and effects, while single-color kits provide a clean, focused look.
- Voltage compatibility: Ensure the kit works with 12V DC systems, standard in most vehicles.
Top Recommended Kits
- Xprite LED RGB Wheel Ring Lights – Amazon
Pros: Bright, app-controlled, multiple sizes.
Cons: Installation may require rotor removal. - OPT7 Aura LED Wheel Well Kit – Amazon
Pros: Easy strip-mounting, strong adhesive, vibrant colors.
Cons: Not as seamless as ring lights. - SUNPIE Wheel Light Kit – Amazon
Pros: Affordable, remote control, waterproof.
Cons: Basic design, not RGB.
These kits provide excellent entry points, depending on your budget and experience level.
Tools, Supplies, and Safety Gear

Tools You’ll Need
- Screwdrivers
- Socket wrench or drill
- Wire stripper and crimper
- Multimeter
Supplies
- Chosen LED wheel light kit
- Zip ties or cable clips
- Wire connectors or solder
- Electrical tape and heat shrink tubing
Safety Gear
- Work gloves
- Safety goggles
- Jack and jack stands
- Battery disconnect tool (optional but useful)
Pro Tip: Some kits come with all needed tools—look for “complete installation kits” to simplify the process.
Preparation Before Mounting
Before getting your hands dirty, prep your vehicle to ensure a clean, smooth installation.
1. Clean the Area
Wash and degrease the wheel wells and mounting areas. Dirt and grime reduce adhesion and may lead to electrical shorts.
2. Lift the Vehicle
Using a jack and stands, raise the car enough to provide easy access to the wheel wells. This is especially important for trucks or vehicles with tight fender gaps.
3. Plan Your Layout
Dry-fit the lights and wires before peeling any adhesive or drilling. Visualize the final setup—ensure symmetry and clearance from tires and moving parts.
4. Disconnect the Battery
Safety first! Always disconnect the battery to prevent accidental shorts while wiring.
6 Easy Steps on How to Mount Wheel Lights
Installing wheel lights is a great way to enhance your vehicle’s look and nighttime visibility. Here’s how to mount them correctly from start to finish.
Step 1: Mounting the Lights
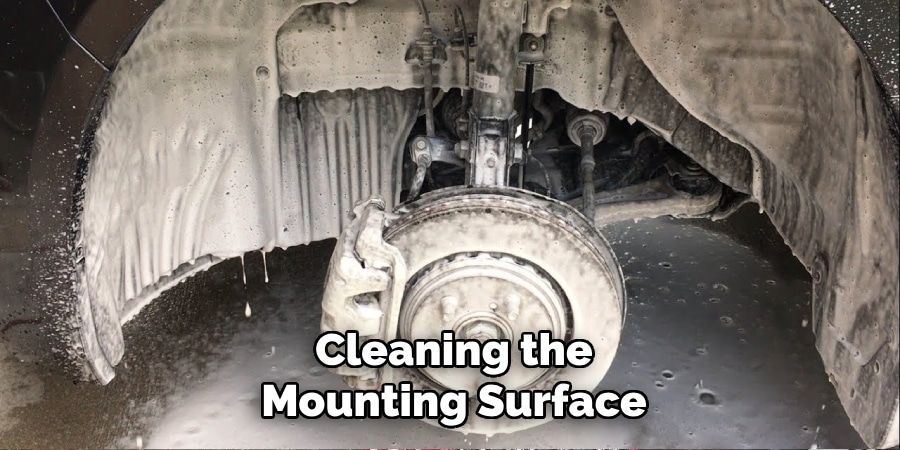
Start by cleaning the mounting surface thoroughly with rubbing alcohol. This removes any dirt, grease, or debris that could prevent proper adhesion or a secure bracket fit.
If you’re using an adhesive kit, peel off the backing from the LED strips and press each strip firmly onto the cleaned surface. Hold each one in place for at least 30 seconds to ensure good contact. If you’re concerned about durability, you can reinforce the strips with zip ties.
If you’re using a bracket or ring kit, position the light rings around the rotor or inside the wheel well. If your vehicle requires it, drill small pilot holes to fit the mounting hardware. Once the position is set, bolt down the brackets securely using the supplied hardware.
Step 2: Running the Wires
Route the wires from each light through the fender liners or along the vehicle’s frame rails. As you do this, take care to avoid hot surfaces like brake calipers and exhaust parts, as well as any sharp edges that could damage the wires.
You’ll also want to avoid moving components such as suspension arms or brake rotors. Use zip ties to secure the wires every few inches, keeping them tight, neat, and out of the way.
Step 3: Connecting the Power
You have two main options for powering your wheel lights.
The first is to connect them to an accessory (ACC) circuit using a fuse tap. Open your fuse box, identify an ACC circuit, and insert the fuse tap. This setup allows the lights to turn on only when the ignition is on, preventing battery drain.
The second option is a direct battery connection. Attach the positive wire from the lights directly to the battery using an inline fuse for protection. Then install a toggle switch or use a remote control unit to turn the lights on or off as needed.
Step 4: Grounding the System
To ground the system properly, find a bare metal area on your vehicle’s chassis. Scrape away any paint or rust to expose clean metal. Attach the ground wire securely using a self-tapping screw or an existing bolt. After connecting, use a multimeter to test for continuity and confirm the ground connection is solid.

Step 5: Testing the Lights
Reconnect the vehicle’s battery if it was disconnected. Use your remote or app to test each individual light. Ensure that all the lights come on at full brightness, that they respond correctly to color changes, and that there is no flickering or uneven performance. This step helps confirm your wiring and power connections are functioning properly.
Step 6: Securing Everything
Once testing is complete and everything works correctly, finalize your installation. Double-check all wire routing and secure any loose cables with additional zip ties or clips. Apply dielectric grease to connectors to prevent moisture intrusion and corrosion. Make sure everything is tucked away safely and neatly.
Congratulations! You’ve successfully installed your wheel lights. Your ride is now road-ready with a new glow that turns heads and improves visibility at night.
Troubleshooting Common Issues
Lights Won’t Turn On
- Check battery connection.
- The Verified fuse is intact.
- Re-pair your remote or app.
Flickering or Incomplete Lighting
- Likely caused by a poor ground or loose connection.
- Re-check wiring and crimps.
Remote or App Not Responding
- Replace remote battery.
- Uninstall and reinstall the app or re-sync.
Moisture Inside Lights
- Use only IP67+ rated lights.
- Reseal any gaps with clear silicone if necessary.
Legal & Safety Considerations
Before hitting the road, check local laws:
- Color restrictions: Red and blue may be restricted to emergency vehicles.
- Flashing/strobing effects: Often illegal on public streets.
- Brightness levels: Excessive brightness can distract other drivers.
Use your wheel lights responsibly—save the flashiest settings for car shows or private roads.
Maintenance Tips for Longevity
Monthly Checks
- Ensure brackets or adhesives are still secure.
- Inspect for frayed or exposed wires.
Cleaning
- Gently rinse off dirt and debris.
- Avoid direct high-pressure water on connectors.
Software Updates
- For app-based kits, check the manufacturer’s website or app store for firmware updates.
Battery Care
- Keep remote batteries fresh.
- Recharge or replace internal batteries as needed.

Frequently Asked Questions
Q: Are wheel lights legal to use on public roads?
Ans: Laws differ depending on your region. Some areas ban certain colors like red or blue or flashing effects. Always check local traffic laws to avoid fines or safety issues.
Q: Can I install wheel lights myself, or do I need a professional?
Ans: Yes, most wheel light kits are designed for DIY installation. If you’re comfortable using basic tools and following wiring diagrams, you can do it yourself. Otherwise, consider professional help for electrical safety..
Q: Will wheel lights drain my car battery?
Ans: If installed correctly—especially using a fuse tap or switch—they won’t drain your battery. Lights should be wired to turn off when the vehicle is off.
Q: How do I keep the wiring safe from heat and moving parts?
Ans: To protect your wheel light wiring, route cables away from hot areas like brake rotors and moving parts like suspension arms. Use zip ties, wire loom, and adhesive clips to secure wires neatly along safe paths. This prevents damage during driving and extends the lifespan of your setup.
Q: Are wheel lights waterproof and safe to use in all weather conditions?
Ans: Yes, as long as you choose kits rated IP67 or higher. These are built to handle rain, mud, and even light pressure washing.
Conclusion
Adding wheel lights isn’t just about flair—it’s about visibility, creativity, and owning your ride’s look. With the right tools and some elbow grease, you can mount your own wheel lights in just a few hours.
From choosing the right kit to mounting, wiring, and troubleshooting, this guide gives you everything you need to do it right—and safely.
Try syncing your lights to music, or go full RGB with app control for a show-stopping look.