Track lighting has long been a popular solution in homes, offices, galleries, and commercial spaces thanks to its flexibility and modern appeal.

It allows users to position multiple light heads along a single electrified track, offering directional illumination where it’s needed most. However, as with any lighting system, there comes a time when track lighting needs to be removed—either due to renovation, replacement, repair, or simply upgrading to a more contemporary design.
This article provides a comprehensive guide on how to take down track lighting effectively. Taking down track lighting might seem like a daunting task, especially when dealing with electrical wiring or fixtures mounted on the ceiling. But with the right preparation, tools, and safety measures, this job can be completed efficiently and safely—even by those with basic DIY skills.
Common Reasons for Track Lighting Removal
There are several reasons a homeowner or property manager may need to remove track lighting. Sometimes, it’s part of a home improvement project—perhaps switching to recessed lights, pendant lights, or smart fixtures. Other times, the system may have malfunctioned or become outdated, or it may no longer match the aesthetic of the room. Even minor issues, such as flickering lights or buzzing sounds, can prompt a full removal, especially if repairs are not cost-effective. And in rental properties, removing and storing track lighting for personal use elsewhere can be a wise move.
Importance of Following Proper Safety Procedures
Before touching anything electrical, safety should be your highest priority. Electrical work—no matter how minor—can pose risks of shock, fire, or property damage if not approached correctly. This is why turning off the power, using proper safety equipment, and following best practices are non-negotiable. If at any point you feel unsure or uncomfortable with the steps, calling a licensed electrician is always a smart decision.
Preparing for the Work
Place the tester near the track, light heads, and wiring connections. A green light or audible beep usually indicates the presence of voltage. If there’s no signal, you’re clear to begin working. Verifying power-off status ensures you’re not at risk of electric shock or short circuits when you touch wires or remove the track.
Gather Necessary Tools and Supplies

Assemble your tools in a small bucket or tool belt for easy access while working on a ladder. You’ll likely need:
- Screwdrivers
- Pliers
- Wire nuts
- Electrical tape
- Flashlight or headlamp
- Ladder
- Voltage tester
Optional items include a drill, a stud finder, and safety gloves for extra protection. Keep a helper nearby if the fixture is long or mounted high.
Understand the Track Lighting System
Track lighting systems typically come in three configurations: H-type, J-type, and L-type—named after their manufacturers. Each uses slightly different connectors and mounting methods. You’ll also want to determine whether the track is surface-mounted or recessed into a ceiling cove or drop ceiling. If you still have the product manual, it can offer helpful diagrams for how the system is attached.
8 Easy Steps on How to Take Down Track Lighting
Step 1: Remove the Light Bulbs
Begin by letting the bulbs cool completely if they were recently on. Once cool, gently twist or pull them out, depending on the fixture design. Halogen and incandescent bulbs get especially hot, so don’t rush this step. Place the bulbs in a soft cloth or padded box for reuse or proper disposal.
Step 2: Detach the Light Heads from the Track
Track light heads usually twist or pull out with a firm turn. Some may have small tabs or locking mechanisms that must be pressed while rotating the fixture. Avoid yanking—this could damage the internal track wiring. If the heads feel stuck, consult the manufacturer’s guidance or look for hidden tabs near the base.
Step 3: Inspect How the Track Is Mounted
Shine a flashlight along the length of the track to find the mounting screws or clips. Most systems are held up by screws at regular intervals. You might also spot snap-in connectors or toggle bolts, especially in drywall ceilings. Make light pencil marks next to the screws if you want to reinstall or reuse the track elsewhere.
Step 4: Unscrew the Track from the Ceiling
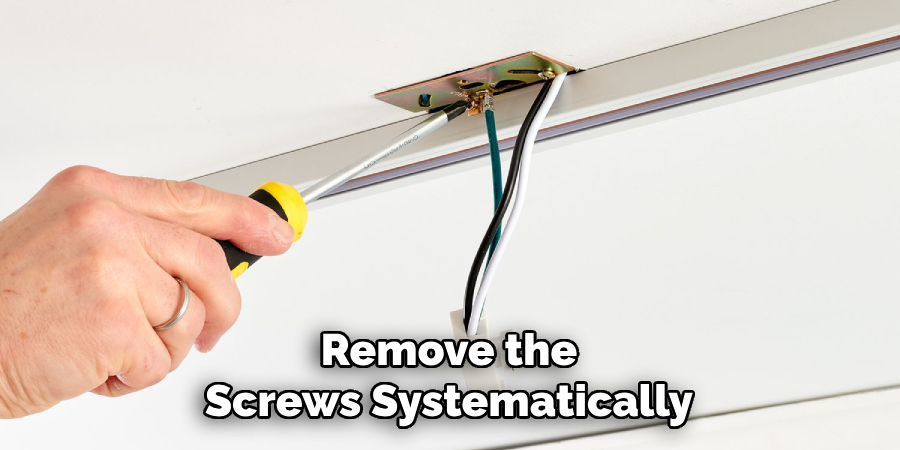
Start at one end of the track and remove the screws systematically. Support the track with one hand to prevent it from falling or swinging. If you encounter drywall anchors, toggle bolts, or stripped screws, a drill may help. Be careful not to damage the ceiling or pull down plaster as you work.
Step 5: Lower the Track Gently
Once unscrewed, lower the entire track slowly. Be cautious of any wires still connected at the end feed. If the track is long or heavy, have a helper hold one end while you detach the other. Set the track aside on a soft surface to avoid scratching or bending it.
Step 6: Open the Electrical Box or End Feed
Locate the power source junction box or end feed where the track connects to house wiring. Remove the cover plate and inspect the wire connections. Typically, you’ll see a black (hot), white (neutral), and bare or green (ground) wire.
Take a photo or label each wire if you plan to reconnect new lighting later. This will help you match up the wiring without guesswork.
Step 7: Disconnect the Wires Safely
Unscrew the wire nuts and gently pull the wires apart. Use new wire nuts to cap the live wires (black and white) even if the power is off. Add electrical tape around the nuts for extra security. Fold the wires carefully back into the electrical box to prepare for sealing.
Step 8: Seal or Cover the Junction Box
If you’re not installing a new light right away, cover the electrical box with a blank faceplate. This keeps it protected and code-compliant. The cover should be flush with the ceiling and fastened with screws. In some areas, local codes may require a specific cover type—check your region’s rules if unsure.
Post-Removal Inspection and Clean-Up
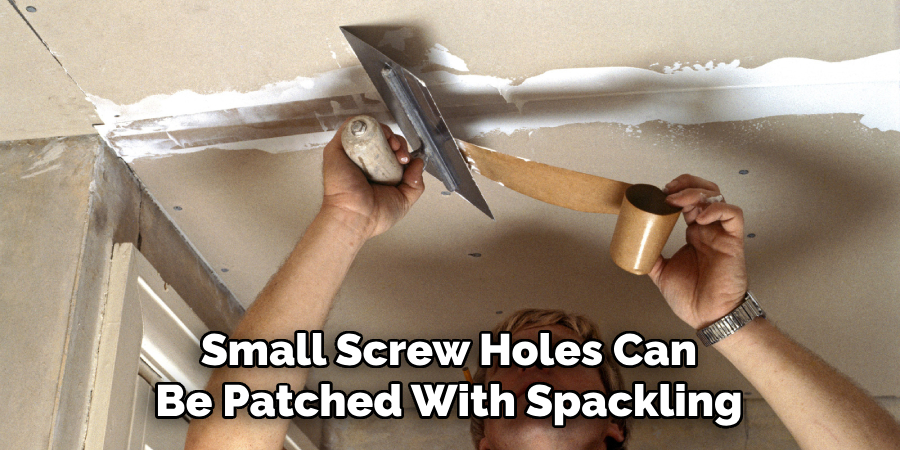
Inspect the Ceiling for Damage
Once the track and heads are down, examine the ceiling for any damage. Small screw holes can be patched with spackling compound, then sanded smooth. If paint was chipped or torn, touch it up to match the surrounding area. Take care not to leave gaps or exposed hardware.
Dispose or Reuse the Old Track Lighting
You can recycle many parts of track lighting—including bulbs, aluminum track sections, and plastic connectors—through local e-waste programs. If you plan to reuse the track, store it in a labeled box with all screws and heads to keep the components organized. If discarding, follow your city’s disposal guidelines for electronic waste.
Common Issues and Troubleshooting
Dealing with Stuck Fixtures or Screws
If a screw won’t come out, try applying penetrating oil and waiting a few minutes. A power drill or screw extractor might help loosen it. Avoid using excessive force—this could damage ceiling material or strip the hardware beyond removal.
Handling Live Wires You Didn’t Expect
If a wire tester suddenly shows power when you thought it was off, immediately stop and re-check the circuit breaker panel. Sometimes circuits are mislabeled, or multiple switches control the same light. Never proceed until you’re 100% sure the power is off. If confusion persists, hire a professional.
Removing Track Lighting from Suspended Ceilings
In commercial spaces or basements, track lighting may be attached to a drop ceiling grid. These setups often use unique mounting brackets that differ from drywall ceilings. Be cautious not to dislodge ceiling tiles, and always ensure the power is off before starting.
Tips for Future Installations or Replacements
Saving Components for Future Use
Some parts of your old system—such as track heads, connectors, and end feeds—may work with new installations. Store these in a container along with hardware and instructions if you plan to reuse or donate them.
Preparing the Area for New Lighting
Patch any holes or repaint the ceiling before installing a new fixture. If you’re installing a pendant, chandelier, or flush mount light, make sure there’s a ceiling junction box in place. Use compatible mounting brackets and verify that the existing wiring matches your new lighting’s power requirements.
Safety Precautions to Always Follow
- Always double-check that the power is off using a voltage tester.
- Use a stable ladder and wear slip-resistant shoes when working at height.
- Never work alone when handling electrical tasks; a second person can assist or call for help if needed.
- If in doubt, don’t hesitate to hire a licensed electrician.

Frequently Asked Questions
Q: What should I do with the wires after removing the fixture?
Ans: If you’re not installing a new fixture immediately, cap the exposed wires with wire nuts and tuck them safely into the junction box. Cover the box with a blank faceplate.
Q: Will removing track lighting damage my ceiling?
Ans: It depends on how the track was installed. Minor cosmetic damage like screw holes or paint peeling may occur, but these can usually be patched and repainted easily.
Q: Can I recycle the removed track lighting parts?
Ans: Some parts, like aluminum tracks or metal lamp heads, may be recyclable. Check your local recycling guidelines or donate working fixtures to a reuse center.
Q: What’s the difference between single-circuit and dual-circuit track lighting during removal?
Ans: Dual-circuit systems have two separate power lines and may have more complex wiring. Make sure to label wires and take pictures before disconnection to avoid confusion.
Conclusion
Taking down track lighting isn’t just a matter of removing a few screws—it requires planning, care, and attention to safety. By understanding the type of system you have, following each step carefully, and using the right tools, you can remove your track lighting confidently and cleanly.
Whether you’re upgrading your home’s lighting, renovating a commercial space, or troubleshooting an old fixture, this process can be straightforward with a little preparation. And once the job is done, you can breathe easy knowing the space is ready for your next lighting adventure.
Browse our latest recommendations and how-to guides on Lightorix.com to illuminate your next project!