Introduction
Hanging lights around your garage is an excellent way to enhance your home’s exterior and create a welcoming, vibrant atmosphere. Whether you’re decorating for a special occasion, upgrading your garage lighting for better visibility and security, or adding year-round charm, the right lighting can elevate your home’s curb appeal.
However, achieving a professional and durable finish requires careful planning and proper execution. The first step is selecting the right lights for your specific needs. String lights or icicle lights are perfect for festive occasions, while LED floodlights and motion-sensor lights are ideal for practical, everyday use. Both options can dramatically improve the look and functionality of your garage.
Using the right installation tools is also essential to ensure a secure and damage-free setup. Adhesive hooks, magnetic clips, or gutter hooks are great choices for hanging lights without the need for drilling holes.
Safety should always be a priority when working with electricity and outdoor installations. Be sure to use outdoor-rated, waterproof lights to withstand the elements, and ensure proper connections and support throughout the process.
In this article, we’ll cover a comprehensive guide on how to hang lights around garage tree effectively, from selecting the ideal lighting to following safe installation practices. Let’s get started and turn your garage into a well-lit, stunning focal point that adds beauty and function to your home.
Essential Tools and Materials for Installation
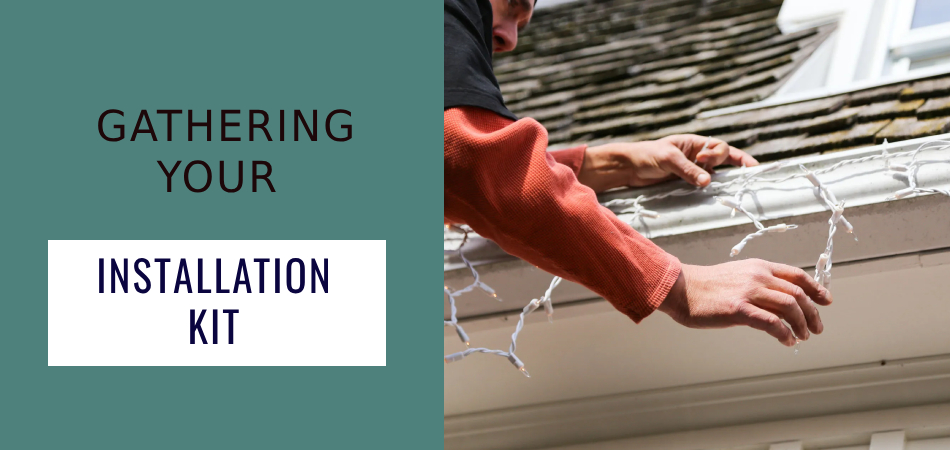
Gathering Your Installation Kit
Before you begin, it’s important to gather all the necessary tools and materials for a seamless installation process. Here’s what you’ll need:
- Outdoor-rated lights (string lights, LED lights, or floodlights)
- Adhesive hooks or light clips
- Extension cords and surge protectors
- Measuring tape
- Ladder
- Screwdriver (if mounting hardware is required)
- Cable ties for securing wires
Safety Equipment to Consider
Installing lights often requires working at heights and handling electrical components. To stay safe, consider the following:
- Gloves to protect your hands from sharp edges or hot bulbs
- Safety goggles to shield your eyes from debris
- A sturdy ladder with non-slip feet
- Outdoor-rated electrical tape to secure connections
- An assistant to hold the ladder or provide support
Planning Your Garage Light Display
Selecting the Right Lights for Your Garage
Choosing the right lights is essential to create the perfect display. For a festive look, string lights or icicle lights add warmth and charm. If you’re aiming for practical, year-round lighting, opt for LED floodlights or motion-sensor lights, which offer bright illumination and energy efficiency. Always select outdoor-rated and waterproof lights to ensure they can withstand harsh weather conditions like rain or snow. The right lighting choice can enhance both the functionality and aesthetics of your garage.
Assessing Your Garage Layout and Power Sources
Start by evaluating your garage’s dimensions, frame structure, and layout to determine the best light placement. Identify nearby electrical outlets and assess whether extension cords or power strips are necessary for your setup. Pay attention to obstacles like gutters, trim, or uneven surfaces that might interfere with attaching or aligning the lights. Proper planning ensures a seamless installation while avoiding potential issues. Consider weatherproofing connections and ensuring accessibility to power sources for a safe and efficient lighting display.
5 Easy Steps For How to Hang Lights Around Garage
Step 1: Measure and Plan Your Light Placement
Start by measuring the areas where you plan to hang your lights, such as the garage frame, roofline, or walls. Use a measuring tape to determine the total length of lights you’ll need. Consider how you want the lights to look—whether straight, evenly spaced, or forming a pattern. Mark your chosen spots lightly with a pencil to guide your installation. If you’re hanging the lights outdoors, ensure they are weatherproof and rated for exterior use.
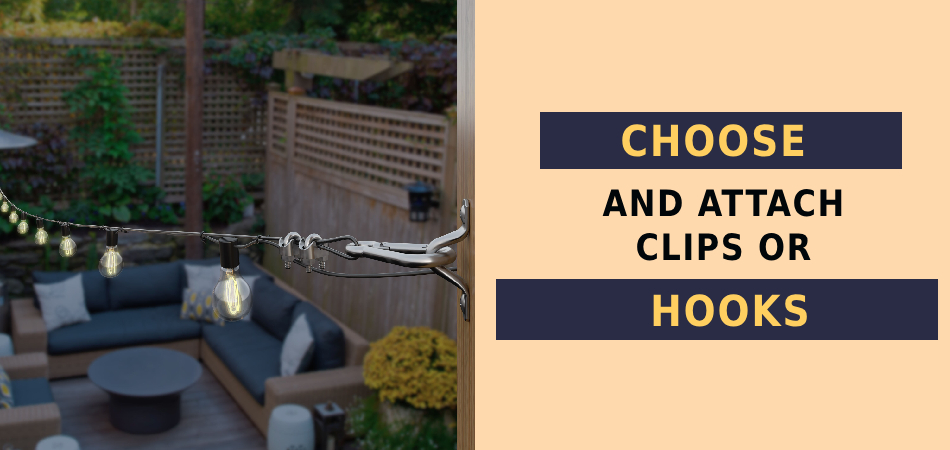
Step 2: Choose and Attach Clips or Hooks
Decide on the type of fasteners you’ll use, such as adhesive hooks, gutter clips, or screw-in hooks. Adhesive hooks are perfect for avoiding damage, while screw-in hooks provide a more secure option. Install the clips along the areas you measured, spacing them evenly—about 12–18 inches apart—to ensure the lights are well-supported and don’t sag. For rooflines or eaves, gutter clips are a quick and effective solution. Make sure the clips or hooks are compatible with the type of lights you’re using.
Step 3: Hang and Secure the Lights
Carefully hang the lights by attaching them to the hooks or clips. Start from one end and work your way to the other, ensuring the lights are stretched taut but not pulled too tightly to avoid damaging the wiring. If you’re using string lights and have extra length, loop or secure the excess with additional clips or cable ties. Ensure the lights are aligned evenly for a polished look. For outdoor installations, avoid positioning lights where they may be exposed to excessive water or wind.
Step 4: Test the Lights During Installation
Before completing the setup, plug in the lights to ensure they’re working properly. Check for any issues, such as dim or non-functional bulbs, loose connections, or uneven lighting. Replace damaged or burnt-out bulbs immediately. Testing as you go ensures you won’t need to redo your work if something isn’t functioning correctly. It also helps you make adjustments for an evenly lit appearance.
Step 5: Final Adjustments and Safety Check
Once all the lights are in place, inspect your work to ensure everything is secure. Check that the wires are not pinched, hanging loose, or exposed to sharp edges. If you’re using outdoor lights, ensure they’re plugged into a GFCI-protected outlet for safety. Tidy up any visible excess wires using cable ties or cord organizers. Finally, enjoy your beautifully lit garage, knowing it’s securely and safely installed!
Key Maintenance Tasks
Maintaining your garage lights ensures they remain functional and visually appealing over time. Regularly check for burnt-out bulbs and replace them promptly. Inspect the wiring for signs of wear or damage, especially after storms or high winds. Clean the lights periodically with a damp cloth to remove dust and debris.
Seek Professional Help for Hanging Christmas Lights
If you’re planning an elaborate or large-scale Christmas light display, hiring professionals can save time and effort while ensuring a flawless result. Professional installers have the tools, experience, and expertise to handle complex setups efficiently. This is particularly helpful for multi-story homes, tall trees, or intricate designs that require ladders, specialized equipment, or advanced techniques.
Professionals prioritize safety, reducing the risk of accidents during high or difficult installations. They’re also familiar with proper electrical connections and weatherproofing, ensuring your lights are both secure and functional throughout the holiday season.
Additionally, hiring experts allows you to focus on enjoying the festive season without the hassle of untangling wires, climbing ladders, or troubleshooting issues. Many services also offer takedown and storage options, simplifying post-holiday cleanup. For a dazzling and stress-free holiday display, consider investing in professional Christmas light installation.

Preparing Your Garage Door for a Festive and Functional Display
Your garage door can become a centerpiece of your holiday decor with the right preparation and creativity. Start by using magnetic hooks or adhesive clips to attach lights securely without causing damage to the door’s surface. These tools are ideal for creating clean, easy-to-remove installations, especially on metal or smooth surfaces.
Outline the structure of your garage door with string lights to highlight its shape and create a bold, eye-catching design. For an added festive touch, consider creating patterns such as snowflakes, stars, or candy canes. If you prefer a more modern approach, projection lights can instantly transform your garage door with vibrant colors or animated holiday scenes.
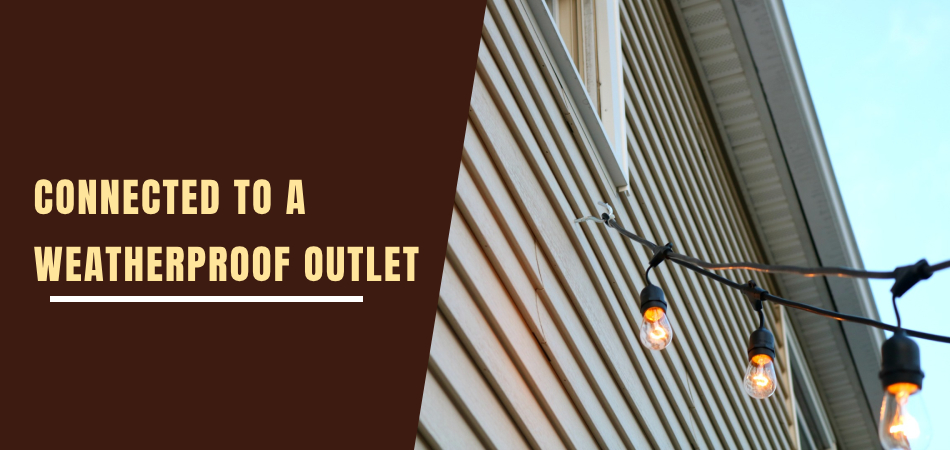
Ensure all lights are rated for outdoor use and connected to a weatherproof outlet. By incorporating your garage door into your display, you can elevate your home’s holiday charm while keeping the setup functional and damage-free.
Frequently Asked Questions
How to safely remove and store lights post-holiday season?
Unplug the lights and gently remove them from the clips or hooks to avoid damaging the wires. Wrap the lights around a storage reel or cardboard to prevent tangling. Store them in a dry, cool place.
Can I hang lights around my garage without drilling holes?
Yes, you can hang lights around your garage without drilling by using adhesive hooks, magnetic clips, or gutter hooks. These options securely hold lights in place and are easy to remove without damaging surfaces.
What type of lights are best for garage exteriors?
Outdoor-rated LED lights are ideal for garage exteriors as they are energy-efficient, durable, and weather-resistant. String lights, floodlights, and motion-sensor lights are popular choices.
How do I connect multiple strands of lights safely?
To safely connect multiple light strands, ensure they’re compatible for end-to-end connections and check their wattage limits. Use outdoor-rated extension cords, secure plugs with electrical tape to block moisture, and connect to a GFCI-protected outlet for safety.
Conclusion
Hanging lights around your garage is a rewarding project that enhances both the functionality and aesthetic appeal of your home. By choosing the right tools and materials, carefully planning your display, and following the step-by-step guide, you can create a stunning light arrangement that suits your needs. Whether for festive decor or year-round lighting, these tips will help you achieve a professional-looking and durable installation. Always prioritize safety and consider seeking professional help for complex setups. Enjoy the satisfaction of a beautifully lit garage that complements your home’s exterior!