LED lights are known for their brightness and energy efficiency, making them a popular choice for homes, offices, and decorative setups. However, their high intensity can sometimes be overwhelming, especially in settings where softer, more diffused lighting is desired. Whether you want to create a cozy atmosphere, reduce eye strain, or eliminate harsh glare, dimming LED lights with paper offers an easy and budget-friendly solution.

In this guide, we’ll explore different techniques to use paper as a light diffuser, discuss the safest options, and provide step-by-step instructions on how to dim led lights with paper. Paper can act as a diffuser by softening the emitted light and spreading it more evenly across a surface. Various types of paper, such as tracing paper, tissue paper, or parchment paper, can be used, each offering a different level of diffusion. The key is to choose a material that effectively reduces brightness without posing a fire hazard.
Securely placing the paper at a safe distance from the LED light source ensures both safety and functionality. By following these simple methods, you can enhance your lighting environment while maintaining energy efficiency and visual appeal.
Gather All the Necessary Tools
Before you start, gather the following materials:
- Thin or translucent paper (e.g., tissue paper, tracing paper, or wax paper)
- Scissors
- Tape or adhesive putty
- Paper clips or aluminum foil (optional)
- Smart plug, smart bulb, or voltage regulator (optional for advanced dimming)
- Remote control (if applicable)
Having these tools ready will make the process smoother and more efficient.
Innovative Ways to Dim LED Lights Using Paper
1. Choosing the Right Type of Paper
Not all paper types work well for dimming LED lights. Opt for:
- Tissue paper: Provides soft, diffused lighting.
- Tracing paper: Offers a slightly stronger dimming effect while maintaining light diffusion.
- Wax paper: A durable option that softens brightness effectively.
- Colored paper: Adds decorative effects to the dimming process.
2. Preparing the Paper for Dimming
Cut the paper to the appropriate size to fit over your LED light source. If necessary, layer multiple sheets to achieve the desired dimming effect.
3. Safely Attaching Paper to LED Lights
Use non-flammable adhesives like tape or adhesive putty to secure the paper around the light source. Avoid placing the paper directly on the LED surface to prevent overheating.

4. Adjusting Paper Placement for Desired Brightness
Experiment with different placements:
- Full coverage for maximum dimming.
- Partial coverage to create a gradient effect.
- Layering multiple sheets for varied brightness levels.
5. Creative Shapes and Colors for Decorative Effects
Consider cutting the paper into patterns or using colored sheets to create decorative and artistic lighting effects, perfect for ambiance or special occasions.
7 Step-by-step Guides on How to Dim Led Lights With Paper:
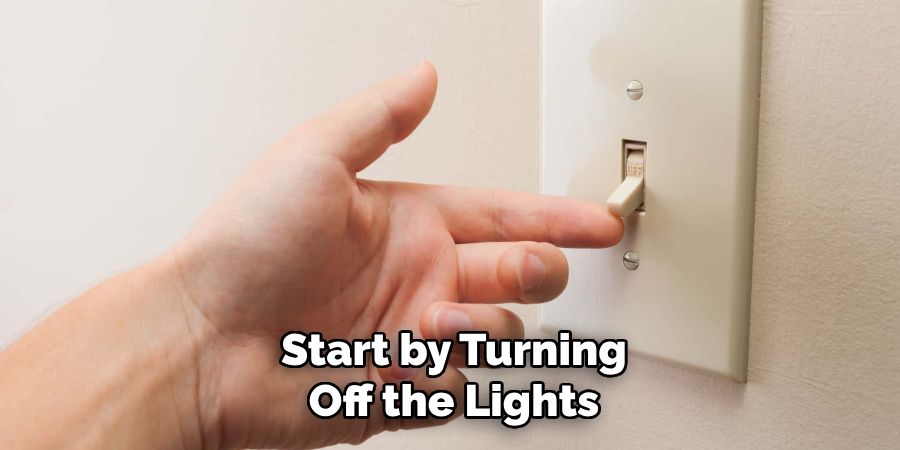
Step 1: Turn Off the Lights
Before beginning the process of dimming your LED lights with paper, it is crucial to ensure your safety. Start by turning off the lights you wish to dim. This step will prevent any risk of electrical shock or injury and allows you to work on the lights comfortably.
Make sure the light fixtures have cooled down, as handling them while they are still hot can be uncomfortable or dangerous.
Step 2: Prepare the Paper
Take your chosen paper and cut it into small pieces, about the size of a playing card. The number of pieces you’ll need will depend on how much you want to dim the lights.
Keep in mind that thicker paper or more layers will provide more significant dimming results.
Step 3: Fold the Paper
Once you have your pieces of paper cut to the appropriate size, the next step is to fold each piece. The folding process adds thickness to the paper, enhancing its ability to dim the light. Begin by folding each piece of paper in half. If additional dimming is desired, you can fold the paper once more, creating a thicker barrier.
The folded paper should be able to cover the LED bulb surface adequately. The number of folds will depend on how much you need to reduce the brightness of your LED lights.
Step 4: Insert the Paper
With the paper pieces folded, it’s now time to insert them between the LED bulbs and lampshade. Carefully place one folded piece of paper between the bulb and shade at a time until you’re satisfied with the level of dimness.
Be sure not to cover the entire bulb or obstruct any ventilation holes, as this can cause overheating and pose a fire hazard.
Step 5: Turn on the Lights
After positioning the paper pieces to your satisfaction, turn the lights back on to check the dimming effect. Observe the brightness level and ensure the paper is secure and does not cause any heat build-up around the LED bulbs. If the lights are still too bright, you can turn them off again and add more layers of folded paper until the desired dimness is achieved.
Make sure that the paper remains in place and does not interfere with the light’s ventilation to prevent any potential safety risks. Once you are happy with the level of dimming, your lights should provide a softer, more ambient glow.
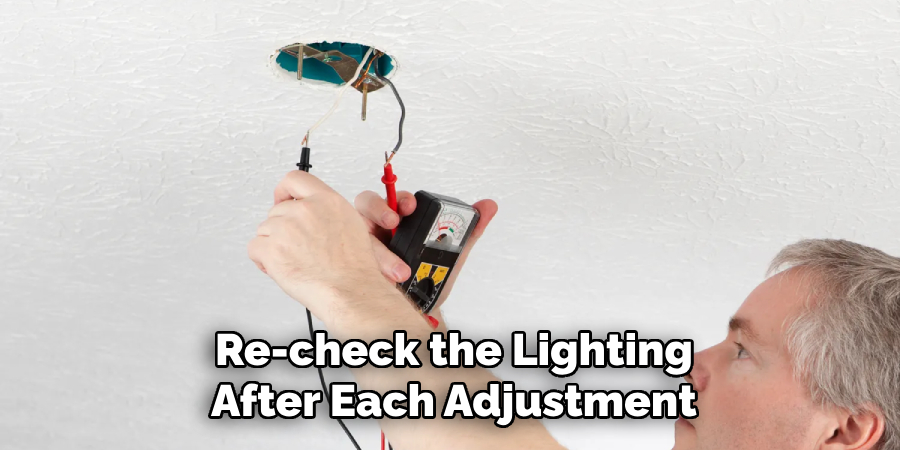
Step 6: Adjust as Needed
Once you have turned the lights back on, take a moment to observe the overall lighting effect in the room. Depending on your personal preferences and the ambiance you want to achieve, you may find that further adjustments are needed. If the lighting is still too bright, turn off the lights again and add additional layers of folded paper. Conversely, if the lights are too dim or uneven, try removing some of the paper or repositioning it for a more balanced effect.
Remember to pay attention to the heat generated by the LED bulbs during this adjustment period. Ensure that the paper remains secure and does not obstruct any necessary ventilation. Re-check the lighting after each adjustment until you achieve the perfect balance of brightness and dimness that suits your needs.
Step 7: Enjoy Your Dimmed LED Lights
After completing these six steps, you should now have perfectly dimmed LED lights without spending a fortune on expensive equipment. This hack is a simple and cost-effective way to create the desired ambiance in any room and make your lighting more versatile. Whether you’re looking to set the mood for a romantic dinner or create a relaxing atmosphere for movie nights at home, using paper-to-dim LED lights is an excellent solution. Just remember to regularly check the paper and make sure it’s not causing any safety hazards.
Following these steps on how to dim led lights with paper will enable you to dim your LED lights with paper safely and effectively. Now go ahead and enjoy your beautifully lit, dimmed space without breaking the bank! So next time you’re in need of a quick, affordable lighting solution, don’t underestimate the power of paper. Happy Dimming!
Tips for Long-Term Use and Safety
- Choose heat-resistant paper to avoid fire hazards.
- Ensure proper ventilation to prevent overheating.
- Regularly check the setup to ensure safety and effectiveness.
- Avoid flammable adhesives that could pose a risk over time.
- Consider upgrading to dimmable LEDs if paper solutions are not sufficient for your needs.
Frequently Asked Questions
Can any type of paper be used to dim LED lights?
Not all paper types are suitable. Use heat-resistant, translucent options like tissue, tracing, or wax paper to safely diffuse LED light without fire hazards.
Is it safe to leave paper on LED lights for extended periods?
Yes, it’s safe if the paper doesn’t touch the LED and there’s proper ventilation to prevent heat buildup, reducing the risk of fire hazards.
Can I cover an LED light to dim it?
Yes, you can cover an LED light to dim it, but use heat-resistant, translucent materials like tracing or wax paper. Ensure proper ventilation to prevent overheating and allow safe light diffusion without compromising the LED’s performance.
Is it safe to use paper clips or aluminum foil to dim LED lights?
Yes, but use them carefully. Paper clips can help hold paper in place, and aluminum foil can reflect light to adjust brightness.
Conclusion
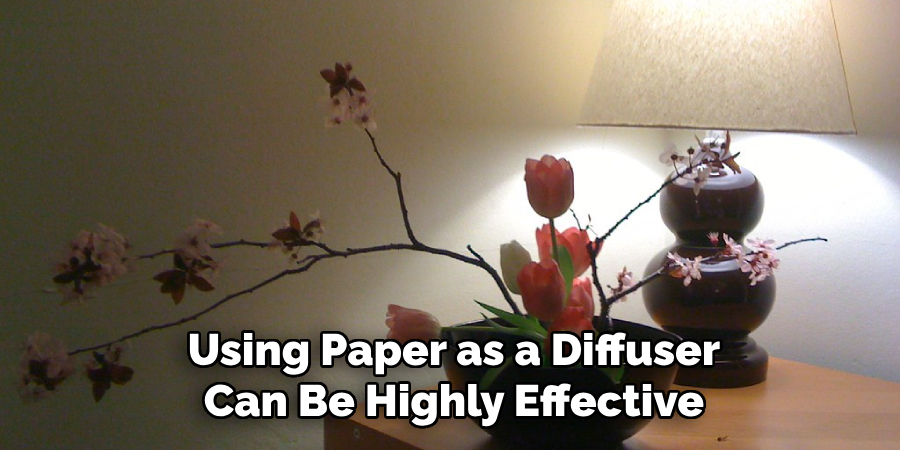
Dimming LED lights with paper is an easy, affordable, and practical solution for controlling brightness, especially when dimmable fixtures or smart bulbs are not an option. Whether you want to soften harsh lighting, create a cozy atmosphere, or reduce glare, using paper as a diffuser can be highly effective. By choosing the right type of paper—such as tracing paper, tissue paper, or wax paper—you can achieve the desired level of diffusion while ensuring safety.
It’s essential to secure the paper properly, keeping it at a safe distance from the LED to prevent direct contact and heat buildup. Regularly checking for adequate ventilation helps minimize any potential risks. Testing different layers and types of paper allows you to fine-tune the brightness to match your preference and setting.
While this DIY method offers a quick and inexpensive fix, those looking for a long-term solution may want to explore smart lighting options or dimmable LED bulbs, which provide greater control and efficiency. No matter the approach, always prioritize safety by using heat-resistant materials and ensuring proper airflow. With careful implementation, you can create a comfortable, aesthetically pleasing lighting environment tailored to your needs.