Christmas lights are an essential part of holiday decorations, adding warmth and festivity to homes, streets, and trees. However, dealing with faulty or non-working lights can be frustrating. Common issues include burnt-out bulbs, broken wiring, and faulty fuses, which can cause entire strands to malfunction.

This article provides a comprehensive guide on how to test Christmas lights effectively. Testing your Christmas lights before setting them up ensures a hassle-free decorating experience and prevents unnecessary replacements. This guide will provide a step-by-step approach to testing and troubleshooting Christmas lights, covering essential tools, methods, and maintenance tips to keep your holiday display shining brightly.
Understanding the Different Types of Christmas Lights
Incandescent vs. LED Christmas Lights
Incandescent and LED Christmas lights have distinct differences:
- Incandescent Lights: Incandescent lights consume more electricity, leading to higher energy costs. They have a shorter lifespan and frequently burn out due to their fragile filament, requiring frequent replacements.
- LED Lights: LED lights are highly energy-efficient, consuming less electricity and reducing costs. They have a longer lifespan and are designed to be durable, making them less likely to fail or require replacements.
Testing methods vary between the two; traditional light testers work with incandescent bulbs, while LED lights require specialized testing tools.
Wiring Setups: Series vs. Parallel Connections
Identifying the wiring type is crucial for troubleshooting effectively.
- Series Wiring: In series wiring, electricity flows through each bulb sequentially. If one bulb fails, it disrupts the circuit, causing the entire strand of lights to stop working.
- Parallel Wiring: In parallel wiring, each bulb has an independent circuit. If one bulb fails, the rest continue to work, ensuring the strand remains illuminated without interruptions.
Indoor vs. Outdoor Christmas Lights
- Indoor Lights: Indoor lights are designed for dry environments and are generally less durable than outdoor lights. They may not withstand moisture, temperature fluctuations, or outdoor conditions, limiting their lifespan and effectiveness outside.
- Outdoor Lights: Outdoor lights are designed to be weather-resistant, built to withstand exposure to rain, snow, and temperature changes. Their robust construction ensures durability and longevity, making them suitable for year-round outdoor use.
Outdoor lights require additional maintenance due to exposure to elements.
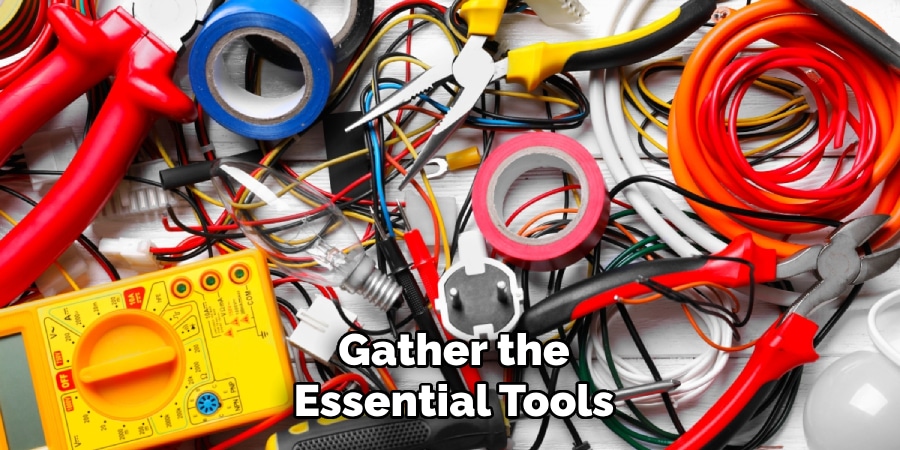
Essential Tools Needed for Testing Christmas Lights
Having the right tools simplifies the testing process:
Basic Tools
- Replacement bulbs and fuses
- Insulation tape
- Needle-nose pliers
- Safety gloves and goggles
Electrical Testing Tools
- Voltage Tester: Checks if power reaches the bulbs.
- Light Tester: Detects faulty bulbs in a strand.
- Multimeter: Measures voltage and continuity.
- Non-Contact Tester: Detects live wires.
6 Easy Steps on Testing Christmas Lights How to Test Christmas Lights
Step 1: Initial Visual Inspection
Before plugging in your Christmas lights, it’s important to conduct a thorough visual inspection to identify any obvious issues. Begin by checking the strands of lights for frayed or exposed wires, as these can pose a safety hazard and cause short circuits. Look for cracked or damaged sockets where the bulbs sit. This can lead to faulty connections or lighting failure.
For outdoor lights, check for any visible water damage or corrosion, as this can cause malfunctioning or even electrical hazards. Additionally, ensure all bulbs are tightly secured, as loose bulbs may cause sections of the strand to stop working. A careful inspection at this stage can save you time by addressing any easy-to-spot problems before further testing.
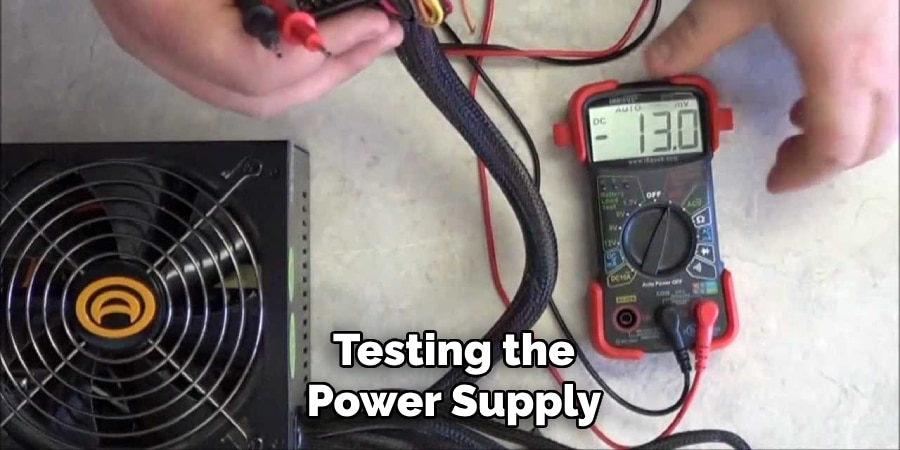
Step 2: Testing the Power Supply
Next, ensure that the power supply is functioning properly. Plug the light strand into a working outlet to check for power. If the lights do not illuminate, test the outlet with another device, such as a lamp or phone charger, to confirm the outlet is providing power. If the outlet works but the lights still don’t, the issue may be with the lights themselves. Additionally, inspect any power strips or extension cords used.
Power strips can sometimes fail or have overloaded circuits, while extension cords may have internal damage. By confirming the power supply is working correctly, you can eliminate this as a potential issue.
Step 3: Checking and Replacing Fuses
Most Christmas lights have fuses located in the plug for safety. If the lights are not working despite a functional outlet, the fuse may have blown. Look for small access doors on the plug housing, which typically contain one or two fuses. Inspect the fuses carefully for any signs of burn marks or blackened glass, which are indicators that the fuse has blown. Replacing the fuse is often a quick fix. Be sure to replace faulty fuses with the correct type and rating, as using the wrong fuse can cause further damage or create safety risks.
Step 4: Testing and Replacing Faulty Bulbs
If a section of the lights is out, a single faulty bulb could be the cause. Using a light tester, you can quickly identify dead bulbs by checking each one. A light tester is a tool that can detect whether a bulb is functioning or needs replacing. Be sure to match the voltage and wattage of the replacement bulbs with those of the original bulbs to avoid overloading the circuit. Additionally, if a bulb is missing, make sure to replace it to complete the circuit, as many light strands will not work properly without all bulbs in place.
Step 5: Using a Multimeter to Test for Continuity and Voltage
If you’re still having trouble identifying the problem, you can use a multimeter to test for continuity and voltage within the circuit. A multimeter will help you check for broken circuits in the wiring, as well as identify whether there is a short circuit or an open circuit. For continuity testing, the multimeter will indicate whether the electrical path is complete or if there is an interruption. This step requires some knowledge of electrical systems, so if you’re not confident in using a multimeter, it’s best to seek professional help.
Step 6: Special Considerations for LED Christmas Lights
LED lights, while generally more durable and energy-efficient, may have specific issues that require extra attention. Because LED lights operate differently from traditional incandescent lights, a battery pack or specialized tester designed for LEDs is often necessary to test them.
Additionally, if the lights flicker or exhibit inconsistent lighting, the rectifier circuit could be the issue. The rectifier converts alternating current (AC) to direct current (DC), and any malfunction in this component can cause erratic performance. Inspecting the rectifier circuit may help pinpoint the problem and allow for appropriate repairs.
By following these detailed steps, you can troubleshoot and maintain your Christmas lights, ensuring they shine brightly and safely throughout the holiday season.
Troubleshooting Common Christmas Light Issues
Fixing a Section of Lights That Won’t Turn On
Identify and replace the faulty bulb in the section. Use a voltage tester to find and fix breaks in the circuit.
Dealing with Half-Working Light Strands
Inspect the light strand for broken wiring or loose connections. If the damage is minimal, you may be able to repair it; otherwise, consider replacing the strand.
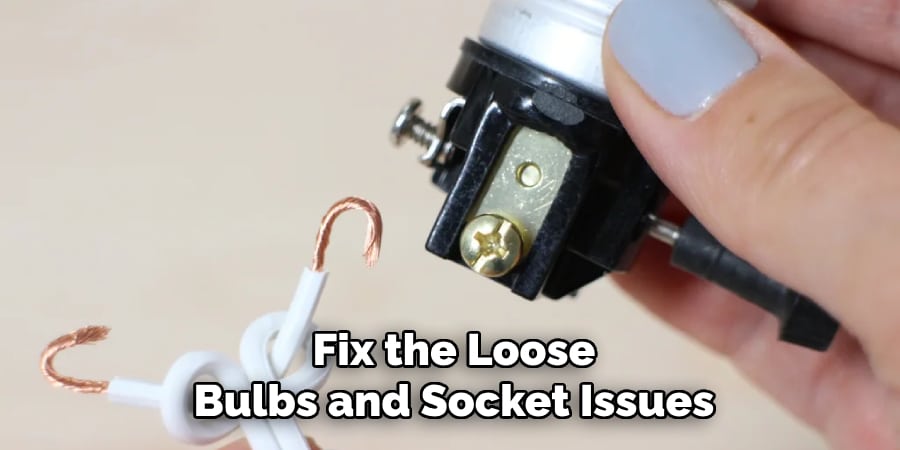
Fixing Loose Bulbs and Socket Issues
To fix loose bulbs, gently tighten them to ensure a secure connection. Inspect the sockets for wear or looseness and replace any damaged or worn-out sockets.
Repairing Broken Wires in Christmas Lights
To repair broken wires, locate the damaged section and carefully splice the wiring together. Use insulation tape to securely cover the splice, ensuring a safe and functional connection.
Addressing Flickering or Dim Lights
To address flickering or dim lights, check for loose connections between bulbs and sockets. Also, inspect the power source for any voltage fluctuations, which could cause inconsistent lighting performance.
Preventive Maintenance and Storage Tips
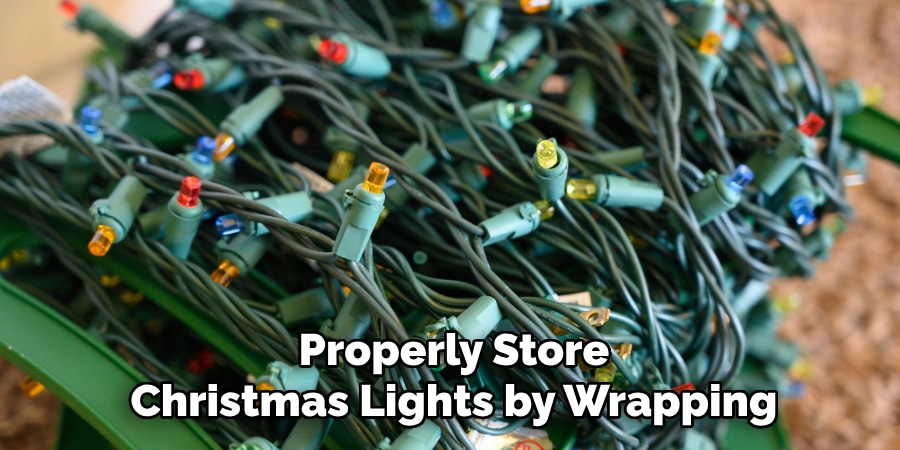
Properly store Christmas lights by wrapping them carefully to prevent tangling and using storage reels or organizers. Clean lights by wiping bulbs before and after use, and prevent dust and moisture buildup. Use surge protectors to safeguard against voltage fluctuations, ensuring you choose the right one for your lights. Test lights before the holiday season to avoid surprises and keep spare bulbs and fuses on hand for quick replacements.
Frequently Asked Questions
Why do some sections of my Christmas lights work while others don’t?
Ans: This usually happens due to a single burned-out bulb, a loose connection, or a broken wire in the section that isn’t working. Try replacing any suspect bulbs and checking the wiring with a voltage tester.
How do I test Christmas lights without plugging them in?
Ans: You can use a light tester or a multimeter to check for continuity in the wiring and bulbs. A light tester can help pinpoint faulty bulbs, while a multimeter can verify if the circuit is intact.
What should I do if my Christmas lights keep blowing a fuse?
Ans: Frequent fuse blowouts may indicate overloading, damaged wiring, or short circuits. Check the fuse rating on your light set, avoid connecting too many strands together, and inspect for frayed wires.
Can I replace incandescent Christmas light bulbs with LED bulbs?
Ans: No, incandescent and LED lights operate on different voltage and circuit designs. If you want to switch to LED, it’s best to replace the entire light strand with an LED-compatible one.
How do I find a broken wire in my Christmas lights?
Ans: Use a voltage tester or multimeter to identify where the power stops flowing. If you find a broken wire, you can either splice and insulate it or replace the entire string if the damage is severe.
Conclusion
Testing Christmas lights before setting them up ensures a smooth holiday season. By following these troubleshooting steps, you can repair instead of replacing faulty lights, saving money and reducing waste. Prioritize safety and preventive maintenance to enjoy bright and problem-free decorations. Start testing your lights today for a hassle-free holiday experience!