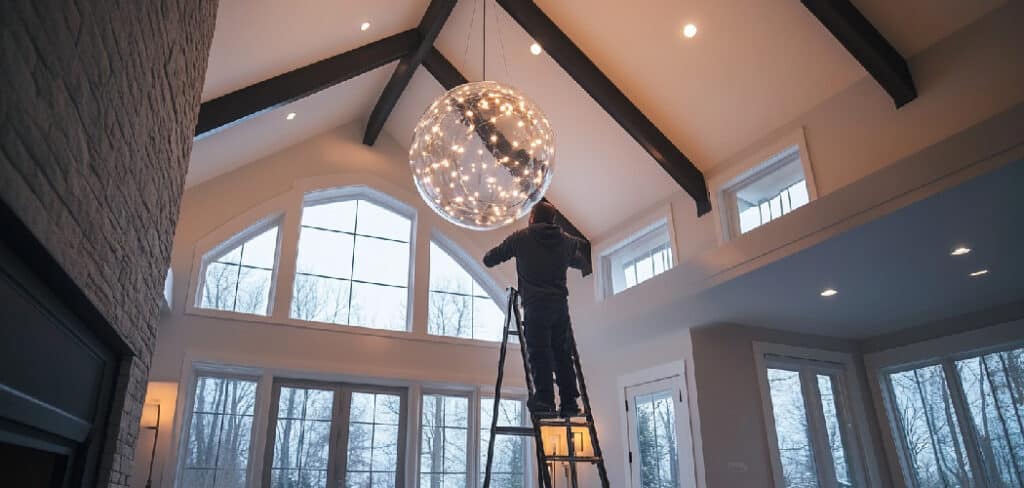
High ceilings enhance the aesthetic appeal of homes, offices, and commercial spaces by creating an open and luxurious atmosphere. However, when it comes to replacing a high ceiling light, the process can be quite challenging due to the height, difficulty in accessing the fixture, and potential safety risks.
Many homeowners and business owners find themselves struggling with this task, often delaying the replacement or opting for costly professional services. This article provides a comprehensive guide on how to replace high ceiling light effectively. If your high ceiling light has burned out or you’re looking to upgrade to a modern, energy-efficient fixture, you don’t necessarily have to rely on professionals.
With the right tools, proper preparation, and careful execution, you can replace the fixture yourself while ensuring safety and efficiency. Whether you are an experienced DIY enthusiast or a beginner, this guide will help you complete the task with confidence and ease.
Tools and Equipment Needed
Before starting, gather the following tools and materials to ensure a smooth process:
Essential Tools:
- Tall ladder or scaffolding – Provides safe access to the high ceiling.
- Light bulb changer pole – Useful for simple bulb replacements.
- Screwdrivers (Phillips & flathead) – Required for removing and securing the fixture.
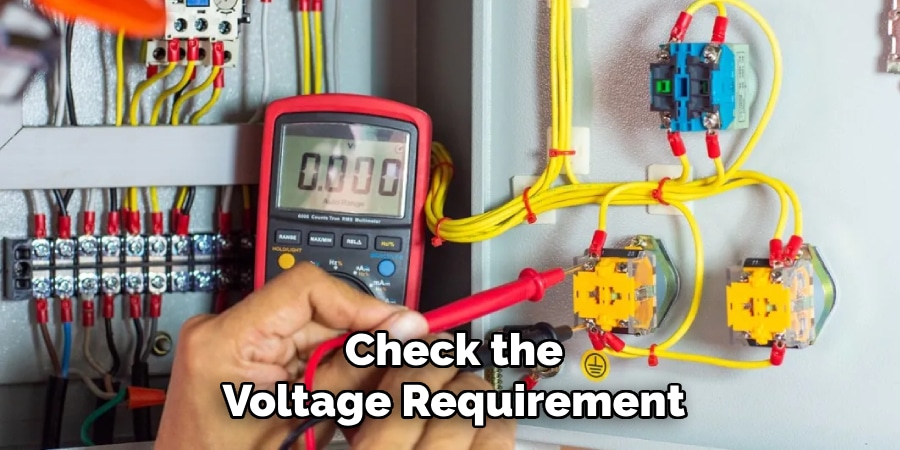
- Voltage tester – Ensures that no electricity is running through the wires before handling them.
- Wire stripper & electrical tape – Needed for connecting and securing wires.
- Safety goggles & gloves – Protects against dust, glass, or sharp edges.
Optional Tools:
- Pole grabber tool – Helps remove and install light bulbs without climbing.
- Circuit breaker finder – Identifies and confirms the correct breaker for shutting off power.
- Cordless drill – Makes the fixture removal and installation process faster.
Having the right tools will make the replacement process safer and more efficient.
Safety Precautions
Ensuring safety is the top priority when replacing a high ceiling light. Since working at elevated heights and handling electrical components can be risky, following proper safety measures is essential to prevent accidents and injuries.
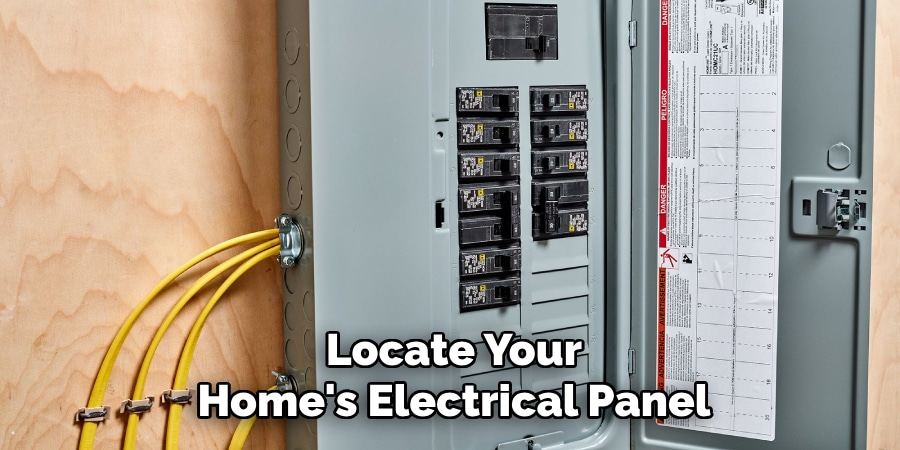
Turn Off Power:
Before starting, locate your home’s electrical panel and switch off the circuit breaker connected to the light fixture. To eliminate any risk of electrical shock, use a voltage tester on the fixture’s wiring to confirm that the power is completely off before proceeding with the replacement.
Secure the Ladder or Scaffolding:
Working at high ceilings requires a stable and secure support system. If using a ladder, ensure it is placed on a level surface to prevent tipping over. For scaffolding, double-check that it is properly assembled, locked, and secured. Having a helper hold the ladder or assist in stabilizing the scaffolding provides an extra layer of safety.
Proper Handling of Light Fixtures:
Light fixtures, especially large or glass-based ones, can be fragile and heavy. Wear protective gloves to prevent cuts from sharp edges or broken glass. If the fixture is bulky, seek assistance to avoid strain or accidental drops. Never work alone when handling high ceiling fixtures to ensure immediate help if needed.
Removing the Old Light Fixture
Properly removing the old fixture is a crucial step before installing a new one. Following a careful and systematic approach will prevent damage to your ceiling, wiring, or yourself.
Step 1: Accessing the Fixture
Begin by positioning a sturdy ladder or scaffolding directly beneath the fixture. Ensure that it is on a stable, even surface to prevent wobbling. Before climbing, gather all necessary tools such as a screwdriver, voltage tester, wire cutters, and a flashlight. This minimizes unnecessary trips up and down, reducing fatigue and the risk of accidents.
Step 2: Removing the Bulb
If you are only replacing a bulb, use a light bulb changer pole to avoid climbing. For fixtures with covers, globes, or glass panels, carefully remove them first by unscrewing or unclipping them. Then, gently unscrew the bulb and set it aside safely.
Step 3: Disconnecting the Fixture
Using a screwdriver, remove the screws securing the fixture to the ceiling while supporting it with one hand. Slowly lower it to expose the wiring. Before touching any wires, use a voltage tester to confirm that no electrical current is present.
Step 4: Disconnecting the Wiring
Take a clear photo of the wiring configuration for easy reference when installing the new fixture. Carefully unscrew or untwist the wire connectors and separate the old fixture from the ceiling wiring. Set the fixture aside, ensuring that no wires are left exposed.
Step by Step Guides on How to Replace High Ceiling Light
Installing a new high ceiling light requires precision and careful handling to ensure both functionality and safety. Follow these steps to complete the installation efficiently.
Step 1: Preparing the New Fixture
Before installation, confirm that the new fixture is compatible with your ceiling’s wiring and mounting bracket. Check the voltage requirements and weight capacity to ensure a proper fit. If the fixture requires assembly, follow the manufacturer’s instructions to put together any components, such as light covers, mounting brackets, or decorative elements. Completing assembly before climbing the ladder reduces the time spent working at a height, minimizing risks.
Step 2: Connecting the Wires
Properly matching and securing the wires is crucial for safety and functionality. Connect the fixture’s wires as follows:
- Black (live) wire to black
- White (neutral) wire to white
- Green or bare copper wire to ground
Use wire connectors to join the wires securely, ensuring a firm connection. For added safety, wrap each connection with electrical tape to prevent accidental loosening or short circuits. Carefully tuck the wires into the electrical box to avoid pinching or damage.
Step 3: Securing the Fixture to the Ceiling
Align the fixture with the mounting bracket or ceiling junction box. While holding it steady, insert and tighten the mounting screws to secure it in place. Ensure all screws are fastened properly to prevent the fixture from shifting or loosening over time, which could pose safety risks.
Testing and Final Adjustments
After successfully installing the new high ceiling light fixture, performing a thorough test and making final adjustments is essential to ensure proper functionality and a secure fit. Follow these steps to complete the process.
Step 1: Restore Power
Once the fixture is securely mounted, go to your electrical panel and switch the appropriate circuit breaker back on to restore electricity to the fixture. If the breaker was labeled before turning it off, locating the correct switch should be easy.
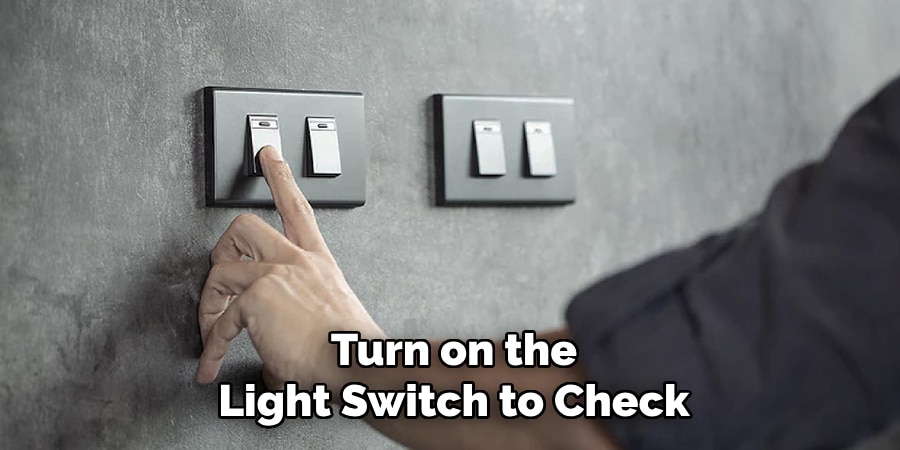
Step 2: Test the Fixture
Turn on the light switch to check if the fixture is operating correctly. If the light does not turn on, follow these troubleshooting steps:
- Check the wiring connections – Ensure all wires are properly connected and secured with wire connectors.
- Confirm the bulb is properly installed – Make sure the light bulb is screwed in tightly and is compatible with the fixture.
- Inspect the circuit breaker – If the breaker trips, reset it and test again. If it continues to trip, there may be an issue with the wiring.
Step 3: Adjustments
Once the fixture is working, perform final adjustments to enhance its stability and appearance:
- Tighten any loose screws or mounting brackets to prevent wobbling.
- Ensure the fixture is level and properly aligned to complement the space aesthetically.
- Clean the fixture to remove any fingerprints or dust from the installation process.
With these steps completed, your high ceiling light installation is successful.
Alternative Methods for Hard-to-Reach Ceiling Lights
Using a Light Bulb Changer Pole
- Ideal for replacing bulbs in high recessed or pendant lights.
- Reduces the need for climbing ladders for minor replacements.
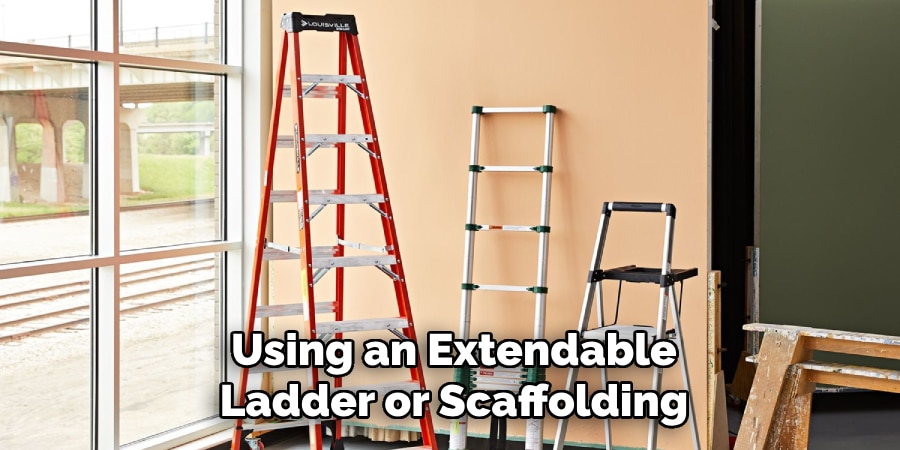
Using an Extendable Ladder or Scaffolding
- Best for replacing entire light fixtures that require access to the wiring.
- Provides a more stable and safer platform than a basic ladder.
Hiring a Professional Electrician
- Recommended for complex wiring situations or extremely high ceilings.
- Ensures the job is done safely and correctly without personal risk.
Maintenance Tips for High Ceiling Lights
- Use long-lasting LED bulbs to minimize the frequency of replacements.
- Clean fixtures regularly to prevent dust buildup that reduces brightness.
- Inspect wiring periodically to ensure safety and proper function.
- Consider installing a motorized lift system to easily lower and raise the fixture for maintenance.
Frequently Asked Questions
What tools do I need to replace a high ceiling light fixture?
Ans: To replace a high ceiling light fixture, you will need a sturdy ladder or scaffolding, a screwdriver, a voltage tester, wire connectors, electrical tape, and possibly a drill if additional mounting support is required. A light bulb changer pole can also be useful for replacing bulbs without climbing.
How do I ensure my safety while working on a high ceiling light?
Ans: To stay safe, always turn off the power at the circuit breaker before handling electrical wiring. Use a stable ladder or scaffolding, and have a helper hold the ladder for extra support. Wear protective gloves when handling glass fixtures, and never work alone when dealing with heavy or fragile lights.
How do I know if my new light fixture is compatible with my ceiling wiring?
Ans: Check the voltage rating, weight capacity, and mounting requirements of the new fixture. Ensure that the wiring configuration matches (black to black, white to white, and ground wire to green or bare copper). If uncertain, consult the manufacturer’s instructions or seek professional advice.
What should I do if my new light fixture doesn’t turn on?
Ans: First, confirm that the power is restored at the circuit breaker. Then, check the wiring connections, ensure the bulb is properly installed, and inspect the circuit breaker for possible tripping. If issues persist, recheck the fixture’s installation.
Can I install a high ceiling light fixture by myself?
Ans: Yes, if you have the right tools and follow safety precautions. However, if the fixture is too heavy, requires complex wiring, or is difficult to access, it’s best to have a helper or hire a professional electrician.

Conclusion
Replacing a high ceiling light may seem like a daunting task, but with the right tools, precautions, and step-by-step approach, it can be done safely and efficiently. The key to success is proper preparation, ensuring safety at all times, and carefully following the wiring and installation instructions.
If you’re unsure about handling electrical wiring or working at heights, don’t hesitate to seek professional assistance. A well-lit home or commercial space enhances aesthetics and functionality, making the effort well worth it. By following this guide, you’ll be able to replace high ceiling lights with confidence and ease.