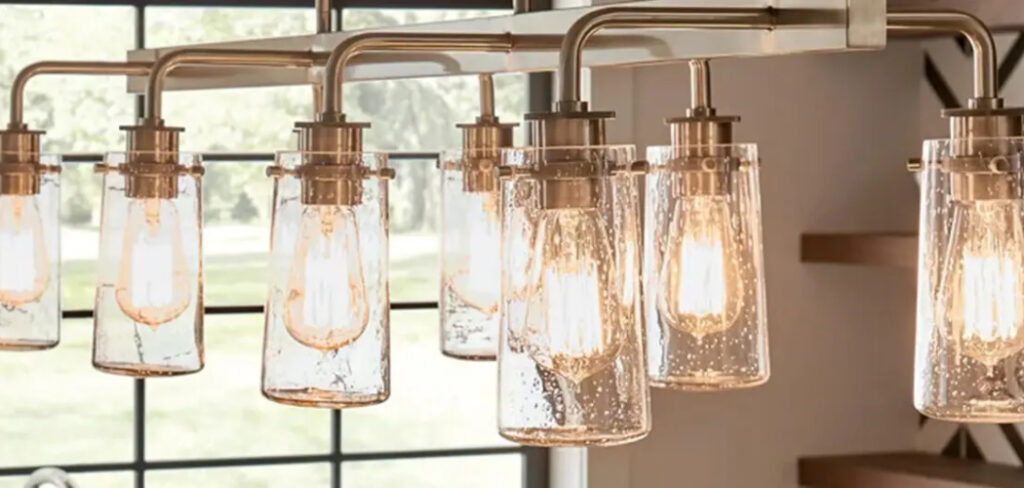
Kichler is a trusted lighting brand known for its elegant designs and energy-efficient fixtures. Like any light source, its bulbs eventually dim or burn out and need replacement. While it may seem tricky, especially with designer lights, changing a Kichler bulb is simple with the right steps.
This article provides a comprehensive guide on how to change a Kichler light bulb effectively—from safety and tools to choosing the correct replacement and installation. Whether you’re updating a pendant light or outdoor fixture, we’ll help you restore brightness and maintain your fixture’s quality with ease.
Safety Precautions Before Starting
Before replacing a Kichler light bulb, prioritize safety. Always turn off the light at the switch and shut off power at the breaker to prevent electric shock. Let the bulb cool completely—especially halogens, which can stay hot. Use a sturdy ladder for high fixtures and avoid unstable surfaces.
Wear clean gloves or use a cloth to prevent smudging or damaging the bulb, particularly with halogen or LED types. Finally, confirm the correct bulb type and wattage before installation to avoid safety risks or fixture damage. Taking these simple precautions ensures a smooth and secure replacement process.
Tools and Materials You’ll Need
Having the right tools can make the process much smoother. Here’s a list of essential items you’ll need for safely removing and installing your new Kichler bulb:
- Replacement Kichler-compatible bulb
- Clean gloves or a lint-free cloth
- Screwdriver
- Ladder or step stool
- Voltage tester
- User manual for your specific Kichler fixture

Types of Kichler Light Fixtures and Bulbs
Kichler offers a wide variety of lighting fixtures, including ceiling mounts, chandeliers, pendants, vanity lights, sconces, outdoor, and landscape options—each requiring different bulb types. Common bulbs include LED, halogen, and incandescent.
Some newer fixtures feature integrated LED light engines, which are built in and non-replaceable; if these fail, the entire fixture may need replacement. To identify the correct bulb, check the socket or old bulb for markings like E26, GU10, or G9, as well as wattage and voltage.
Refer to the fixture’s manual if needed. Knowing this ensures you choose the right replacement bulb and avoid damaging your Kichler light fixture.
8 Easy Steps on How to Change a Kichler Light Bulb
Changing a Kichler light bulb safely ensures optimal performance. This guide outlines essential steps for various fixtures, helping even beginners replace bulbs confidently and correctly. Below are the eight essential steps:
Step 1: Turn Off Power
Always begin by turning off the power to the light fixture. Start with the wall switch, but for added safety, also switch off the corresponding breaker in your home’s electrical panel. This is especially important if you’re working with ceiling-mounted or outdoor lights.
Electricity can cause serious harm, so double-check by using a non-contact voltage tester to confirm that no current is running through the wires or socket. If there’s still power detected, avoid proceeding until the source is fully disconnected.

Step 2: Let the Fixture Cool Down
Light bulbs, especially halogen or incandescent types, can retain heat for several minutes after being turned off. Touching a hot bulb may cause burns or even result in the bulb cracking due to sudden contact with skin or gloves. Wait at least 10–15 minutes after turning off the light before handling the fixture. This is crucial for your safety and helps prevent accidental damage to the bulb or the fixture.
Step 3: Access the Light Bulb
Next, carefully access the bulb. For enclosed fixtures—such as ceiling mounts, vanity lights, or pendant lights—you may need to remove a glass cover, shade, or decorative dome. Some covers are held by screws, while others simply twist or slide off. Use a screwdriver if needed, and be sure to set aside any screws or mounting hardware in a secure location.
Take your time and work gently to avoid cracking delicate glass or scratching metal finishes. If you’re working with an outdoor or high-mounted Kichler fixture, use a sturdy step ladder and ask for someone to assist by holding it steady.
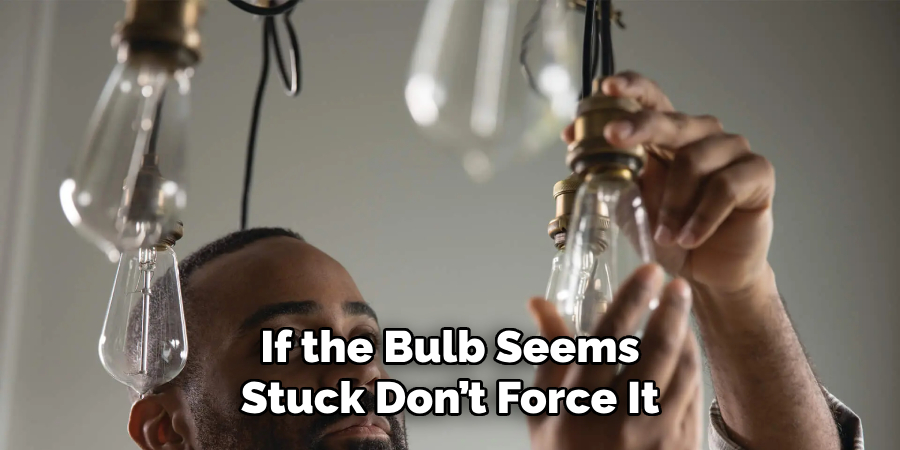
Step 4: Remove the Old Bulb
Once you have clear access to the bulb, it’s time to remove it. First, put on cotton gloves or use a clean, dry cloth—this keeps oils from your skin off the bulb and provides a better grip.
- For screw-in bulbs (like E26 or E12), twist the bulb counterclockwise until it releases.
- For pin-based bulbs (like GU10 or G9), gently pull straight out or twist slightly as required by the design.
If the bulb seems stuck, don’t force it. Try wiggling it gently from side to side until it loosens. Once removed, inspect the socket for signs of burn marks, corrosion, or damage. If anything looks off, consider calling a licensed electrician before proceeding.
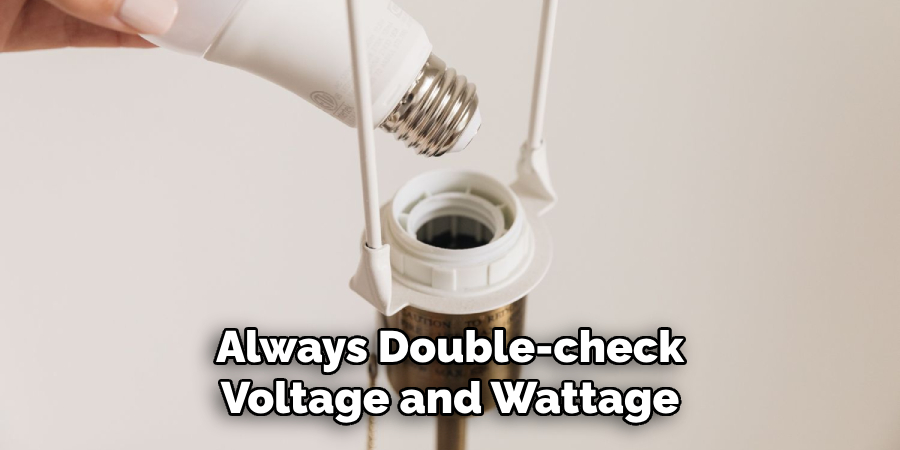
Step 5: Check Bulb Specifications
Before installing the new bulb, check the old one (or the fixture label) for details such as:
- Base type
- Wattage and voltage
- Bulb shape and size
Using a bulb that exceeds the recommended wattage can lead to overheating, damaged fixtures, or even fire risk. If you no longer have the manual, you can usually find bulb specs by searching the fixture’s model number online or on the Kichler website.
Step 6: Insert the New Bulb
With your specifications confirmed, take the new bulb and gently insert it:
- For screw-in bases, rotate the bulb clockwise until snug.
- For pin-style bulbs, push it gently into the socket until it clicks or feels secure.
Step 7: Reassemble the Fixture
Avoid using excessive force—if it doesn’t go in smoothly, check for alignment. Ensure the bulb is fully seated to avoid flickering or loose connections.
Once the new bulb is in place, reattach any covers, glass shades, or housings. Be careful not to overtighten screws, especially on delicate materials like frosted glass or crystal elements often found in Kichler designs. Use a microfiber cloth to wipe away fingerprints or smudges, giving your fixture a clean, finished appearance.
Step 8: Restore Power and Test the Bulb
Finally, return to your breaker panel and switch the power back on. Flip the wall switch to test the light. The new bulb should turn on immediately and shine with full brightness.
If the bulb doesn’t light up, double-check the connection. Try a different bulb to rule out a factory defect. If the issue persists, you may have a problem with the fixture’s wiring and should consult a professional electrician.

Common Mistakes to Avoid
One of the most common errors people make is forgetting to shut off power completely, especially at the breaker. This can lead to dangerous shocks or even short circuits.
Another mistake is using the wrong type of bulb. Always double-check voltage, wattage, and base type. Installing a bulb with too high wattage can overheat and potentially damage your fixture—or worse, cause a fire hazard.
Never handle bulbs—especially halogen—with bare hands. Oils from your skin can heat unevenly and cause the bulb to fail prematurely. Also avoid forcing a bulb into the socket if it doesn’t fit naturally. That usually means you’ve got the wrong type.
Finally, don’t ignore damage inside the socket. If you see charring, rust, or cracks, call a licensed electrician before proceeding.
Maintenance Tips After Replacement
Now that your bulb is replaced and everything is working well, it’s a good time to give your fixture a bit of routine care. Dust and dirt can collect on glass shades and around the bulb, affecting light quality and fixture longevity.
Wipe everything down with a dry, non-abrasive cloth. For enclosed fixtures, check for dust build-up inside. If the fixture is in a moisture-prone area like a bathroom or outside, periodically inspect for signs of rust or corrosion.
If your fixture uses two or more bulbs, consider replacing both at once. This ensures uniform brightness and color temperature. Over time, upgrading to long-lasting, energy-efficient LED bulbs can also save money and reduce the need for frequent replacements.
When You Should Call a Professional
There are times when replacing a bulb becomes more than just a DIY task. If your fixture is extremely high or in a hard-to-reach location like a vaulted ceiling, it’s safer to hire a professional with the right equipment.
If you notice flickering or repeated bulb failures, there could be an issue with the wiring or socket. A professional can safely diagnose and repair the problem.
Some Kichler fixtures use integrated LED modules that are sealed and not meant for user replacement. If your fixture doesn’t have a replaceable bulb, call the manufacturer or a licensed electrician for assistance.
Additionally, if you feel uncomfortable working with any electrical components, it’s always best to stay safe and let an expert handle it.
Frequently Asked Questions
Q: What kind of bulb does a Kichler light take?
Ans: Kichler lights use a variety of bulbs including LED, halogen, or incandescent, depending on the model. Check your fixture manual or the old bulb for base type and wattage specifications.
Q: Are Kichler LED bulbs replaceable?
Ans: Some Kichler fixtures use replaceable LED bulbs, while others have integrated LEDs that are built-in and not user-serviceable. Always check the model details or consult the manual.
Q: Can I use a non-Kichler bulb in a Kichler fixture?
Ans: Yes, as long as it meets the correct voltage, wattage, and base type. However, using Kichler-branded replacements may ensure the best fit and lighting performance.
Q: Why did my new bulb not work after replacing it?
Ans: Double-check that the power is on, the bulb is installed properly, and the socket is not damaged. Also, try a different bulb to rule out defects or test the circuit with a known working fixture.
Q: Do I need to wear gloves when changing a bulb?
Ans: Yes, especially for halogen bulbs. Gloves help prevent fingerprints, reduce the risk of overheating, and protect against broken glass.
Conclusion
Changing a Kichler light bulb doesn’t have to be complicated or intimidating. With the proper tools, attention to safety, and a bit of patience, anyone can do it—whether it’s a hallway pendant, a vanity sconce, or a landscape spotlight.
Just remember to turn off the power, match the right bulb to your fixture, and avoid common mistakes like touching the glass with bare hands. Regular bulb maintenance will keep your lighting bright, safe, and efficient.
And if you’re ever unsure—especially with integrated LEDs or electrical issues—don’t hesitate to call a professional. For more helpful guides, lighting tips, and product recommendations, be sure to explore other resources on Lightorix.com.