LED strip lights are a fantastic addition to any space, providing flexibility, vibrant illumination, and endless design possibilities. Whether you’re enhancing your living room ambiance, creating a cozy bedroom vibe, or upgrading your workspace, LED strips offer unmatched versatility.
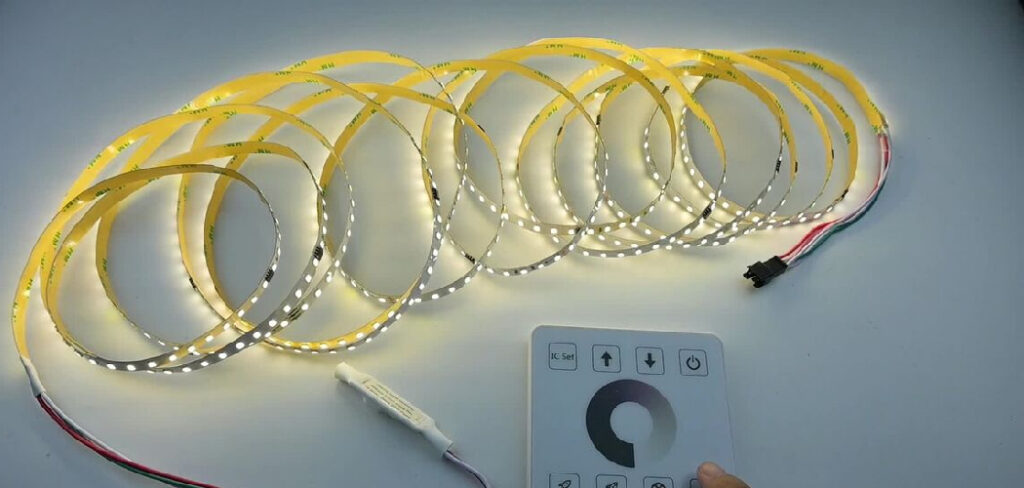
However, connecting multiple LED strips to a single power source might appear complex, especially if you’re new to lighting projects. This article provides a comprehensive guide on how to connect multiple led strips to one power sourceeffectively. With the right approach and tools, it’s easier than you think. This guide will walk you through the process step by step, ensuring your LED lighting project is not only visually appealing but also efficient and safe. By understanding the basics of power requirements, connectors, and layout planning, you can create a seamless setup that transforms your space into something truly remarkable.
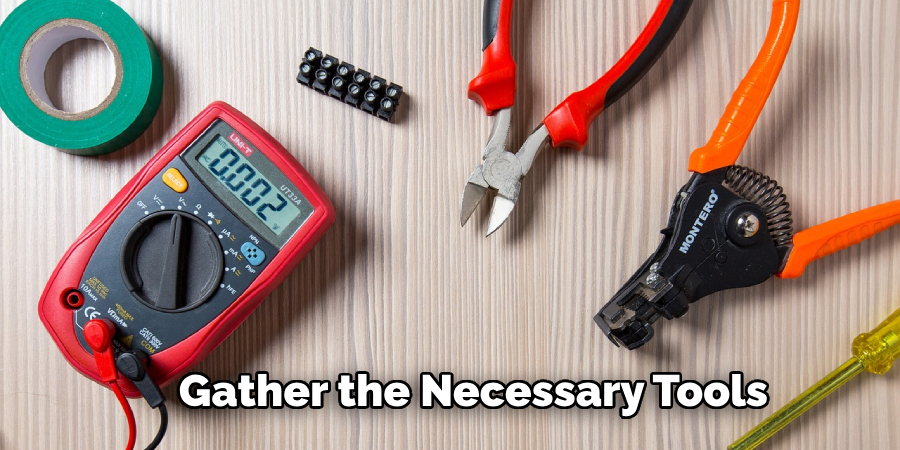
Essential Tools and Materials You’ll Need
Before diving into the process, gather the necessary tools and materials:
- LED strips (ensure they’re compatible with your desired project)
- LED strip connectors
- A suitable power source (such as a power supply unit with adequate wattage)
- Multimeter for checking voltage and connections
- Wire cutters and strippers
- Soldering iron (if needed)
- Heat shrink tubing or electrical tape
- Controller or dimmer (optional but helpful for customization)
Having the right tools ensures a smooth installation process.
Understanding LED Strips and Power Requirements
The Basics of LED Strip Lighting
LED strip lights consist of multiple small LEDs mounted on a flexible circuit board. They are available in various lengths, colors, and brightness levels, making them ideal for countless applications. LED strips often require low voltage power, typically 12V or 24V DC, to function efficiently.
Calculating the Power Needs for Your LED Project
To avoid overloading your power source, calculate the total power requirements for your LED strips:
- Check the wattage per meter of your LED strip (usually mentioned in the product specifications).
- Multiply the wattage per meter by the total length of the LED strips you plan to use.
- Add a 20-30% buffer to the total wattage to ensure the power supply can handle the load safely.
For instance, if your LED strip consumes 10 watts per meter and you’re using 5 meters, the calculation would be: 10W/m x 5m = 50W. Add a 20% buffer: 50W x 1.2 = 60W. Thus, your power source should supply at least 60 watts.
Preparing to Connect Multiple LED Strips
Essential Tools and Materials for Installation
In addition to the tools mentioned earlier, consider additional items such as mounting clips, adhesive backing, and extension wires to facilitate the installation process.
Safety Precautions Before Starting
Safety is crucial when working with electrical components. Follow these precautions:
- Ensure the power source is unplugged before starting.
- Work in a dry, well-lit area to avoid accidents.
- Double-check the voltage ratings of your LED strips and power supply.
- Wear protective gear, such as gloves, when soldering.
Connecting Strategies for LED Strips
Series vs. Parallel: Pros and Cons
- Series Connection: LED strips are connected end-to-end. This method is simple but can cause voltage drops, leading to dimmer lights at the far end.
- Parallel Connection: Each LED strip is connected directly to the power source. This method prevents voltage drops and ensures consistent brightness but requires more wiring.
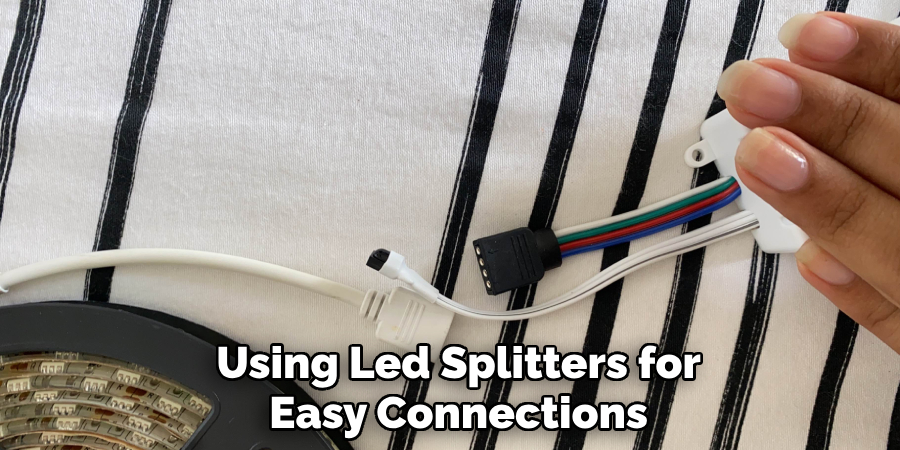
Using LED Splitters for Easy Connections
LED splitters simplify the process by allowing multiple LED strips to connect to a single power source without complicated wiring. These are particularly useful for parallel connections.
Customizing with Soldering Techniques
For a more customized setup, soldering provides robust and durable connections. While it requires some skill and tools, soldering ensures minimal power loss and a neat finish.
6 Easy Steps For How to Connect Multiple LED Strips to One Power Source
Step 1: Purchase the Right LED Strip Connectors
The first step is selecting the correct connectors for your LED strip type. LED strips come in different configurations, such as single-color (monochrome), RGB (red, green, blue), or RGBW (RGB with an additional white channel). Ensure the connectors you choose are compatible with your specific strip type.
Why connectors? These handy tools eliminate the need for soldering, making the installation process simpler and faster. Look for clip-on connectors or plug-and-play designs that allow you to attach strips without the risk of damaging the LEDs. For added reliability, choose connectors with clear instructions and robust locking mechanisms.
Step 2: Peel Back Adhesive Tape & Join LED Strips Using Connectors
Once you have the connectors ready, prepare the LED strips by peeling off the protective backing covering their adhesive side. This step exposes the solder pads or terminals on the LED strip ends.
Next, align the metal contacts on the LED strip with the corresponding pins inside the connector. Be precise—ensure the positive (+) and negative (-) terminals or RGB channels match up perfectly. Snap the connector shut to lock the strip in place securely. This alignment ensures a stable electrical connection between strips, avoiding flickering or malfunctions.
Step 3: Cover the Connector for Protection
After connecting the strips, secure the connectors using heat shrink tubing or electrical tape. Slide a piece of heat shrink tubing over the connector and gently heat it with a heat gun until it shrinks snugly around the connection. Alternatively, wrap electrical tape tightly around the connector to insulate it.
This step protects the connection from dust, moisture, and physical wear, ensuring durability—especially important if the strips are installed in high-traffic areas or outdoors.
Step 4: Peel Back Adhesive from the Solder Pads (For Soldering)
If you’re opting for a soldered connection instead of connectors, start by exposing the solder pads on the LED strip. Peel back the adhesive layer covering the pads at the end of the strip. Be gentle to avoid tearing the strip or damaging the pads. Inspect the solder pads to ensure they are clean and free of any residue that might hinder a proper solder joint.
Step 5: Heat the Solder Pads & Apply Solder
Prepare your soldering iron and ensure it’s heated to the appropriate temperature (typically 350–400°C for most soldering jobs). Gently press the iron’s tip onto the solder pads to heat them, and apply a small amount of solder.
Once the solder is in place, connect wires or additional strips by holding their ends against the solder pads and applying the soldering iron. The solder should melt and form a smooth, shiny joint that securely bonds the wires or strips to the pads. Avoid overloading with solder, as this can cause short circuits or uneven connections.
Step 6: Connect the Strips & Test the Setup
Once the soldering is complete, slide a piece of heat shrink tubing over the connection to insulate it. Heat the tubing with a heat gun to seal it securely. If you don’t have heat shrink tubing, wrap the connection in electrical tape to prevent short circuits.
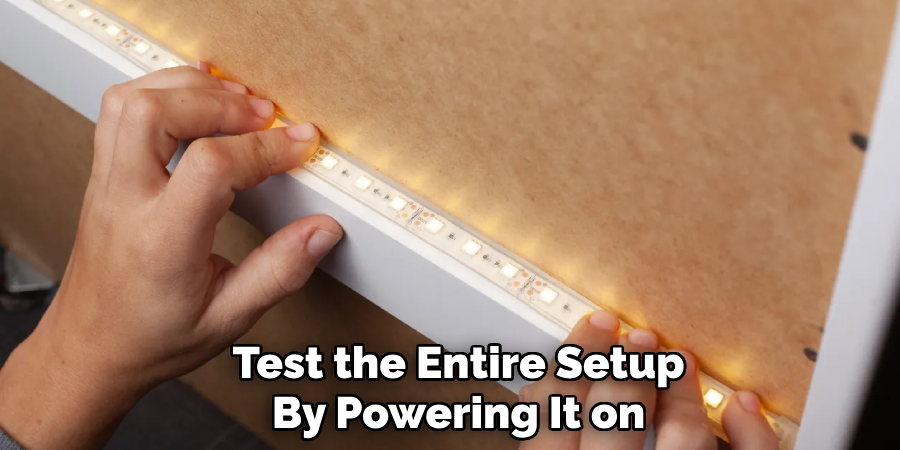
Before proceeding with the final installation, test the entire setup by powering it on. Ensure all the LED strips light up evenly and that there are no flickering or dim sections. Address any issues, such as loose connections, before finalizing the installation.
Advanced Connection Methods
Employing Connectors for Seamless Integration
Connectors designed for LED strips ensure clean and professional connections without soldering. Look for corner connectors, T-connectors, or Y-splitters for complex layouts.
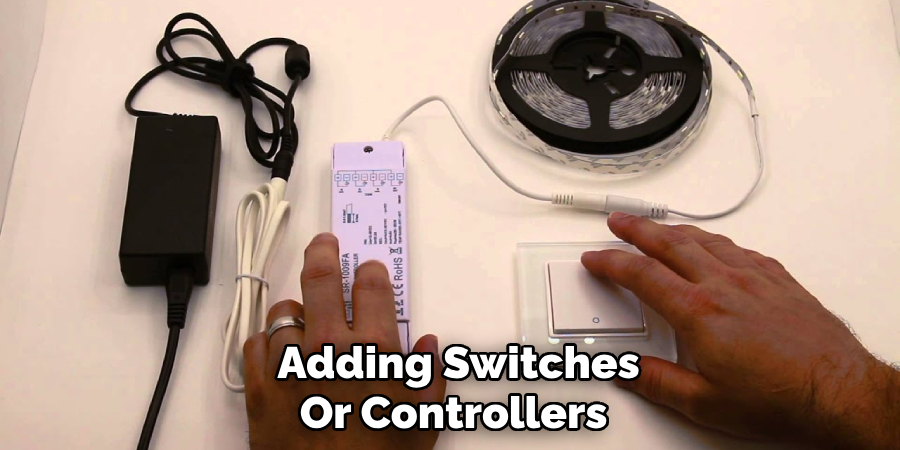
Incorporating Switches and Controllers
Adding switches or controllers allows you to customize the brightness, color, and patterns of your LED strips. These devices connect between the power source and LED strips.
Troubleshooting Common Connection Issues
Identifying and Fixing Loose Connections
Loose connections can lead to flickering or non-functional LEDs. Inspect each connection and ensure they’re secure. Re-solder or reattach connectors if necessary.
Dealing with Inconsistent Light Output
Inconsistent brightness or color may indicate voltage drops. Ensure proper power distribution and consider adding amplifiers for long runs.
Frequently Asked Questions
Can I connect LED strips without soldering?
Yes, you can use LED connectors, which are a simple and effective alternative to soldering.
How many LED strips can I connect to one power source?
This depends on the total wattage of the strips and the capacity of the power source. Ensure the power supply can handle the combined wattage with a safety margin.
What is the maximum length for a single LED strip run?
The maximum length varies by strip type and power capacity. Typically, 5 meters is a safe maximum to avoid voltage drops.
How do I know if my power source is sufficient for all my LED strips?
Calculate the total wattage of your LED strips and ensure the power supply provides at least 20-30% more wattage than required.
Is It Safe To Connect Multiple LED Strip Lights?
Yes, as long as you follow proper safety precautions and use a power source with sufficient capacity.
Conclusion
Connecting multiple LED strips to a single power source becomes simple and efficient when approached methodically. By understanding the power requirements, selecting the right connectors and tools, and carefully following the outlined steps, you can create a visually stunning and functional lighting setup. Proper planning ensures your strips are safely and effectively powered without overloading the system.
Whether you’re enhancing your home’s ambiance, upgrading your workspace, or working on a creative project, these tips guarantee a professional finish while maintaining safety and durability. With a little attention to detail and the right preparation, your LED lighting project will bring your vision to life, transforming any space with vibrant and efficient illumination.