Smart bulbs are transforming the way we illuminate our homes, providing convenience, energy efficiency, and advanced customization. These intelligent lighting solutions allow users to control brightness, set schedules, and even change colors—all from a smartphone or voice assistant.
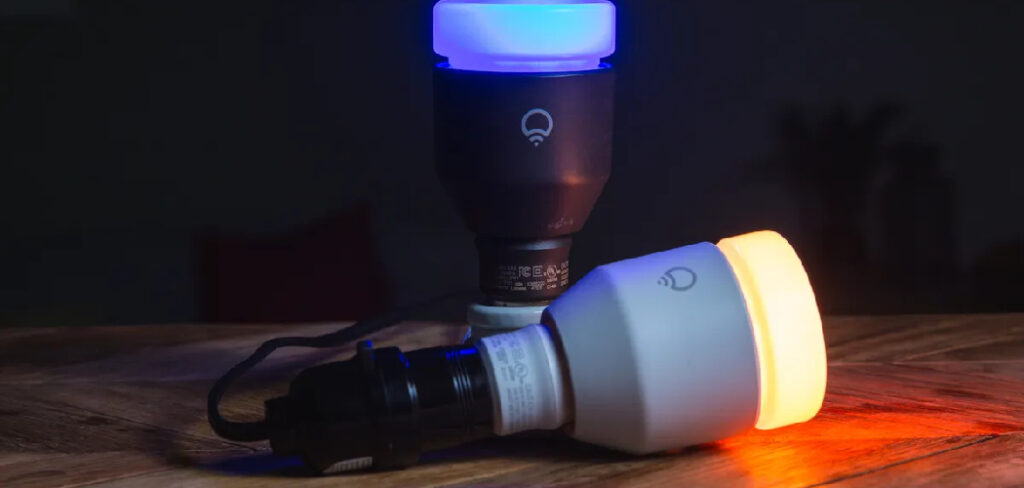
Among the many options available, Smart Life Bulbs have gained popularity for their affordability, ease of installation, and seamless integration with platforms like Amazon Alexa, Google Assistant, and the Smart Life App. However, to take full advantage of these smart features, proper WiFi setup is crucial.
Many users encounter difficulties during the connection process, often due to network compatibility issues, incorrect setup procedures, or signal interference. Without a stable connection, the bulb may not respond as expected, limiting its functionality. Fortunately, with the right approach, connecting a Smart Life Bulb to Wi-Fi can be a quick and straightforward process. This article provides a comprehensive guide on how to connect smart life bulb to Wi-Fi effectively.
Understanding Smart Life Bulbs
What is a Smart Life Bulb?
A Smart Life Bulb is an intelligent lighting solution that connects to WiFi, allowing remote control through a smartphone app. Unlike traditional bulbs, these smart bulbs offer features such as:
- Remote Control: Turn lights on/off from anywhere.
- Scheduling & Automation: Set lighting schedules for convenience and energy savings.
- Voice Control: Compatible with Amazon Alexa and Google Assistant.
- Energy Efficiency: Consume less power than conventional bulbs.
Why is WiFi Connectivity Important?
WiFi enabled smart bulbs to function seamlessly, facilitating app and voice controls. Without a stable connection, features like automation and remote access won’t work efficiently. Therefore, setting up the bulb properly is crucial.
Preparing for Installation
Before connecting your Smart Life Bulb to Wi-Fi, ensure you have the following:

Check Compatibility
- WiFi Frequency: Smart Life Bulbs typically support 2.4GHz WiFi, not 5GHz.
- Router Settings: Some routers may need minor tweaks, such as enabling AP isolation.
Gather Necessary Items
- A Smart Life-compatible bulb
- A smartphone or tablet with the Smart Life App installed
- A stable internet connection
Download & Install the Smart Life App
- iOS and Android versions available
- Create an account or log in to Smart Life
3 Easy Steps on How to Connect Smart Life Bulb to Wi-Fi
Smart Life Bulbs provide a seamless way to control your lighting using a smartphone or voice assistants like Alexa and Google Assistant. To enjoy their smart features, you need to connect them to WiFi. Follow these three simple steps for a smooth setup.
Step 1: Setting Up the Bulb
To begin, screw the Smart Life Bulb into a compatible light socket and turn it on. If the bulb is brand new, it should start blinking rapidly, indicating that it is in pairing mode. If the bulb does not blink, it needs to be reset. To do this, turn the bulb on and off three to five times until it begins flashing. This flashing light means the bulb is now in pairing mode and ready to connect.
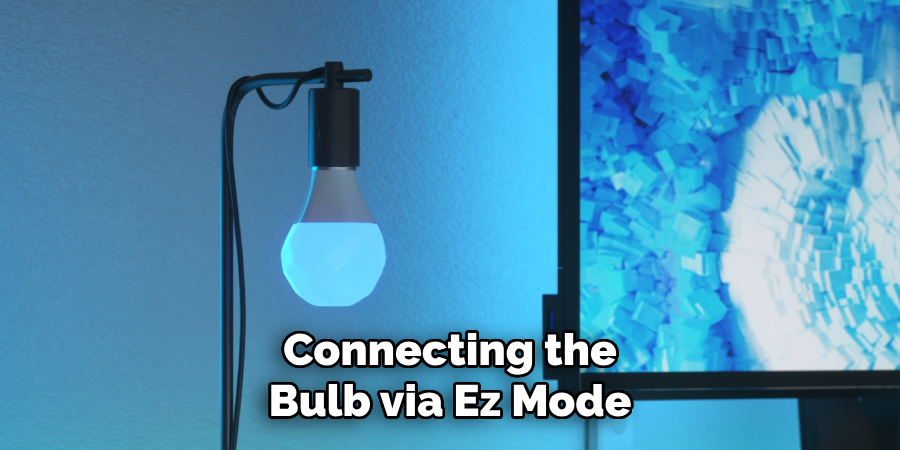
Step 2: Connecting via EZ Mode
Once the bulb is in pairing mode, open the Smart Life App on your smartphone. If you don’t already have the app, download it from the Google Play Store or Apple App Store and sign in. Tap the “+” icon to add a new device, then navigate to the lighting section and select “Smart Bulb.” The app will prompt you to confirm that the bulb is blinking rapidly, which it should be if it’s in pairing mode.
Next, enter your Wi-Fi credentials, ensuring that you are using a 2.4GHz network, as Smart Life Bulbs do not support 5GHz networks. The app will now attempt to connect to the bulb. This process may take a few seconds. Once connected, the bulb will be registered in your Smart Life App, allowing you to name it and customize its settings.
Step 3: Connecting via AP Mode
If the bulb fails to connect using EZ Mode, you can try AP Mode, which works through a temporary Wi-Fi network created by the bulb itself. First, reset the bulb again until it starts blinking slowly instead of rapidly. Open the Smart Life App and switch to AP Mode from the connection options.
The app will instruct you to go to your phone’s Wi-Fi settings and connect to the bulb’s temporary network.” Once connected, return to the Smart Life App and follow the on-screen instructions to complete the setup. The app will transfer your Wi-Fi credentials to the bulb, allowing it to connect to your home network. Once the process is complete, your Smart Life Bulb will be successfully linked to Wi-Fi and ready for use.
Troubleshooting Connection Issues
Common Issues & Fixes
- Bulb not blinking → Reset it properly.
- WiFi not connecting → Ensure you’re using 2.4GHz and check the password.
- App not detecting bulb → Restart the router and the Smart Life app.
- Interference from other devices → Move the router closer or reduce interference.
- Firmware updates → Check for and install updates via the app.
Advanced Troubleshooting
- Reset your router and check settings.
- Ensure the Smart Life App has the necessary permissions.
- Try using a different smartphone or reinstalling the app.
- Use a WiFi extender if the signal is weak.
Integrating Smart Life Bulb with Voice Assistants
Connecting with Amazon Alexa
- Open the Alexa App.
- Enable Smart Life Skill.
- Link your Smart Life Account.
- Discover devices and assign the bulb to a room.
- Use commands like “Alexa, turn on the living room light.”
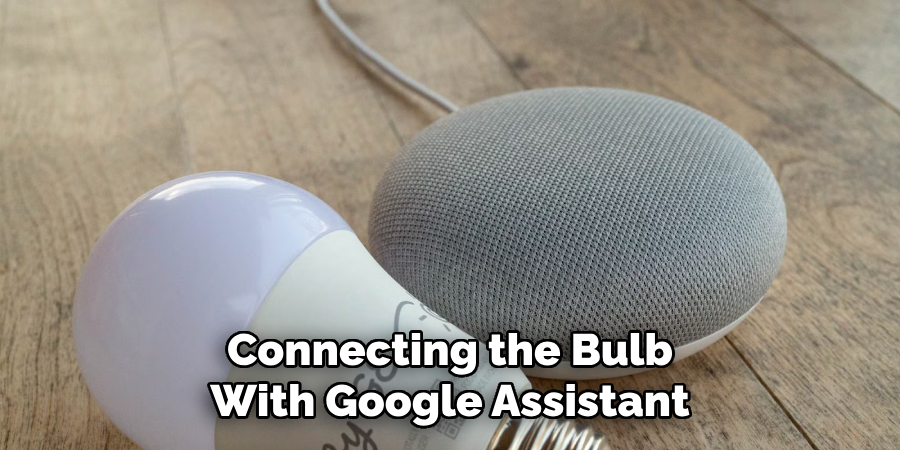
Connecting with Google Assistant
- Open the Google Home App.
- Add Smart Life as a service.
- Link your Smart Life Account.
- Assign the bulb to a room and create automation.
- Use commands like “Hey Google, dim the lights.”
Customizing and Optimizing Smart Life Bulb Settings
Adjusting Brightness and Color
For RGB smart bulbs, the Smart Life App allows users to modify brightness levels and choose from a wide range of colors. You can manually select colors from the color wheel or use preset scenes for different moods, such as warm tones for relaxation or vibrant colors for parties. The app also lets you adjust the brightness intensity, helping you create the perfect ambiance for any occasion. Dimmable options work well for nighttime use, reducing strain on the eyes while conserving energy.
Setting Schedules and Timers
One of the most useful features of Smart Life Bulbs is the ability to automate lighting through schedules and timers. You can set lights to turn on or off at specific times, ensuring convenience and energy efficiency. For example, you can schedule lights to turn on in the evening before you arrive home and turn off automatically at bedtime.
This feature is also beneficial for home security, giving the appearance of occupancy when you’re away. Additionally, countdown timers can be set to turn off lights after a certain period, which is particularly useful for bedrooms or children’s rooms.
Grouping Multiple Smart Bulbs
If you have multiple Smart Life Bulbs installed in different rooms or areas, you can group them together for synchronized control. Through the Smart Life App, you can assign bulbs to specific zones such as “Living Room,” “Bedroom,” or “Kitchen” and control them all at once. This feature is ideal for creating a uniform lighting setup throughout your home, whether for daily use or special occasions. Instead of adjusting each bulb individually, you can turn an entire group on or off with a single tap or voice command.
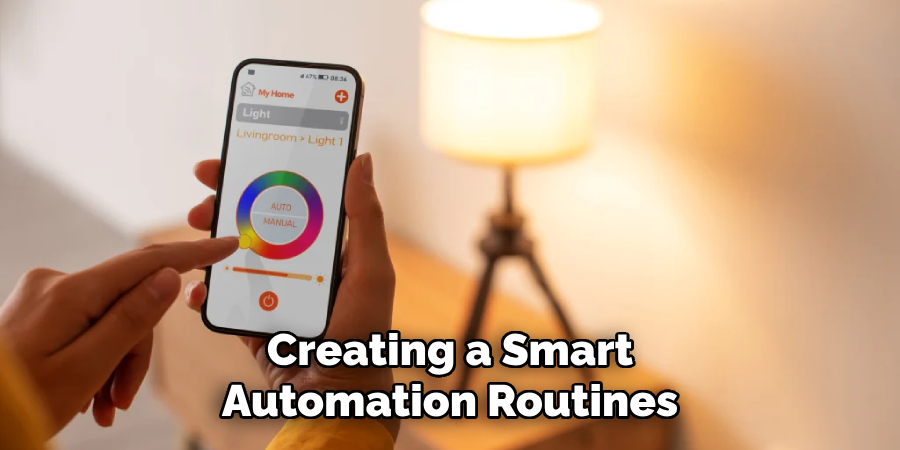
Creating Automation Routines
For advanced customization, Smart Life Bulbs can be integrated into automation routines. You can sync lights with sunrise and sunset, allowing them to turn on as it gets dark and turn off in the morning. If your home has motion sensors, you can configure the lights to turn on automatically when movement is detected. Additionally, Smart Life Bulbs can be connected to third-party automation platforms like IFTTT, enabling even more personalized settings such as flashing notifications or adjusting brightness based on ambient light levels.
Frequently Asked Questions
Q: Why won’t my Smart Life Bulb connect to WiFi?
Ans: Smart Life Bulbs typically require a 2.4GHz WiFi network to function. If your router is set to 5GHz only, the bulb won’t connect. Also, ensure that your WiFi signal is strong, the bulb is in pairing mode, and you’ve entered the correct WiFi credentials in the Smart Life App.
Q: Can I connect my Smart Life Bulb to multiple devices?
Ans: Yes, once the bulb is connected to the Smart Life App, you can share device access with multiple users. Simply go to the app settings and add family members or other users who need control over the bulb.
Q: How do I reset my Smart Life Bulb if it won’t pair?
Ans: To reset the bulb, turn it on and off 3–5 times until it starts flashing rapidly. This puts the bulb into pairing mode, allowing you to reconnect it to your WiFi network via the Smart Life App.
Q: What should I do if my Smart Life Bulb disconnects from WiFi frequently?
Ans: If your bulb keeps disconnecting, check if your WiFi signal is weak or unstable. Try moving your router closer to the bulb, reducing interference from other devices, or resetting your router. Also, ensure that your router firmware is up to date.
Q: Can I use Smart Life Bulbs with Alexa or Google Assistant?
Ans: Yes! After setting up your bulb in the Smart Life App, you can link it to Amazon Alexa or Google Assistant to control it using voice commands, such as “Alexa, turn off the living room light.”
Conclusion
Connecting a Smart Life Bulb to WiFi is a simple process when done correctly. With proper setup, you unlock convenient remote control, automation, and voice assistant compatibility. Smart bulbs not only enhance lighting experiences but also contribute to energy efficiency and home security.
By following this guide, you can troubleshoot common issues, integrate with Alexa/Google Assistant, and explore advanced settings. Take full advantage of your smart lighting system and enjoy a more connected home!
Start setting up your Smart Life Bulb today and experience the future of lighting!