A lamp that refuses to turn on can be a frustrating issue, whether it’s a favorite desk lamp or a floor lamp that illuminates your living room. It’s easy to assume the worst—that the lamp needs to be replaced—but in many cases, the problem is something simple that can be fixed with a bit of troubleshooting.
There are numerous reasons why lamps stop working, from a burnt-out bulb to faulty wiring, and most can be addressed without the need for professional help. How to fix a lamp that won’t turn on often involves checking common components like the power source, light bulb, switch, and wiring. In this article, we’ll guide you through identifying and addressing these common issues with clear, step-by-step instructions.
This article provides a comprehensive guide on How to fix a lamp that won’t turn on effectively. Whether you’re a seasoned DIYer or just starting out, you’ll find these tips straightforward and easy to implement, helping you get your lamp back in working order quickly.
List of Necessary Tools
Before diving into troubleshooting your lamp, make sure you have the following tools on hand:
- Screwdrivers: A basic set with flathead and Phillips head screwdrivers.
- Multimeter: To test for continuity and electrical problems.
- Replacement Bulbs: A suitable replacement for the current bulb in your lamp.
- Electrical Tape: For insulating connections if needed.
- Wire Strippers: If you need to remove insulation from any wires.
- Lamp Socket: If replacing the socket is necessary.
- New Lamp Switch: In case the switch needs replacing.
With these tools, you’ll be ready to begin troubleshooting your lamp and identify the cause of the issue.
Identifying Common Lamp Issues
Recognizing Symptoms of a Faulty Lamp
Before jumping into repairs, it’s helpful to identify the symptoms your lamp is exhibiting. Some common signs include:
- The lamp turns on intermittently.
- It flickers or dims unpredictably.
- There’s no response when the switch is pressed or turned.
By understanding these symptoms, you can narrow down the potential causes of the issue and focus on troubleshooting specific components.

Understanding the Impact of Wear and Tear
Over time, the components of your lamp, including the cord, switch, and socket, can wear out or become damaged. Wear and tear often result from regular use, frequent plugging and unplugging, or even environmental factors like humidity. When dealing with older lamps, the age of the electrical components may also be a contributing factor to malfunction.
Lamp Knob Too Tight to Turn
Sometimes, the issue may not be electrical at all. If the knob or switch feels too tight or difficult to turn, the internal mechanism might have become stiff or corroded. This is an issue that can often be resolved with a simple cleaning or lubrication, and is one of the easiest fixes to try before moving on to more complicated solutions.
6 Easy Steps to Troubleshooting a Lamp
Here are six detailed steps to help you troubleshoot and fix a lamp that won’t turn on:
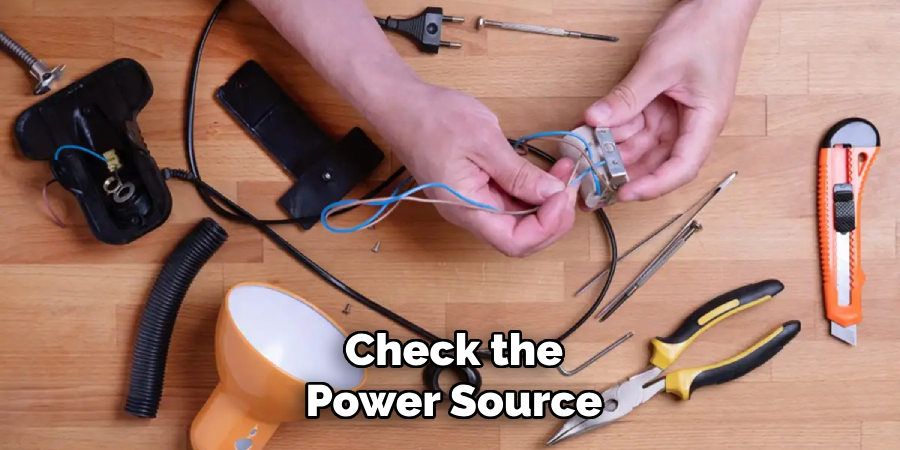
Step 1: Check the Power Source
The first thing to check is whether your lamp is receiving power. It’s easy to overlook, but a non-working power outlet can often be the cause. Unplug the lamp and plug it into a different outlet in the room or another room altogether. If the lamp turns on, the original socket may be faulty. You can also check the power source by plugging in a different device, like a phone charger, to confirm that the outlet is supplying power. If the lamp works in a different outlet, it’s time to inspect the original outlet. A broken fuse, tripped circuit breaker, or damaged wiring may be the cause, and you may need to contact an electrician.
Step 2: Inspect the Light Bulb
A common and often overlooked reason for a lamp not turning on is a burnt-out light bulb. Remove the bulb from the lamp and carefully inspect it. Check for visible signs of damage such as a broken filament (the thin wire inside) or discoloration. If the filament is broken or the bulb is cloudy, it has likely burned out and needs to be replaced. Make sure to use the correct type and wattage of bulb for your lamp, as using a bulb with too high a wattage can damage the socket or cause a fire hazard. Try replacing the bulb with a new one to see if the lamp works.
Step 3: Examine the Lamp Switch for Issues
The lamp switch is another common culprit. A switch that’s worn out, broken, or dirty can prevent your lamp from turning on. If the switch feels loose, makes a clicking sound, or doesn’t work at all, the switch might be malfunctioning. First, make sure the lamp is unplugged, then remove the switch cover to examine the components inside. Look for any signs of wear, corrosion, or broken parts. If the switch looks damaged or corroded, it may need to be replaced. Additionally, a dirty switch could cause issues with electrical contact, so try cleaning it gently to remove any dirt or grime buildup.
Step 4: Replace the Lamp Switch to Fix the Issue
If you determine that the lamp switch is the issue, replacing it is relatively simple. Begin by turning off the power to the lamp and unplugging it from the outlet. Use a screwdriver to remove the screws holding the switch in place. Once you’ve removed the cover, disconnect the wires from the old switch.
Take note of the wiring configuration so you can replicate it when installing the new switch. After the old switch is removed, connect the wires to the new switch, secure it in place, and reassemble the lamp. Finally, plug the lamp back in and test it to see if the new switch resolves the problem.
Step 5: Fix a Faulty Wiring Connection in a Lamp
Faulty or damaged wiring is another common cause of lamps that won’t turn on. Examine the entire length of the lamp’s cord and any exposed wiring for signs of damage, such as fraying, exposed copper, or broken sections. If you notice any damage, it’s important to fix it to prevent further electrical hazards. You can cut away the damaged section and strip the insulation from the wires.

Then, carefully reconnect the wires using electrical tape or wire nuts to insulate them. If the damage is extensive or the wires are beyond repair, you may need to replace the entire cord. Always take extra precautions when handling electrical components and, if necessary, consult a professional.
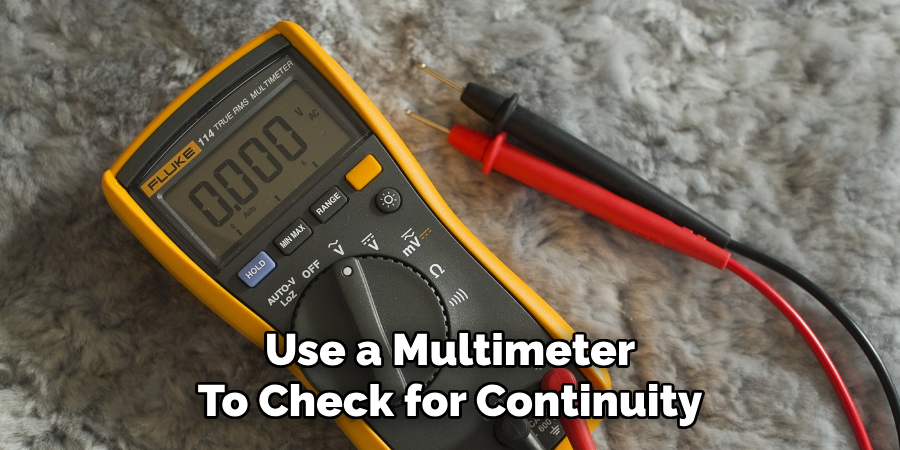
Step 6: Test the Socket of a Lamp That Won’t Turn On
If everything else seems to be working correctly, the issue may lie with the lamp socket itself. Over time, sockets can become worn or corroded, preventing proper contact with the light bulb. To test the socket, use a multimeter to check for continuity. Set the multimeter to the “resistance” or “continuity” mode and touch the probes to the metal contacts inside the socket.
If you don’t get a reading or the meter beeps, the socket is likely damaged and needs to be replaced. If you’re unsure how to replace a socket, you can find replacement sockets at most hardware stores or consider consulting a professional for assistance. A faulty socket can be a fire hazard, so it’s important to address this issue promptly.
By following these six troubleshooting steps, you can likely identify and fix the issue causing your lamp to not turn on. Always remember to take necessary safety precautions, such as unplugging the lamp before working on it and wearing gloves when handling electrical components. If you’re unsure at any step, don’t hesitate to reach out to a professional for help.
Frequently Asked Questions
How to Reattach LED Strip Lights
If you’re working with LED strip lights instead of a traditional lamp, reattaching them may involve using connectors or soldering the ends together. Ensure the power is off and the strip is cut at the correct points, then use the appropriate connectors or solder for a secure connection.
What Are the First Steps in Diagnosing a Lamp That Won’t Turn On?
Start by checking the power source, then inspect the light bulb and lamp switch. From there, look for any issues with wiring or the socket. These steps should help identify the root cause of the problem.
Can I Repair a Faulty Switch Myself, or Should I Seek Professional Help?
If you feel comfortable working with electrical components, replacing a faulty switch is a manageable task. However, if you’re unsure or uncomfortable, it’s always a good idea to consult a professional electrician.
What Safety Precautions Should I Take When Attempting to Fix a Lamp?
Always unplug the lamp before working on it. If you’re handling wiring, make sure the power is completely turned off. Wear gloves and use insulated tools to protect yourself from electrical shock. If in doubt, seek professional help.
Conclusion
A lamp that won’t turn on is a common issue that can be easily fixed with a bit of troubleshooting. By following the steps outlined in this guide, you can quickly identify the problem and determine whether it’s a simple fix or a more complex issue that requires replacement parts. Always remember to prioritize safety when working with electrical components, and don’t hesitate to seek professional help if needed. With a little patience and the right tools, you can restore your lamp to full working order and enjoy its light once again!