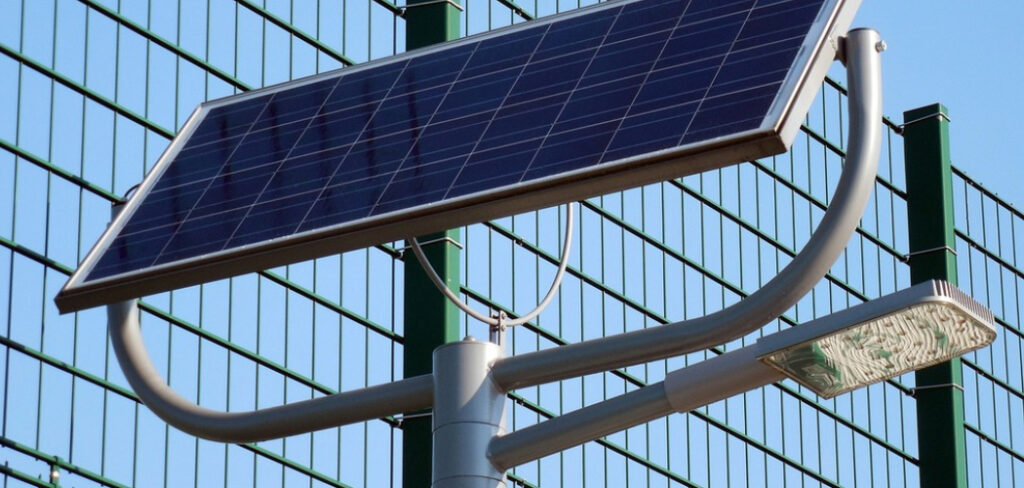
Solar lights have become an increasingly popular and eco-friendly choice for outdoor lighting, offering a sustainable way to illuminate pathways, gardens, and driveways without adding to electricity costs. These lights rely on a crucial component—the solar light sensor—which detects ambient light levels to automatically switch the lights on at dusk and off at dawn.
However, like any outdoor device, solar light sensors can develop issues over time. Common problems include lights failing to turn on at night, staying on during the day, flickering, or not functioning at all. These malfunctions often result from dirt buildup on the sensor, depleted or faulty batteries, wiring issues, or even prolonged exposure to harsh weather conditions.
To ensure your solar lights continue to function optimally, it is essential to diagnose and resolve sensor-related problems effectively. This guide will provide how to fix solar light sensors and help you restore your lighting system’s efficiency and longevity with simple, practical solutions.
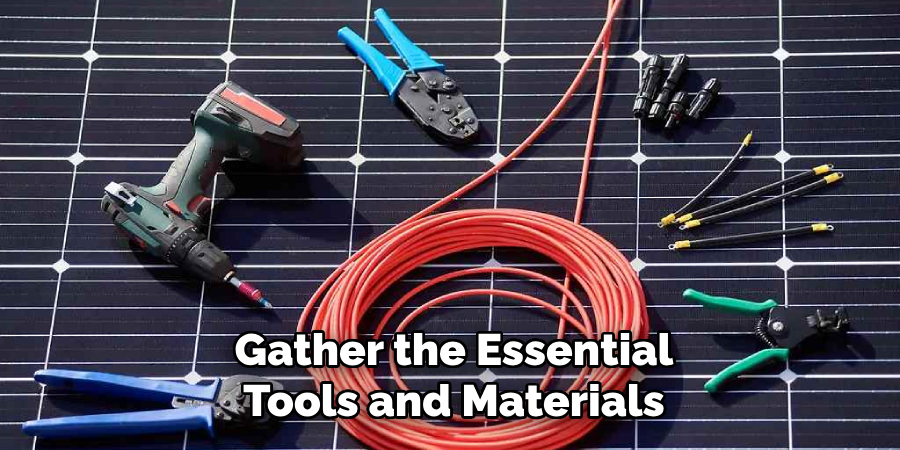
Essential Tools and Materials You’ll Need
To effectively troubleshoot and repair solar light sensors, gather the following tools and materials:
- Soft Cloth & Soapy Water – For cleaning the sensor and solar panel.
- Multimeter – To test battery voltage and electrical connections.
- Rechargeable Batteries – Compatible replacements if the existing ones are faulty.
- Screwdriver Set – For opening the solar light casing.
- Soldering Iron & Solder Wire – To fix or replace faulty wiring and sensors.
- Replacement Wires & Connectors – For repairing damaged internal connections.
- New Sensor (LDR or Photodiode) – If the existing sensor is defective.
Understanding How Solar Light Sensors Work
What is a Solar Light Sensor?
A solar light sensor is a crucial electronic component that detects ambient light levels and controls when solar lights turn on or off. It ensures automatic operation—activating the lights at night and turning them off during daylight—eliminating the need for manual switching.
Types of Solar Light Sensors
There are two main types of solar light sensors used in outdoor lighting systems:
- Light-Dependent Resistors (LDRs): These sensors adjust their resistance based on light intensity. In bright conditions, the resistance is low, preventing the light from turning on. At night, resistance increases, allowing the light to activate.
- Photodiodes: These semiconductor devices convert light into an electrical signal, providing more precise control over the lighting system. They are commonly found in advanced solar lights.
How Solar Light Sensors Function
- Daytime Operation: The solar panel collects sunlight, converting it into electrical energy that charges the internal rechargeable battery. The sensor detects brightness and keeps the light off.
- Nighttime Activation: When the sensor detects darkness, it triggers the battery to supply power to the LED light, turning it on.
- Potential Issues: If the sensor, battery, or wiring fails, the solar light may malfunction, requiring troubleshooting to restore proper functionality.
Common Issues with Solar Light Sensors
1. Dirt & Obstructions
- Dust, debris, or water spots on the sensor or solar panel can block light detection, causing malfunction.
2. Battery Failure
- Rechargeable batteries degrade over time, reducing their ability to store power.
- Corroded or weak batteries may fail to supply enough energy for sensor operation.
3. Water Damage
- Exposure to rain and moisture can cause short circuits or sensor failure.
4. Loose Wiring
- Internal wires can become loose or corroded, disrupting the connection between the sensor and the lighting system.
5. Incorrect Placement
- If the solar light is placed near a streetlight or another artificial light source, it may fail to detect darkness, preventing it from turning on.
6 Easy Steps Guide for How to Fix Solar Light Sensor
Solar lights are a convenient and energy-efficient outdoor lighting solution, but their sensors can develop issues over time. If your solar lights fail to turn on at night, stay on during the day, or flicker intermittently, follow this step-by-step guide to diagnose and fix the problem effectively.
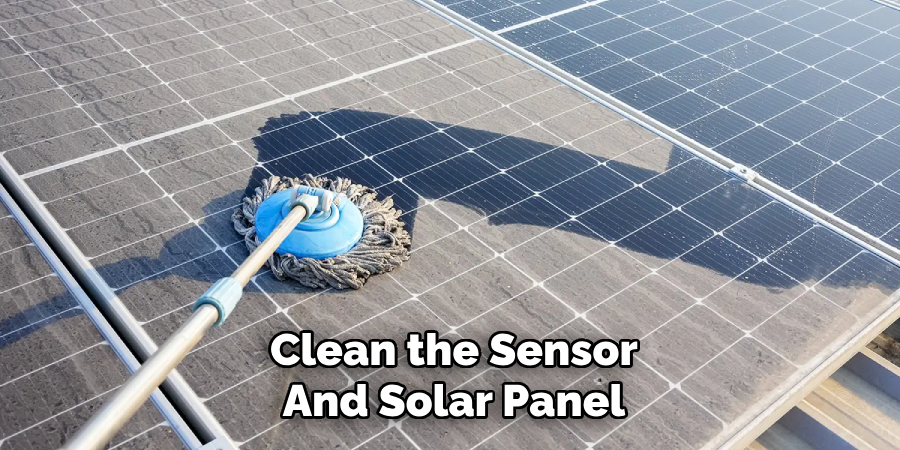
Step 1: Cleaning & Basic Checks
One of the most common reasons for malfunctioning solar light sensors is dirt accumulation. Dust, debris, and even moisture can obstruct the sensor, preventing it from detecting light levels accurately.
- Clean the Sensor and Solar Panel: Use a soft cloth and soapy water to gently wipe down the sensor and solar panel. Avoid using harsh chemicals, as they can damage the surface.
- Check for Obstructions: Ensure that leaves, dust, or any external objects are not blocking the sensor or solar panel.
- Optimize Solar Panel Positioning: The solar panel should receive direct sunlight for at least 6-8 hours daily for optimal performance. If necessary, reposition it to avoid shade from trees, buildings, or other structures.
Step 2: Checking & Replacing Batteries
Solar lights use rechargeable batteries to store energy collected during the day. If these batteries degrade or fail, the sensor may not function properly.
- Inspect the Battery Compartment: Open the compartment and check for corrosion, leakage, or any visible damage.
- Test Battery Voltage with a Multimeter:
- If the battery voltage is significantly lower than the required range (typically 1.2V-3.7V, depending on the model), it may need replacement.
- Replace the batteries with compatible rechargeable ones of the same voltage and capacity.
- Ensure Proper Sealing: After replacing the battery, ensure that the battery compartment is dry and sealed tightly to prevent moisture damage.
Step 3: Testing the Sensor
Before replacing the sensor, check if it is functioning properly using simple manual tests.
- Manual Hand Test: Cover the sensor with your hand. If the light turns on, the sensor is responding correctly.
- Flashlight Test: Shine a flashlight directly at the sensor:
- If the light turns off, the sensor is working.
- If the light does not respond, further troubleshooting is required.
If the sensor fails these tests, proceed to the next steps for repairing or replacing it.
Step 4: Fixing Wiring Issues
Faulty or loose wiring can prevent the solar light sensor from functioning properly.
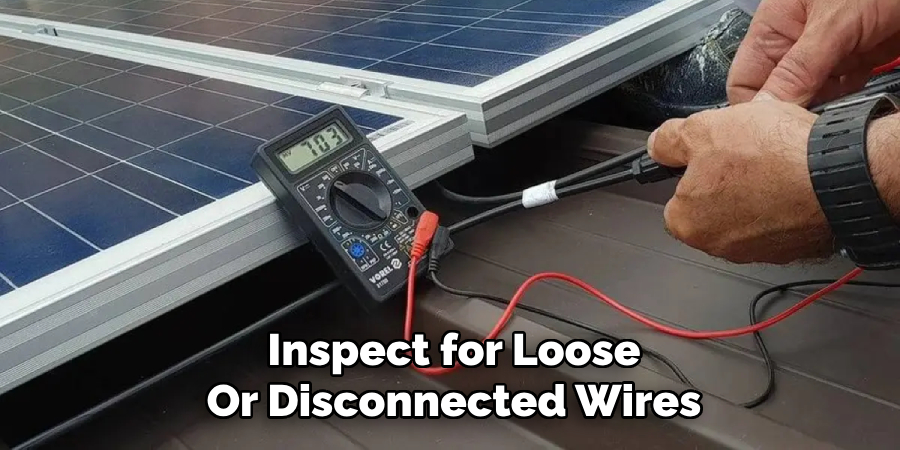
- Open the Light Casing: Use a screwdriver to carefully remove the cover and access the internal wiring.
- Inspect for Loose or Disconnected Wires:
- If any wires appear loose, reattach them securely.
- If wires are disconnected, use a soldering iron to reattach them firmly.
- Check for Damaged Wires:
- If a wire is frayed or broken, replace it with a new wire of the same gauge to ensure proper conductivity.
- Reassemble the Light: Once the wiring is secured, close the casing and ensure all components are properly fitted.
Step 5: Replacing a Faulty Sensor
If the sensor itself is defective, replacing it may be necessary.
- Identify the Sensor Type: Solar lights use LDRs (Light Dependent Resistors) or photodiodes to detect light levels. Check your model’s specifications.
- Desolder the Old Sensor: Use a soldering iron to carefully remove the faulty sensor from the circuit board.
- Install the New Sensor: Position the replacement sensor correctly and solder it securely in place.
- Reassemble the Light: Ensure all components are properly attached before closing the casing.
Step 6: Reassembly & Final Testing
After fixing the issue, perform a final check to ensure the solar light sensor is working correctly.
- Secure All Components: Ensure that screws, wires, and the casing are properly in place.
- Charge the Solar Light: Place it under direct sunlight for a full day to ensure the battery is fully charged.
- Perform Day & Night Tests:
- Test in daylight to ensure the sensor turns the light off.
- Test in darkness to confirm that the light turns on automatically.
Preventative Maintenance Tips
- Regular Cleaning: Wipe down solar panels and sensors once a month to prevent dirt buildup.
- Check Batteries Annually: Replace rechargeable batteries every 1-2 years for optimal performance.
- Protect Against Water Damage: If possible, use weatherproof coatings or place lights under sheltered areas.
- Positioning Matters: Ensure solar lights are placed away from artificial lights to prevent false readings.
- Routine Sensor Testing: Perform seasonal checks to identify issues before they escalate.
Frequently Asked Questions
How do I know if my solar light sensor is faulty?
Ans: To test the sensor, cover it with your hand or place the solar light in a dark area. If the light does not turn on, the sensor may be faulty. Another test is to shine a flashlight directly at the sensor—if the light does not turn off, the sensor isn’t functioning correctly. In such cases, cleaning or replacing the sensor may be required.
What type of batteries should I use in my solar lights?
Ans: Most solar lights use rechargeable NiMH, NiCd, or Li-ion batteries, depending on the model. Check your manufacturer’s specifications for the correct voltage, typically 1.2V-3.7V. Always replace old batteries with compatible ones to ensure optimal performance and longevity of your solar light system.

How often should I clean my solar light sensor?
Ans: It’s best to clean the sensor and solar panel at least once a month to prevent dirt buildup that can interfere with proper light detection. If you live in a dusty or rainy area, consider cleaning them more frequently. Use a soft cloth and mild soapy water, avoiding harsh chemicals that could damage the components.
How long do solar light sensors typically last?
Ans: Solar light sensors can last several years, typically 3-5 years, depending on the quality of the sensor and maintenance. Regular cleaning and proper battery care can extend the lifespan of both the sensor and the solar light itself. If the sensor starts malfunctioning before this period, it may require cleaning or replacement.
How can I improve the battery life of my solar lights?
Ans: To improve battery life, ensure the solar panel receives adequate sunlight exposure for at least 6-8 hours a day. Clean both the solar panel and sensor regularly to avoid dirt buildup. Additionally, replace older or weak batteries with high-quality rechargeable ones to ensure better energy storage.
Conclusion
Fixing a solar light sensor is often a simple process that involves cleaning, checking batteries, inspecting wiring, and replacing faulty sensors when necessary. With proper maintenance, solar lights can last for years, providing reliable illumination while reducing energy costs.
By following this troubleshooting guide, you can easily restore malfunctioning solar lights and enjoy uninterrupted outdoor lighting. If you’re interested in more lighting solutions and troubleshooting guides, visit Lightorix.com for expert insights and product recommendations!