A pool light wedge is a small but crucial component that ensures your pool lighting remains secure, stable, and properly aligned. Over time, pool lights can become loose due to factors such as vibrations, water pressure, or improper installation.

When a pool light shifts or wobbles, it can affect illumination, reduce visibility, and even pose a safety hazard. A pool light wedge helps prevent this movement, keeping the light firmly in place and ensuring consistent illumination. This not only enhances the aesthetics of your pool but also contributes to a safer swimming environment. Installing a pool light wedge is a straightforward process, but it requires attention to detail and the right tools to ensure a secure fit.
In this guide, we will take you through a step-by-step installation process on how to install pool light wedge effectively. Whether you are a pool owner looking to improve lighting stability or a professional handling pool maintenance, this guide will equip you with the knowledge to install a pool light wedge efficiently and effectively. By following these instructions, you can enhance your pool’s lighting performance and prolong the lifespan of your pool lights.
Essential Tools and Materials You’ll Need
Before starting, gather the following tools and materials to make the process easier and more efficient:
- Pool light wedge
- Screwdriver (Phillips and flathead)
- Waterproof sealant (if required)
- Pool light fixture
- Safety gloves and goggles
- Voltage tester
- Wrench (if applicable)
Understanding Pool Light Wedges and Power Requirements
The Basics of Pool Light Wedges
A pool light wedge is a small insert used to keep the light fixture securely in place within the niche. Without a wedge, pool lights can become loose or misaligned, leading to safety issues and reduced lighting performance.
Key Benefits of a Pool Light Wedge:
- Ensures a secure fit for the pool light fixture
- Prevents water infiltration and damage
- Enhances the durability and longevity of the lighting system
- Reduces the risk of the light fixture detaching
Calculating Power Needs for Your Pool Light
Before installing the wedge, it’s important to verify the power requirements of your pool light to ensure compatibility:
- Check the Voltage: Most pool lights operate on either 12V or 120V. Make sure the power supply matches the fixture’s requirements.
- Wattage Considerations: Different lights require different wattages. Ensure the power supply can handle the fixture’s load.
- Circuit Compatibility: Confirm that the pool light and wedge fit properly within the existing setup.

Preparing to Install the Pool Light Wedge
Essential Tools and Materials for Installation
Before beginning installation, ensure you have all the necessary tools on hand. Having the right equipment will make the process more efficient and reduce the risk of errors.
Safety Precautions Before Starting
- Turn Off Power: Switch off the pool light circuit at the breaker box to prevent electrical hazards.
- Dry the Work Area: Ensure the fixture and surrounding area are completely dry before handling electrical components.
- Wear Protective Gear: Use safety gloves and goggles to protect yourself from sharp edges and electrical shock.
5 Easy Steps for How to Install Pool Light Wedge
Step 1: Removing the Existing Pool Light
- Loosen the Screws: Start by using a screwdriver to remove the screws that are securing the pool light fixture. These screws are typically located around the perimeter of the light, holding it in place within the niche.
- Carefully Remove the Light Fixture: Once the screws are loosened or removed, gently pull the light fixture out of the niche. Be cautious not to pull too hard to avoid damaging the wiring or light fixture itself.
- Inspect the Niche and Wiring: With the light removed, inspect the niche for any corrosion, wear, or loose wiring. Ensure all electrical components are intact and safe to work with. If you notice any issues, address them before proceeding.
- Clean the Area: Wipe away any dirt, old sealant, or debris from the niche area. A clean surface is essential for ensuring a secure fit for the new light wedge.
Step 2: Preparing the Pool Light Wedge
- Check the Wedge Size: Before inserting the wedge, ensure that you have the correct size that fits the light fixture snugly. The wedge should help stabilize the fixture without forcing it into place.
- Position the Wedge: Identify the correct location to insert the wedge. The wedge should be placed in a position that stabilizes the light fixture and ensures it remains secure within the niche, without causing any misalignment.
Step 3: Inserting the Pool Light Wedge
- Insert the Wedge into the Niche: Slide the wedge into the niche, ensuring it fits tightly around the light fixture. The goal is to prevent the fixture from moving once reinstalled. Ensure the wedge is positioned properly, as it helps to hold the fixture in place.
- Adjust the Wedge Position: If necessary, adjust the wedge to achieve optimal stability. Make sure that it is not too tight or too loose, as either condition could affect the fixture’s alignment.
Step 4: Reinstalling the Pool Light Fixture
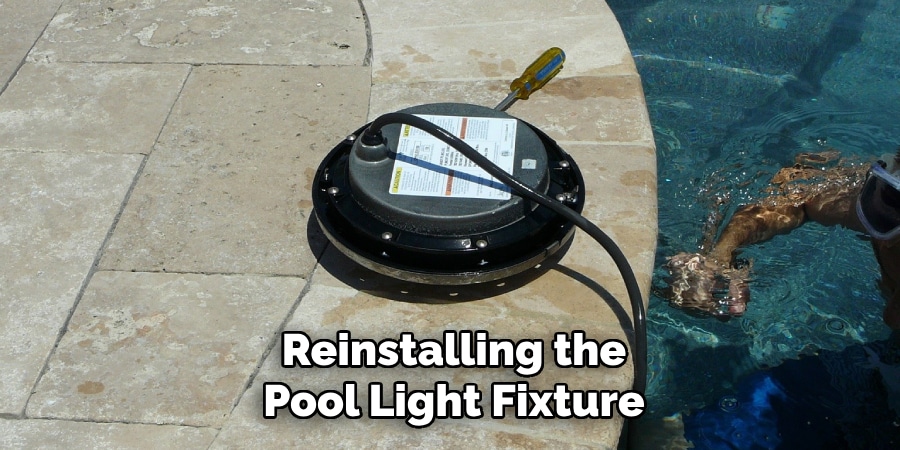
- Reinsert the Light Fixture: Carefully place the pool light fixture back into its niche, ensuring it sits properly with the wedge securely in place. The light should fit snugly within the niche, with the wedge helping to stabilize it.
- Check for Alignment: Before securing the fixture, ensure it is aligned correctly with no gaps or misalignment between the fixture and the wedge.
Step 5: Securing the Pool Light and Final Inspection
- Tighten the Screws: Use your screwdriver to tighten the screws that hold the fixture in place. Make sure the screws are evenly tightened to ensure an even pressure distribution.
- Check for Gaps or Loose Fittings: Once the screws are tightened, inspect the light fixture and wedge for any gaps or signs of looseness. The fixture should be securely in place, and the wedge should not move.
- Test the Light: Finally, turn the power back on and test the light to ensure everything is functioning properly and that there are no leaks or issues. Regularly inspect the light and wedge to maintain stability and performance.
Testing and Final Adjustments
Step 1: Restoring Power and Testing the Light
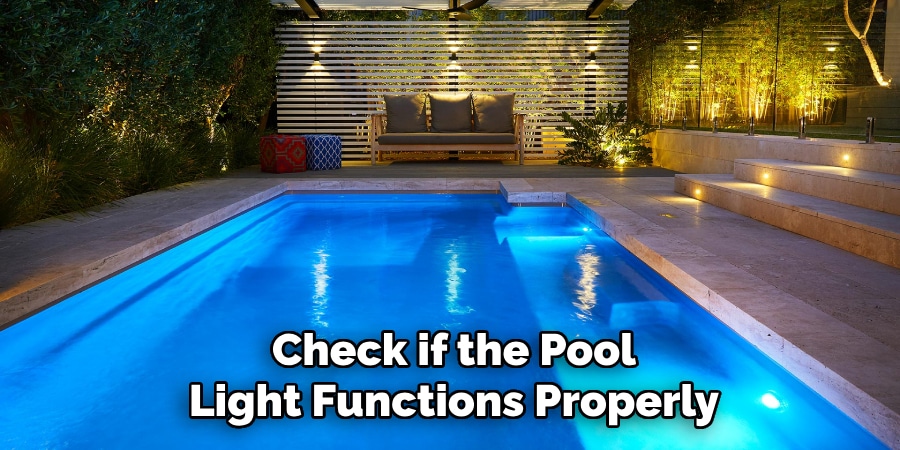
- Turn the Power Back On: Switch on the breaker to restore power.
- Test the Light: Check if the light functions properly and remains stable.
Step 2: Checking for Stability and Water Resistance
- Press the Fixture Gently: Ensure the light does not wobble or shift.
- Apply Waterproof Sealant (If Needed): Seal around the fixture for added protection.
- Monitor for Leaks: Check for any signs of water infiltration.
Advanced Installation Techniques
Employing Additional Fixation Methods
- Use Extra Wedges: For larger fixtures, multiple wedges may be required.
- Implement Rubber Spacers: These can provide additional stability.
Incorporating Waterproof Sealants and Gaskets
- Choose the Right Sealant: Use high-quality, pool-safe waterproof sealant.
- Apply Properly: Seal around the wedge and fixture to prevent leaks.

Troubleshooting Common Installation Issues
Identifying and Fixing Loose Fittings
- Check for a Secure Fit: If the light is still loose, adjust or replace around the light wedge.
- Tighten Screws Again: Ensure all screws are firmly secured.
Dealing with Water Leakage
- Inspect the Seals: Check if the waterproof sealant is applied correctly.
- Reapply Sealant: If necessary, add an extra layer of protection.
Frequently Asked Questions
Can I install a pool light wedge without turning off the power?
No, always turn off the power at the breaker box before installing a pool light wedge. Handling electrical components with live power can lead to electrocution and serious injury. Use a voltage tester to confirm power is off.
How do I know if my pool light wedge is the right size?
Check your pool light’s model and manufacturer specifications to determine the correct wedge size. Compare the old wedge with the new one, ensuring a snug fit to prevent leaks and maintain proper sealing.
What should I do if my pool light is still loose after installation?
Tighten the screw securely and ensure the wedge is properly seated. If the light is still loose, check for a damaged gasket or incorrect wedge size. Replace parts if necessary for a secure fit.
Do I need to replace the pool light wedge regularly?
Pool light wedges don’t need frequent replacement but should be checked periodically. Replace them if you notice looseness, leaks, or wear. Regular inspections help maintain a secure fit and prevent water from damaging the light fixture.
Is it safe to install a pool light wedge on my own?
Yes, but only if you follow safety precautions. Turn off power at the breaker, use proper tools, and ensure a correct fit. If unsure or inexperienced with electrical components, consult a professional to avoid risks like electrocution or water damage. Safety should always come first.
Conclusion
Installing a pool light wedge is crucial for maintaining a secure, functional, and safe pool lighting system. Always start by turning off the power at the breaker box to prevent electrocution. After ensuring the power is off, remove the old wedge and inspect the fixture for wear, corrosion, or damage. Ensure the new wedge fits properly and securely to prevent leaks.
Use the correct tools during installation and avoid overtightening, as this can damage the gasket or fixture. Once installed, test the light to ensure proper function and check for leaks around the wedge. If it remains loose or leaks, verify the wedge size or replace damaged components.
Regular inspections and maintenance are key to the longevity of your pool light. Wedges can degrade over time due to chemical exposure and water pressure. By routinely checking for wear and replacing damaged parts, you ensure the durability and reliability of your pool lighting system, keeping it safe and well-lit for everyone.