Emergency lights are crucial in homes, offices, schools, and public buildings across the USA, providing illumination during blackouts, fires, or power failures. Like any fixture, they need maintenance—replacing bulbs, cleaning dust, or changing backup batteries.
To do this, you must first learn how to remove emergency light cover safely. While it may seem intimidating, with worries about shocks or breaking delicate parts, most covers are designed for easy removal using simple household tools. With patience and the right approach, anyone—from DIY homeowners to facility managers—can handle the task.
This guide explains cover types, tools, and safe step-by-step methods, while also sharing personal tips to make the process easier and ensure your emergency lights remain reliable when needed most.
Understanding Emergency Light Covers
Not all emergency lights are built the same, and their covers vary as well. The most common in the USA is the plastic snap-on cover, which is lightweight, affordable, and easily released with gentle prying. Screw-mounted covers are sturdier, secured with screws, and often used where tampering might occur.
Hinged covers swing open like a door, making them convenient in commercial settings for quick inspections or bulb changes. In industrial or high-security areas, you may find specialty covers designed to resist dust, moisture, or vandalism, which often need special tools to remove.
Regardless of type, covers serve a safety purpose—shielding internal components, preventing accidental contact with wiring, and keeping fixtures secure. Identifying the cover type first ensures you remove it safely without damage.
Tools and Preparations
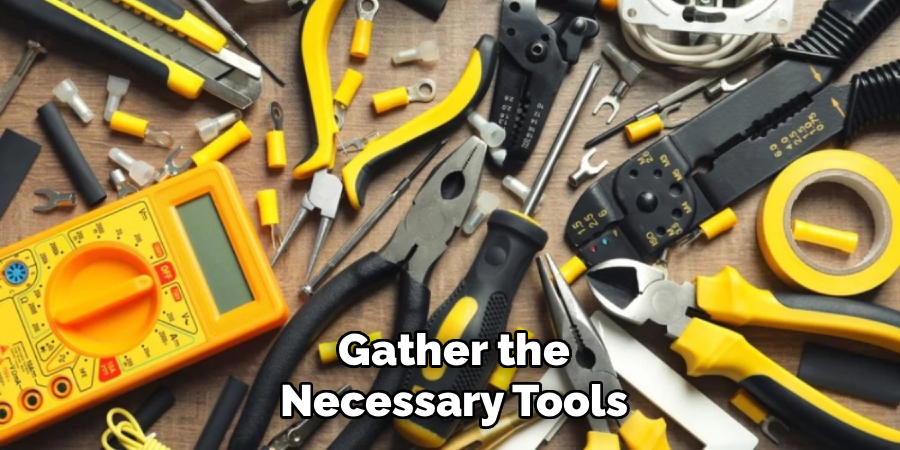
Having the right tools can make the process much smoother. Here’s a list of essential items you’ll need for safely removing, checking, and reinstalling your emergency light cover:
- Screwdriver set (Phillips and flathead)
- Small ladder or step stool
- Insulated gloves
- Flashlight
- Voltage tester
- A small container or magnetic tray for screws or clips
Before you get started, safety should be your number one concern. Always switch off the breaker or power supply to the light you’re working on. Don’t assume flipping a wall switch is enough—it may still carry power from the circuit. If the light has been on recently, give it a few minutes to cool down so you don’t burn your hands when handling the cover. If you’re unsure about the wiring or nervous about shocks, wear insulated gloves. They provide an extra layer of protection.
Finally, make sure your work area is safe. If the emergency light is mounted on a wall or ceiling, use a stable ladder instead of balancing on a chair. Clear the area around you so you don’t trip while holding tools. And always have a container nearby for small screws—losing one on the carpet or floor can bring your whole project to a halt.
6 Easy Steps How to Remove Emergency Light Cover
Step 1: Turn Off Power
Start at the breaker panel and switch off the circuit feeding the emergency light. Don’t rely only on a wall switch—circuits can share power. Press the fixture’s “TEST” button (if present) to confirm it won’t light, or flip the wall switch to make sure nothing comes on. If you have a non-contact voltage tester, scan around the housing to be extra sure the area is de-energized. Give recently used lights a few minutes to cool.
Step 2: Inspect the Emergency Light Fixture
Before touching anything, study how the cover is secured. Look along the edges for small Phillips screws, spring clips, or a hinge line. Brands like Lithonia, Cooper, and Hubbell often use similar—but not identical—layouts, so details matter.
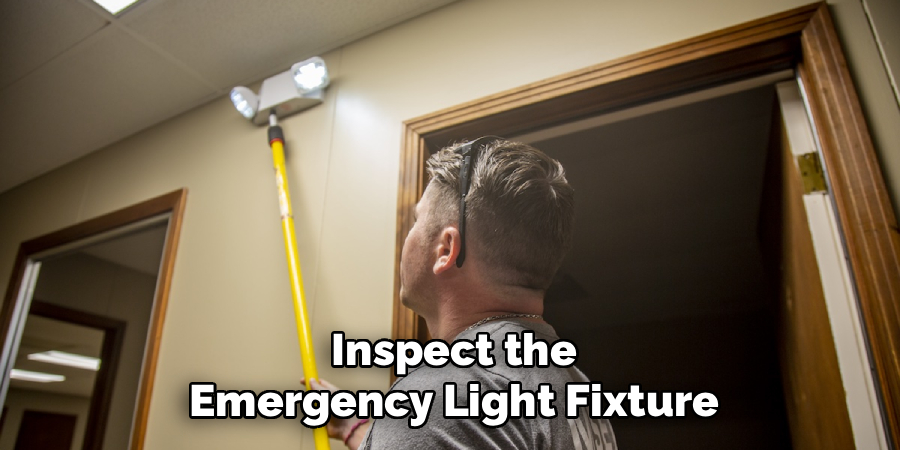
Note whether you have a snap-on, screw-on, or hinged style. Check for labels or caps that might conceal fasteners, and make sure your ladder is stable and at the right height so you’re not prying at an awkward angle.
Step 3: Remove Screws or Clips
If you see screws, choose the correct driver (usually Phillips #1 or #2 for USA fixtures) and keep steady downward pressure to avoid cam-out. As each screw comes free, drop it into a small container or magnetic tray so nothing goes missing.
If your unit uses clips, slide a flathead under the lip and press inward or upward (per the clip design) until the cover loosens. A small piece of painter’s tape on the flathead tip can prevent scuffs on soft plastic.
Step 4: Gently Pry or Slide the Cover
For snap-on lenses, begin at a corner or any notch you can see, then work evenly around the perimeter. Pull with consistent, moderate pressure—don’t yank. For hinged designs, support the cover with one hand as you swing it down like a door so the hinge doesn’t stress and crack. If the cover resists, pause and re-inspect for a hidden screw under a sticker or a center tab you missed.
Short personal tip: I once broke a perfectly good plastic cover because I got frustrated and forced it open. Now I always take an extra minute to double-check for hidden fasteners before prying.
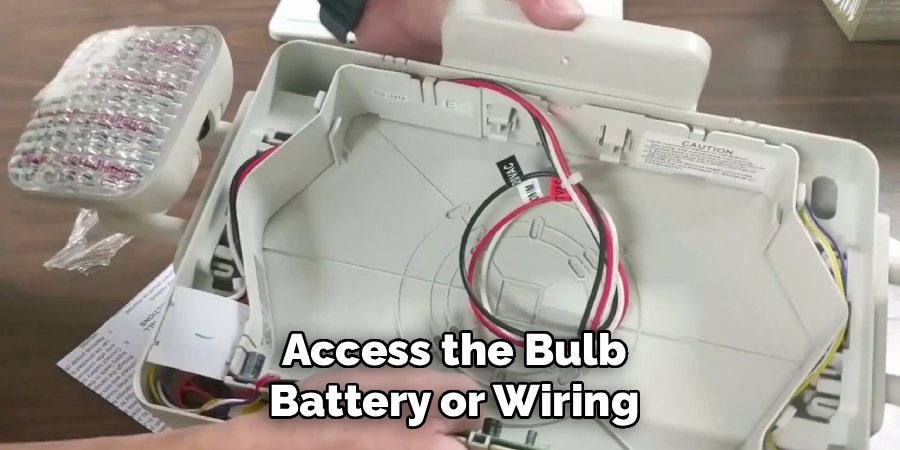
Step 5: Access the Bulb, Battery, or Wiring
With the cover off, you can replace a blown bulb, clean out dust with a dry microfiber cloth, or service the backup battery. Handle bulbs by the base to avoid skin oils shortening their life. For batteries (often 6V/12V sealed lead-acid or NiMH packs), disconnect gently at the plug—don’t pull wires.
Inspect terminals for corrosion and make sure any LED boards or connectors are seated firmly. Avoid aerosol cleaners inside the housing; moisture and residues can cause problems later.
Step 6: Reinstall or Leave Open for Maintenance
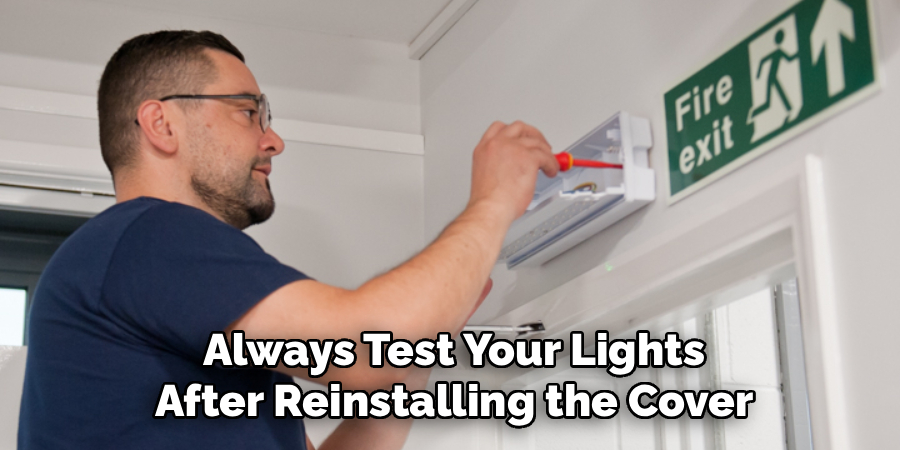
When you’re finished, seat the cover the same way it came off: align tabs and hinges first, then snap or screw it back without overtightening (which can crack plastic or strip threads). Restore power at the breaker and press the TEST button for 30 seconds to confirm steady illumination.
If you notice flicker, recheck bulb seating and battery connections. A small label or piece of painter’s tape with today’s date inside the housing is a handy reminder of when maintenance was done.
Common Mistakes to Avoid
The most common mistake people make is forgetting to turn off the breaker. It’s not just dangerous—it’s potentially life-threatening. Another mistake is using too much force and cracking the plastic cover. Replacement covers aren’t always easy to find, so be gentle.
Losing screws or clips is another headache. A small magnetic tray has saved me countless times—no more crawling around the floor searching for tiny pieces. Also, don’t ignore the backup battery inside. OSHA requires emergency lights in the USA to have functioning batteries, so make sure yours is in good condition. And finally, don’t reinstall a dusty or dirty cover. A quick wipe before putting it back can improve the brightness significantly.
Safety Tips for USA Homeowners and Businesses
In the United States, both OSHA (Occupational Safety and Health Administration) and NFPA (National Fire Protection Association) set requirements for emergency lighting in workplaces. These aren’t just guidelines—they’re safety laws. That means if you’re maintaining lights in a commercial space, you’re also ensuring compliance.
For homeowners, the stakes are personal. A working emergency light can make a huge difference in a power outage, guiding your family safely to exits. Always test your lights after reinstalling the cover, and if anything feels beyond your comfort level—like wiring repairs—call a licensed electrician.
For business owners or building managers, remember that only authorized personnel should handle cover removal and maintenance. Keep a log of inspections, replacements, and cleanings to stay compliant with regulations.
Personal Tips
I’ve learned a few little lessons over the years that might save you time:
- I once cracked a plastic cover by forcing it open—learned the hard way to check for hidden clips first.
- Keeping a small magnetic tray for screws has saved me from crawling on the floor countless times.
- A flashlight in your pocket is your best friend when working on ceiling-mounted emergency lights.
- If the cover feels stuck, patience is better than strength—there’s usually a hidden clip or screw.
These may sound small, but they make the whole process smoother and less frustrating.
Frequently Asked Questions
Q: Can I remove an emergency light cover without turning off the power?
Ans: Technically yes, but it’s strongly discouraged. The risk of electric shock is real. Always turn off the breaker first.
Q: What if my emergency light cover won’t come off?
Ans: Check carefully for hidden screws or clips. Sometimes they’re tucked under small labels. If you still can’t remove it, check the user manual or call a technician.
Q: Do I need special tools to remove the cover?
Ans: No, usually just a screwdriver and sometimes a flathead for prying.
Q: Can I replace the emergency light bulb myself?
Ans: Yes, in most cases. But if you’re dealing with wiring or battery replacements in a commercial setup, it may be safer (and legally required) to hire a technician.
Q: How often should I check and clean emergency light covers?
Ans: For homes, once or twice a year is fine. For workplaces in the USA, NFPA 101 requires monthly testing and annual full maintenance checks.
Conclusion
Emergency lights are easy to ignore—until you need them. They’re essential for safety in both homes and workplaces across the USA. Removing their covers for maintenance is not complicated if you follow the right steps.
Always prioritize safety by cutting power before working. Take your time identifying the type of cover, use the right tools, and handle the plastic gently. A few small precautions—like using a magnetic tray for screws and wiping the cover clean—go a long way.
By keeping your emergency lights maintained, you’re not just following a checklist. You’re making sure your family, employees, or building occupants have a reliable path to safety when it matters most. With patience, simple tools, and the guidance you’ve just read, anyone can confidently and safely remove an emergency light cover.