Emergency lights are the quiet safety net in homes, offices, and public spaces. You barely notice them—until a blackout—when they guide people through halls, stairs, and exits.
Sometimes they misbehave: glowing after power returns, staying dark during tests, or refusing to reset after a battery swap. Knowing how to reset emergency lights saves time, money, and stress. In the U.S., OSHA and NFPA rules require regular testing and upkeep, so reliability is also a compliance issue—not just convenience.
In this guide, you’ll get a clear, step-by-step process to identify your light type, check batteries, use the test/reset button or breaker, and confirm proper operation—explained in plain English so you can handle it confidently without calling an electrician.
Understanding Emergency Lights
At their core, emergency lights are designed to do one thing: provide illumination when normal power fails. They usually kick in during blackouts, fire alarms, or any other situation where the main electricity supply is interrupted.
There are several types commonly found in U.S. homes and businesses:
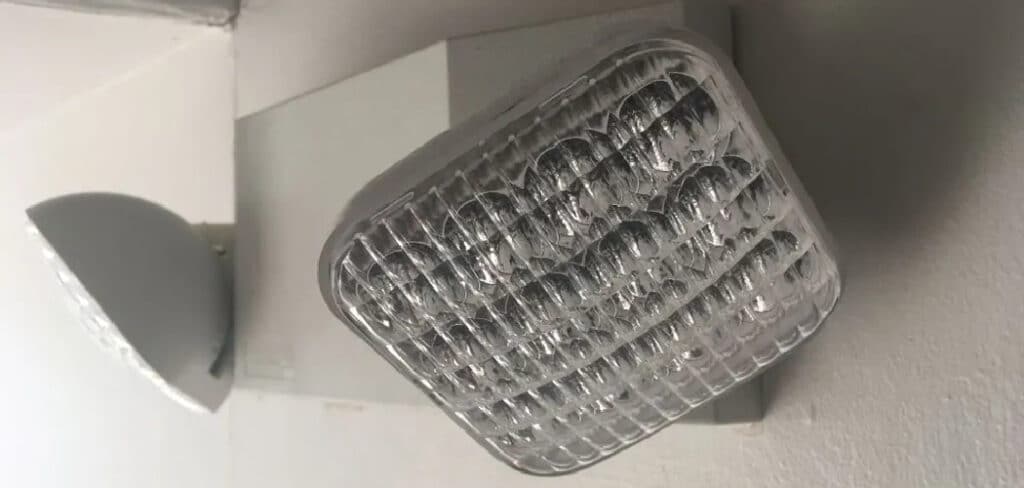
- Standalone battery-powered units: These are simple wall-mounted lights with built-in batteries. They’re common in homes, small offices, and hallways.
- Combination exit signs with lights: You’ll often see these in schools, theaters, or retail stores. They have the glowing “EXIT” sign plus directional lamps.
- Centralized systems connected to building power: Larger facilities like hospitals or high-rise offices may rely on centralized systems that tie emergency lights into a main power grid or backup generator.
Resetting methods vary depending on which one you’re dealing with. And while homeowners may only need to worry about one or two fixtures, businesses are bound by NFPA (National Fire Protection Association) and OSHA (Occupational Safety and Health Administration) regulations, which require regular testing and documentation.
Here are the most common reset scenarios:
- After pressing the test button for routine inspection.
- Following battery replacement.
- When lights fail to turn off after power restoration.
- When lights don’t come on during a power failure simulation.

Tools and Safety Precautions
Having the right tools can make the process smoother and safer. Here’s a list of essentials you’ll likely need for resetting or maintaining your emergency lights:
- Screwdriver
- Flashlight
- Replacement battery (if required)
- Ladder
Before you jump in, make sure you’re working safely. Always turn off the power supply when handling wires or replacing a battery. Wear gloves and eye protection to avoid minor shocks or injuries. And don’t forget a backup flashlight—you don’t want to be fumbling in the dark while working.
One last thing: emergency light designs vary by brand. A Lithonia fixture might reset differently than a Hubbell or Cooper Lighting model. Always double-check the manufacturer’s manual for specifics.
7 Easy Steps on How to Reset Emergency Lights
Below is a detailed guide that walks you through the process, covering everything from identifying your light type to performing regular maintenance checks.
Step 1: Identify the Type of Emergency Light
The first step is figuring out what kind of emergency light you’re dealing with. Not all fixtures reset the same way. In many American homes and small offices, you’ll find standalone wall-mounted units with built-in batteries. These usually reset through a small button on the front or side.

In commercial spaces like theaters, schools, or retail stores, you’re more likely to see combination exit signs with directional lamps, which also have reset buttons. Finally, in larger facilities—such as hospitals or office towers—you might encounter centralized systems connected directly to the breaker panel or backup generator. These often require resetting through the electrical system itself rather than a button on the unit.
Knowing which type you have will save you time and prevent unnecessary trial and error. For instance, pressing buttons on a centralized system won’t help if the reset actually requires cycling the breaker.
Step 2: Inspect the Light and Battery Condition
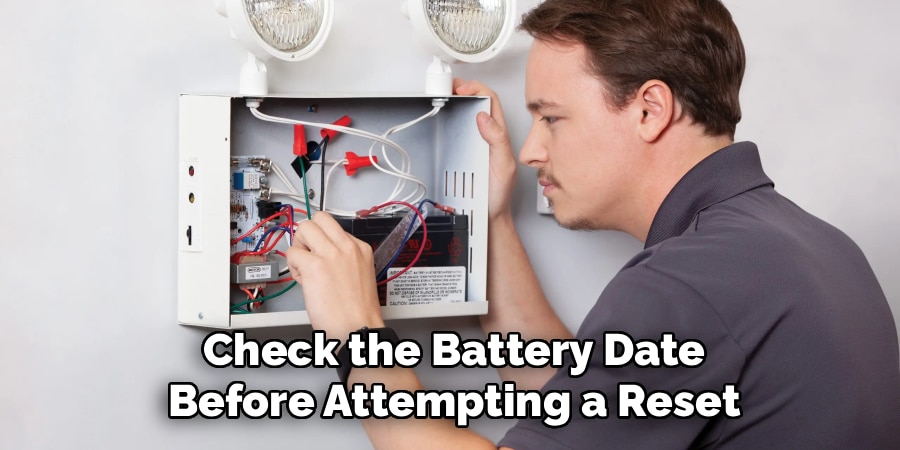
Before you attempt a reset, take a good look at the unit. Do the bulbs look dim? Are they flickering, or failing to turn on at all? These symptoms often point to an aging or damaged battery. Open the battery compartment and check for any signs of corrosion, swelling, or leaks. In most U.S. emergency lights, batteries have a lifespan of three to five years.
If your battery is older than that, you may be wasting your time trying to reset—the issue is likely a worn-out battery that needs replacing. A quick inspection also ensures you’re not dealing with deeper wiring problems or visible damage. Catching these early can save you from a bigger headache later.
Step 3: Locate the Test/Reset Button
Most emergency lights include a small button labeled “Test” or “Reset.” It’s usually recessed to avoid accidental presses, so you may need a pen or screwdriver tip to reach it. Pressing this button simulates a power outage, which allows the light to run off its backup battery.
This feature is required by safety codes and makes it simple to verify functionality. If your unit doesn’t have a reset button, don’t panic. Some older or specialized models don’t include one, and in that case, resetting typically requires cycling the breaker in your electrical panel.
Step 4: Perform the Reset Procedure
For lights with a reset button, press and hold it for around 30 seconds. When you release the button, the light should return to normal operation, switching back to its standby mode.
If your emergency light is connected to a breaker system, head to your electrical panel. Flip the breaker that controls the light off, wait about one to two minutes, and then switch it back on. This action often clears temporary glitches, just like rebooting a computer.
Step 5: Replace Battery if Needed
If resetting still doesn’t solve the problem, there’s a good chance the battery has failed. Here’s how to replace it safely:
- Shut off power to the unit.
- Use a screwdriver to open the battery compartment.
- Remove the old battery and replace it with one of the same type and voltage.
- Close the compartment, restore power, and try the reset procedure again.
Step 6: Verify Proper Operation
Once you’ve reset or replaced the battery, test the lights again. Walk through the area to ensure they illuminate all hallways, staircases, and exit routes properly. If you’re responsible for a business, remember that compliance requires you to record these checks. Documentation not only keeps you covered legally but also helps track when batteries or lights may be due for replacement.
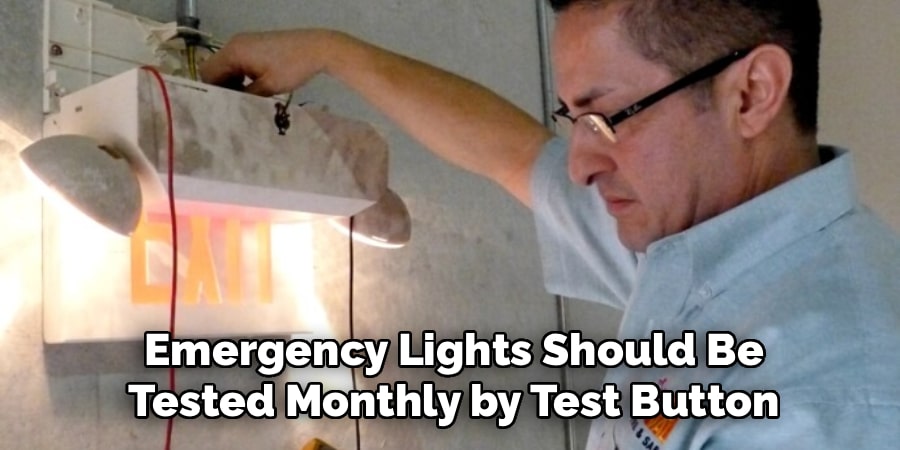
Step 7: Regular Maintenance
Resetting isn’t something you do once and forget about. According to NFPA guidelines, emergency lights should be tested monthly by pressing the test button, and a full 90-minute discharge test should be performed annually. This ensures the battery can handle an extended outage.
If you’re managing a business or larger facility, it’s also smart to keep spare batteries on hand. That way, if one fails during a test, you can replace it immediately without waiting on a supplier. Regular attention keeps your system reliable and your space compliant with U.S. safety codes.
Common Mistakes to Avoid
Resetting emergency lights is simple in theory, but many people run into trouble by making preventable mistakes. Some of the most common include:
- Ignoring the manufacturer’s reset instructions. Not every model is the same.
- Forgetting to shut off the power before swapping batteries, risking sparks or short circuits.
- Using the wrong battery type—size and voltage matter.
- Skipping compliance checks, which can lead to fines in workplace settings.
- Attempting a reset when the real issue is wiring damage or a tripped breaker.
Short Personal Tips
Here are a few little insights I’ve picked up along the way:
- In my own experience, I’ve noticed many people forget to check the battery date before attempting a reset. A quick glance at the sticker can save you frustration.
- When I helped a neighbor reset their emergency lights, we discovered the problem wasn’t the fixture at all—it was a tripped breaker. Always check your power source before assuming the light is broken.
- If you run a small business, I suggest setting a monthly phone reminder to press the test button. It takes just a minute and could save you big headaches during inspections.
Frequently Asked Questions
Q: How often should I reset or test emergency lights?
Ans: U.S. fire codes recommend a quick functional test every month and a 90-minute full test annually. Resetting may be required after each test.
Q: What if my emergency light still doesn’t work after resetting?
Ans: That usually means the battery or wiring is faulty. Replace the battery first. If that doesn’t work, call a licensed electrician.
Q: Can I reset emergency lights without turning off the breaker?
Ans: Yes, if your unit has a reset/test button. For some models without one, breaker cycling is the only option.
Q: Do all emergency lights in the U.S. have the same reset method?
Ans: No. While most use a button or breaker reset, brand-specific designs can differ. Always consult the manual.
Q: Is it safe to replace the battery myself?
Ans: For standalone or small units, yes. Just follow safety steps. But for large commercial or wired systems, it’s best to leave it to a licensed professional.
Conclusion
Emergency lights might not be the flashiest fixtures in your home or workplace, but they’re some of the most important. Resetting them properly ensures they’ll be ready to guide you when power goes out, keeping you and others safe.
The process is straightforward: identify your light type, inspect it, use the reset button or breaker, replace the battery if necessary, and confirm operation. With a little monthly maintenance and awareness of U.S. compliance rules, you’ll keep your system reliable and legal.
At the end of the day, it’s about peace of mind. A well-maintained emergency light can be the difference between calm and chaos in a true emergency.