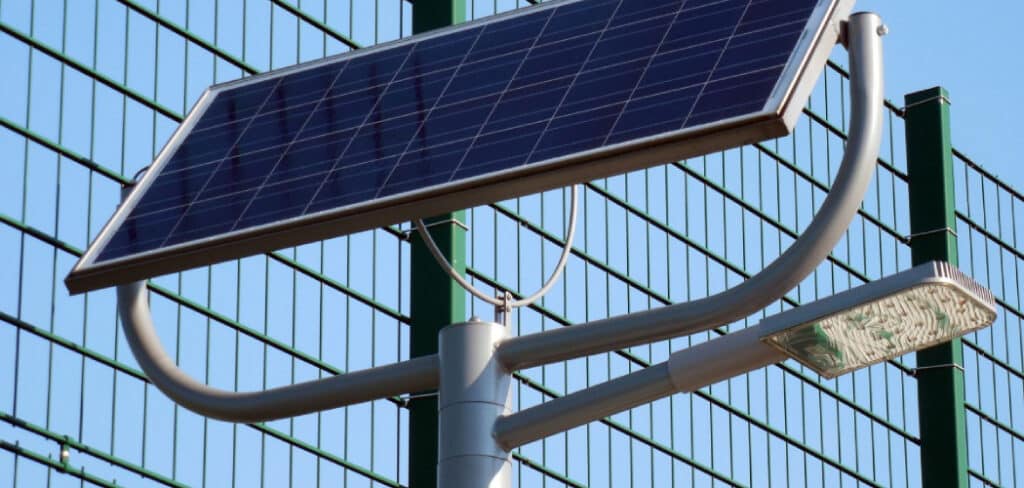
Solar lights have become a staple in gardens, pathways, and outdoor spaces for their energy efficiency and ease of installation. But like all electronics, they can occasionally misbehave.
Sometimes a light will refuse to turn on at night, stay on during the day, or flicker unpredictably. In many cases, these issues aren’t caused by permanent damage but by a temporary glitch in the controller or a problem with the rechargeable battery’s calibration.
Resetting your solar light essentially means restoring its controller and battery to a known working state so the unit can re-learn when to turn on and off, clear any mode/timer confusion, and recover from minor firmware hiccups.
You might need to reset your solar lights after seasonal storage, replacing batteries, extended cloudy weather, or when they start acting inconsistently. This article provides a comprehensive guide on how to reset solar lights effectively.
Why reset solar lights
A reset can work wonders because it restores the device’s internal “decision-making” and energy storage systems to normal operation. First, it re-establishes the day/night sensor threshold and default mode settings. If the unit accidentally got switched to a test mode, or its memory became scrambled due to a power surge or low voltage, a reset gives it a fresh start.
Second, it clears stuck electronic states. Like a computer that freezes and needs a reboot, a solar light’s microcontroller can sometimes lock up in the wrong mode—staying on at the wrong time, ignoring the solar sensor, or shutting off prematurely. Third, it allows the charger/regulator to recognize a freshly charged or replaced battery. Without a reset, some lights might not detect the battery’s capacity correctly, leading to short runtimes or no illumination at all.
However, resetting is not a magic fix for everything. If your solar panel is cracked, your LEDs are burned out, your batteries are completely dead and won’t hold charge, or the wiring is severely corroded, no amount of resetting will restore function. In such cases, replacement parts—or a new light—will be the only solution.

Tools and materials
Having the right tools can make the process much smoother. Here’s a list of essential items you’ll need for safely opening, cleaning, and restoring your solar lights:
Essential tools:
- Small screwdriver – to open battery compartments or remove screws.
- Multimeter – for testing battery voltage and solar panel output.
- Soft cloth and mild cleaner – for removing dirt and debris from the solar panel.
- Needle-nose pliers – for safely handling corroded battery terminals.
- Replacement rechargeable battery – correct size and chemistry for your light.
Replacement parts and consumables:
- Correct type of rechargeable cell(s) (commonly NiMH 1.2 V AA or AAA).
- Dielectric grease or silicone sealant – to protect terminals from moisture.
- Electrical tape or heat-shrink tubing – for small wiring repairs.
Before buying replacements, check your light’s manual or the manufacturer’s recommendations for the right battery chemistry and capacity.
Safety precautions
Although solar lights operate on low voltage, you should still work carefully. Always handle electronics in a safe environment. Work on a dry, stable surface and never open fixtures that are wet or filled with water. Remove any jewelry to avoid accidental short circuits. If you’re using a multimeter, follow its instructions closely and never short battery terminals.
Batteries that are swollen, leaking, or heavily corroded should be handled with care. Avoid touching the leakage directly and dispose of damaged batteries at a proper recycling facility. If at any point you feel unsure, contact the manufacturer or a qualified technician—forcing a repair can cause more harm than good.
6 Easy Steps on How to Reset Solar Lights
Step 1: Inspect and prepare the unit
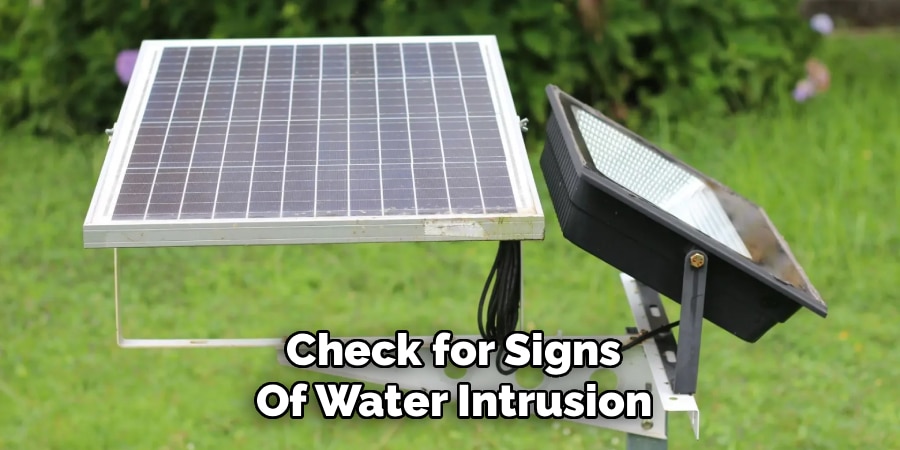
Before doing anything hands-on, take a close look at your solar light. Check for signs of water intrusion, insect nests, cracked panels, heavy corrosion, or loose wiring. If the damage is severe, you might be better off replacing parts rather than attempting a reset. Also, locate the mode switch (usually labeled AUTO, OFF, or TEST) and ensure it’s set to AUTO. If it’s in TEST mode, the light may stay on constantly or act erratically.
Step 2: Clean the solar panel and lens
A dirty solar panel can drastically reduce charging efficiency. Wipe it gently with a soft damp cloth and mild cleaner to remove dust, pollen, or debris. While you’re at it, clean the LED lens so the light output is as bright as possible. Proper cleaning ensures the reset process has the best chance of success.
Step 3: Power down and remove the battery pack
If the fixture has an ON/OFF switch, turn it OFF to stop any power draw. Then, open the battery compartment carefully and remove the rechargeable batteries. Inspect them for swelling, leaks, or corrosion. Damaged batteries should be replaced, not reused.
Step 4: Test and reset the controller
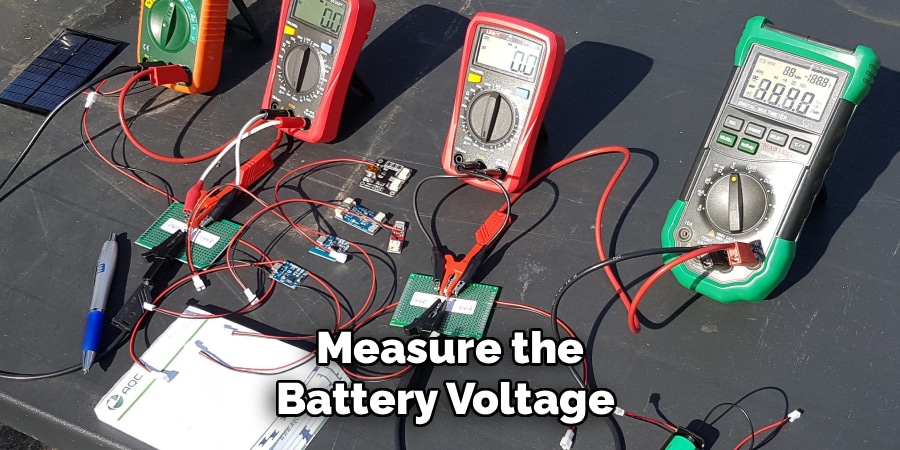
Check the removed batteries with a multimeter — healthy NiMH or NiCd cells should read about 1.2–1.3 volts when charged. Weak or flat readings suggest replacement. With the batteries removed and the switch still OFF, press and hold the power or mode button (if present) for 10–15 seconds to discharge any residual electricity from the controller. If there’s no button, leave the batteries out for at least 30–60 seconds to achieve the same effect.
Step 5: Recharge or replace and reinstall batteries
If your batteries are in good condition, recharge them using a compatible charger or by placing them in direct sunlight (if the manufacturer allows it). If they’re weak or old, replace them with the correct type and capacity recommended for your light. Insert the batteries correctly, close the compartment securely, and switch back to AUTO mode. Make sure seals and gaskets are properly seated to keep moisture out.
Step 6: Calibrate and test performance
Place the light in bright sun for several hours to allow a full charge cycle. If your light supports dusk calibration, cover the solar panel with an opaque cloth for 10–30 seconds, then uncover it — the LEDs should flash or turn on, confirming night mode recognition. Leave the light in place and monitor its behavior over the next couple of nights. Consistent dusk-to-dawn operation means your reset was successful.
Troubleshooting after reset
If your reset didn’t solve the problem, a few targeted checks can help. If the light still doesn’t turn on at night, measure the battery voltage after a full day of charging. If it’s low, replace the battery. If the battery is fine but the panel’s voltage is low in bright sun, the panel may be damaged.
If the light stays on during the day, the sensor may be receiving artificial light from a nearby source—try relocating or shading it. Flickering or dim lighting often points to weak batteries or loose wiring. Clean and tighten connections before replacing components.
If the LEDs remain dark but power is present, the LED driver or the LEDs themselves may be faulty—at this point, replacing the fixture might be the most cost-effective option. For moisture-related issues after rain, dry the fixture thoroughly, reseal the housing, and apply silicone sealant to prevent further ingress.
Maintenance to avoid future resets
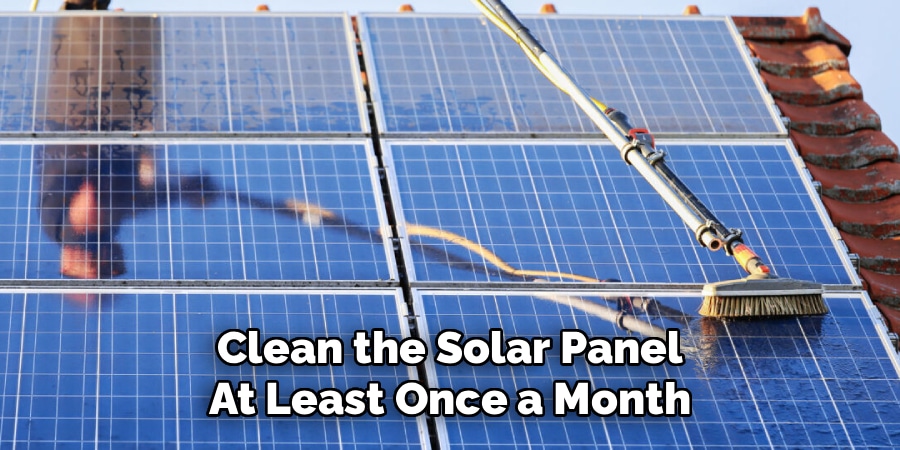
Once your solar light is working again, a little care can keep it from needing frequent resets. Clean the solar panel at least once a month during dusty or pollen-heavy seasons. Replace rechargeable batteries every one to three years, as their capacity will naturally decline over time.
If your lights aren’t designed for extreme cold, store them indoors during harsh winters. Always ensure the battery compartment gasket is intact and apply dielectric grease to battery terminals to prevent corrosion. And remember: location matters. Place your lights where they’ll receive at least four to six hours of direct sunlight daily.
Frequently asked questions
Q: How long does a reset take and when will I see results?
Ans: The actual reset process usually takes 10–30 minutes. Once complete, you should see normal operation the first night, though it’s best to observe the light for two to three nights to confirm stability.
Q: Can a reset revive a dead rechargeable battery?
Ans: Unfortunately, no. If a battery is physically degraded or unable to hold a charge, resetting won’t restore it. A fresh, compatible replacement is the only solution.
Q: Will covering the solar panel reset the light?
Ans: Covering the panel can force the light into night mode for testing, but it’s not a true reset. A proper reset involves cutting power by removing the battery or turning the switch off.
Q: What battery type should I use when replacing cells?
Ans: Stick with the manufacturer’s recommended type, usually NiMH 1.2 V AA or AAA. Never use disposable alkaline batteries—they can leak or damage the charging circuit.
Q: How can I tell if the solar panel or controller is bad?
Ans: Test the panel’s open-circuit voltage in bright sunlight. If it’s well below expected levels, the panel is likely faulty. If the panel works but the light still doesn’t function after a reset and battery replacement, the controller or LED driver may have failed.
Conclusion
Resetting a solar light is often the quickest and most affordable way to restore its performance. By performing a careful inspection, cleaning the solar panel, checking the batteries, and power cycling the controller, you can often get your light shining again without replacing the entire unit.
Remember, resetting won’t fix severe damage or completely dead components, but it’s an excellent first step before investing in new parts. Practice safe handling, recycle old batteries responsibly, and maintain your lights with regular cleaning and battery replacement. With these habits, your solar lights can continue brightening your space for years to come.