Lighting is essential for safety and functionality, but moisture, dirt, and corrosion can reduce bulb efficiency over time. Bulb grease offers a simple solution by acting as a protective barrier that prevents corrosion, maintains strong electrical contact, and makes bulbs easier to remove.
Commonly used in automotive, outdoor, and marine lighting, this dielectric silicone compound helps extend the life of both bulbs and sockets. When applied correctly, it prevents issues like flickering, stuck bulbs, and electrical failure. In this article, you’ll discover what bulb grease is, where it’s used, why it matters, and how to use bulb grease step by step for best results.
What is Bulb Grease?
Bulb grease is a non-conductive dielectric silicone compound designed to protect bulb sockets and metal contacts from moisture, dirt, and corrosion. Ideal for harsh environments like cars, RVs, boats, and outdoor fixtures, it creates a barrier that extends bulb life and ensures reliable electrical contact.
It should be applied only to the metal base of the bulb, not to socket pins or wiring. Commonly used in headlights, tail lights, porch lights, and marine systems, bulb grease prevents stuck bulbs, flickering, and corrosion-related failures. Whether you’re a DIYer or a professional, this simple solution offers long-term protection and hassle-free maintenance for any lighting setup exposed to weather or vibration.
Why You Should Use Bulb Grease
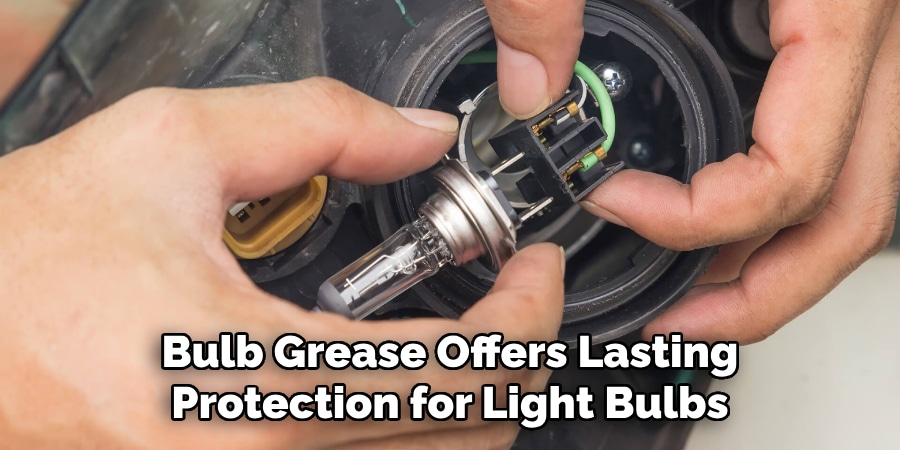
Bulb grease offers lasting protection for light bulbs, especially in damp or harsh environments. It prevents corrosion by sealing metal contacts from moisture and air, reducing the risk of flickering, dimming, or failure. It also makes bulb installation and removal easier by acting as a lubricant, preventing bulbs from getting stuck due to heat or vibration.
Additionally, bulb grease ensures strong electrical contact by keeping the socket clean from dirt and oxidation, resulting in consistent lighting. Economical and easy to use, a small amount goes a long way, helping avoid costly replacements or repairs. Overall, using bulb grease extends bulb life and ensures reliable performance in challenging conditions.
When Not to Use Bulb Grease
Bulb grease isn’t suitable for all situations. Avoid using it with high-heat bulbs like halogen or HID, as the grease can break down, burn, or produce odors—possibly voiding warranties. Never apply grease to the glass part of a bulb, as it can burn, stain, reduce brightness, or become a fire risk in enclosed fixtures.
Also, do not use it on non-electrical fittings or plastics; unless it’s plastic-safe, it may degrade plastic components over time. Use bulb grease only on metal contacts and in moderate-temperature environments to avoid safety and performance issues.
Tools and Materials Needed
Having the right tools can make the process of applying bulb grease much easier and more efficient. Here’s a list of essential items you’ll need for safely removing, cleaning, and reinstalling your bulbs:
- Bulb grease
- Clean microfiber cloth or paper towel
- Screwdriver
- Gloves
- New or replacement bulbs
7 Easy Steps on How to Use Bulb Grease
Proper use of bulb grease extends lighting performance and prevents corrosion. Whether for automotive, outdoor, or trailer lights, carefully following each step ensures safe, efficient application. Here’s a step-by-step guide to do it right.
Step 1: Turn Off the Power or Remove the Battery
Safety comes first. Before you begin, make sure the power is turned off. If you’re working on a household light, switch off the light at the wall and, for added safety, cut power at the breaker box. If it’s a vehicle or RV light, disconnect the battery to eliminate any risk of electric shock or short circuits.

This step is especially important because handling electrical components while they are powered can result in shock, injury, or damage to the system. Additionally, allowing the bulb and socket to cool down prevents burns, particularly if the bulb has been in use recently.
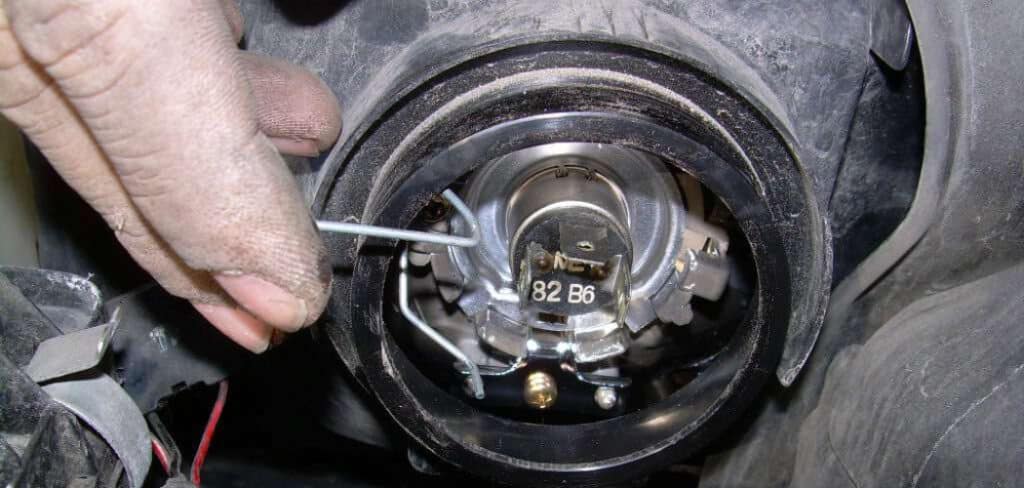
Step 2: Remove the Old Bulb Carefully
Once the power is off and the fixture or vehicle is safe to handle, gently remove the old bulb. The removal method will vary depending on the socket type—some bulbs require a slight twist, while others pull straight out. Avoid using force; if the bulb feels stuck, use a soft cloth or rubber gloves to improve your grip and protect your hands in case the glass breaks.
Take your time here. Forcing a stubborn bulb can break the glass or damage the socket, making future replacements more difficult or even unsafe.
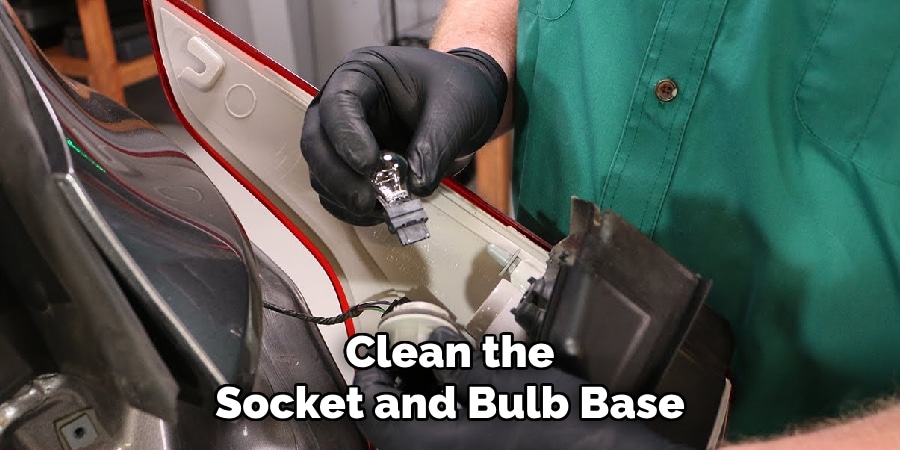
Step 3: Clean the Socket and Bulb Base
With the old bulb removed, inspect the socket for any dirt, debris, corrosion, or moisture. Use a dry, clean cloth or cotton swab to gently clean inside the socket and around the bulb base. If there’s any rust or heavy buildup, consider using a contact cleaner or fine-grit sandpaper—very lightly—to restore the connection points.
A clean socket ensures proper electrical contact and maximizes the effectiveness of the bulb grease. Any leftover contaminants can interfere with conductivity or trap moisture, defeating the purpose of applying the grease.
Step 4: Apply a Small Amount of Bulb Grease
This is the most crucial step. Using your fingertip, a cotton swab, or the nozzle of the grease tube, apply a thin layer of bulb grease only to the metal contacts on the base of the new bulb. The goal is to lightly coat the contact points—not to slather the entire bulb or the inside of the socket.
Be careful not to apply the grease to the glass part of the bulb or non-metallic surfaces. Excessive grease can burn or cause discoloration when the bulb heats up. It may also spread inside the socket, potentially interfering with the electrical connection.
Remember: less is more. A small dab goes a long way.
Step 5: Reinstall the Bulb
After applying the grease, gently insert the bulb back into the socket. It should slide in smoothly thanks to the lubricant. Ensure it is seated firmly but do not overtighten or press too hard—this could crack the bulb or deform the socket contacts.
The grease not only helps the bulb fit in easier, but also makes future removal much simpler, especially in fixtures exposed to moisture, vibration, or temperature fluctuations.
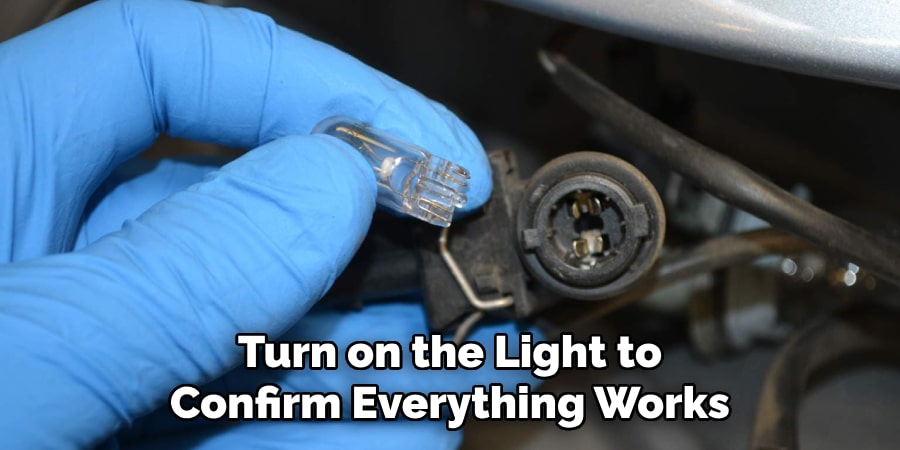
Step 6: Test the Light
Once the bulb is securely installed, restore power or reconnect the battery. Turn on the light to confirm everything works as expected. The bulb should turn on immediately without flickering, dimming, or delay.
If the light doesn’t come on, double-check:
- Whether the bulb is properly seated
- If too much grease has been applied
- If the socket is clean and dry
- That the power source or battery is reconnected properly
If necessary, repeat the installation with a better connection or reduced grease.
Step 7: Wipe Away Any Excess
Finally, inspect the area around the bulb base and socket. If any grease has squeezed out during installation, wipe it off gently with a clean cloth or tissue. Leaving excess grease exposed can attract dust, dirt, and moisture—leading to future problems, especially in outdoor or automotive applications.

Keeping the installation clean and tidy ensures long-lasting performance and makes future maintenance easier.
Best Practices for Using Bulb Grease
To get the most out of your bulb grease, it’s essential to follow a few key best practices. First, always apply it only on metal contacts. The goal is to create a protective barrier on the electrical connection, not insulate it or affect other parts of the fixture.
Never substitute bulb grease with other types of grease, such as petroleum jelly or automotive grease. These can conduct electricity or melt under heat, causing more harm than good. Bulb grease is specifically designed for electrical applications and will perform more reliably under varying conditions.
Proper storage also matters. Keep the tube in a cool, dry place and always seal it after use to maintain its quality over time. Since you only use a small amount at a time, a single tube can last for many applications if stored properly.
Lastly, always check compatibility when working with LED or specialty bulbs. Some manufacturers explicitly advise against using any form of grease, even dielectric types. When in doubt, refer to the product’s manual or website.
Common Mistakes to Avoid
One of the most common errors people make when using bulb grease is applying too much of it. A thick layer can interfere with electrical contact or trap heat in high-wattage applications. Remember, a thin coat is more than sufficient.
Another mistake is using bulb grease on bulbs that aren’t compatible, such as high-heat halogen or HID bulbs. These can cause the grease to degrade or smoke when the bulb gets hot.
Skipping the socket cleaning step is another issue. If the socket is dirty, greasy, or corroded, applying bulb grease on top of that mess won’t help—and may even worsen the contact issues you’re trying to fix.
Frequently Asked Questions
Q: What is the difference between bulb grease and regular grease?
Ans: Bulb grease is a non-conductive, silicone-based dielectric compound made specifically for electrical applications. Regular grease can be conductive or melt under heat, making it unsafe for light sockets or electronic contacts.
Q: Can bulb grease cause a bulb not to work?
Ans: Only if it’s applied incorrectly. If too much is used or it gets on the actual contact pins, it could block the electrical path. When applied lightly to the bulb base only, it won’t interfere with performance.
Q: Is bulb grease safe for LED bulbs?
Ans: Yes, as long as it’s used only on the metal part of the bulb that contacts the socket. Avoid using it on internal electronics, wiring, or heat sinks, and always verify with the manufacturer if you’re unsure.
Q: How long does bulb grease last?
Ans: Bulb grease is designed to last for years under normal use. It should be reapplied when you replace bulbs or inspect the socket, especially in outdoor or high-moisture environments.
Q: Can I use bulb grease on household lamps?
Ans: Absolutely. It’s helpful in any lamp or fixture, especially those used outdoors or in garages and basements, where corrosion or moisture could be a concern.
Conclusion
Bulb grease might seem like a small and optional product, but it plays a big role in maintaining long-term performance in your lighting systems. It prevents corrosion, improves bulb contact, and makes future maintenance hassle-free. Whether you’re replacing a tail light on your car, installing a porch light, or dealing with a tricky garage fixture, using bulb grease correctly can make a significant difference.
Just remember: clean the socket, use a thin layer, and follow safety guidelines. With these simple practices, you’ll enjoy more reliable lighting and extend the life of both your bulbs and their sockets—saving money, time, and frustration in the process.
If you’re serious about keeping your lights in top shape, bulb grease is a must-have tool in your lighting maintenance kit.