A motion sensor light switch is a modern, energy-efficient solution that enhances convenience, security, and energy savings. It automatically turns the lights on when movement is detected and off after a preset period of inactivity, reducing unnecessary energy consumption.
Additionally, we will cover troubleshooting tips to help resolve common issues. This article provides a comprehensive guide on how to wire a motion sensor light switch effectively. By following proper safety precautions and instructions, you can successfully install a motion sensor switch and upgrade your home’s lighting system with ease.
Understanding Motion Sensor Light Switches
What is a Motion Sensor Light Switch?
A motion sensor light switch detects movement using infrared or ultrasonic sensors and automatically controls the lighting. It replaces standard light switches and eliminates the need for manual operation.
There are two main types:
- Occupancy Sensors: Turn lights on and off based on detected motion.
- Vacancy Sensors: Require manual activation but turn off automatically when no movement is detected.
Benefits of Using a Motion Sensor Switch
- Energy Efficiency: Reduces electricity consumption by turning lights off when not needed.
- Enhanced Security: Deters intruders by automatically lighting up dark areas.
- Convenience: Eliminates the need to manually switch lights on and off, ideal for hands-free operation.
Where to Install Motion Sensor Switches?
Best Locations:
- Hallways
- Bathrooms
- Garages
- Basements
- Outdoor entry points
Places to Avoid:
- Bedrooms
- High-traffic areas with constant movement
Tools and Materials Required

Tools:
- Flathead and Phillips screwdrivers
- Wire strippers
- Voltage tester
- Electrical tape
- Needle-nose pliers
Materials:
- Motion sensor light switch
- Wire nuts
- Electrical box
- Circuit tester
Safety Precautions Before Installation
Turning Off the Power
- Locate the correct circuit breaker and turn it off.
- Use a voltage tester to confirm that power is off before proceeding.
Understanding Electrical Wiring
- Hot Wire (Black): Carries power from the breaker.
- Neutral Wire (White): Completes the circuit.
- Ground Wire (Green/Bare Copper): Prevents electrical hazards.
5 Easy Steps on How to Wire a Motion Sensor Light Switch
Motion sensor light switches provide hands-free lighting control, improving both energy efficiency and convenience. Proper installation ensures safe and reliable operation. Follow this step-by-step guide to wire a motion sensor switch correctly.

Step 1: Preparing for the Installation
Before beginning, ensure your safety by turning off the power supply to the existing light switch. Locate the correct circuit breaker at your electrical panel and switch it off. To double-check, try turning on the switch; if the light remains off, the power is disconnected.
Gather all the necessary tools and materials for the job, including a flathead and Phillips screwdriver, wire stripper, voltage tester, wire nuts, and electrical tape. Having these tools within reach will make the process easier and more efficient.
For added safety, use a non-contact voltage tester to verify that no electrical current is present in the switch wires. This step prevents accidental electrical shocks while working on the wiring.
Step 2: Removing the Old Switch
Start by removing the cover plate from the existing light switch using a screwdriver. Once removed, unscrew the switch from the electrical box and carefully pull it out to expose the wiring.
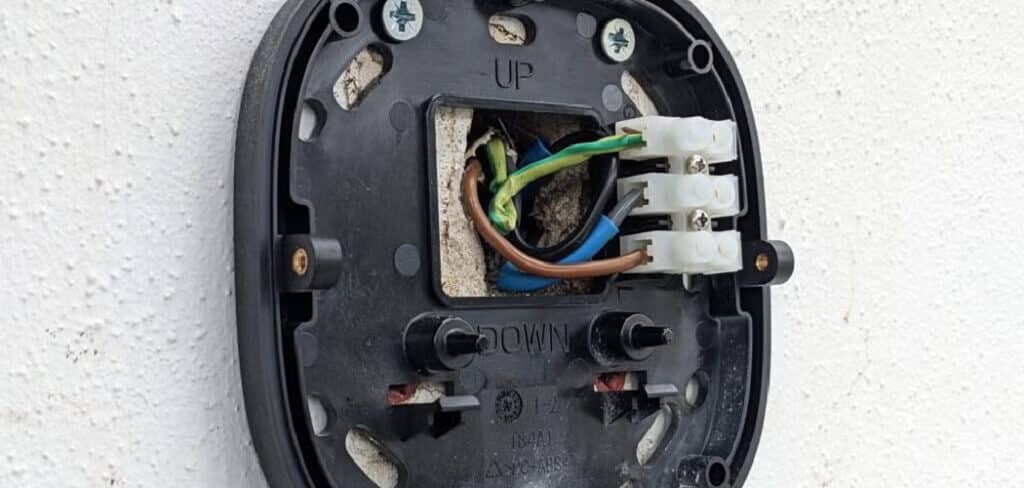
Examine the wires connected to the switch and take note of their placement. The primary wires include the hot (live) wire, load wire, neutral wire (if present), and ground wire. If needed, label these wires using masking tape or a marker to ensure proper reconnection later.
Using a screwdriver, loosen the terminal screws or wire connectors and detach the wires from the old switch. Be gentle while pulling the wires to avoid damaging them.
Step 3: Wiring the Motion Sensor Switch
With the old switch removed, it’s time to connect the motion sensor switch. Start with the ground wire—this is usually a bare copper or green wire. Attach it to the green terminal screw on the new switch and tighten the screw securely.
Next, connect the hot (live) wire, which is typically black. Attach it to the corresponding black terminal on the motion sensor switch. Ensure the connection is tight to prevent electrical hazards.
Now, connect the load wire, which carries power from the switch to the light fixture. This is usually a black or red wire. Attach it to the load terminal on the switch.

Some motion sensor switches require a neutral wire for proper functionality. If your switch has a neutral terminal and a white wire is available in the electrical box, connect it accordingly. However, some models do not require this connection.
Step 4: Mounting the Motion Sensor Switch
Carefully push the connected wires back into the electrical box, ensuring they are neatly arranged to prevent overcrowding. Position the motion sensor switch properly, aligning it with the screw holes.
Use mounting screws to secure the switch in place. Once mounted, attach the wall plate over the switch and fasten it tightly with screws to complete the installation.
Step 5: Restoring Power and Testing
Return to the breaker panel and switch the power back on. Once restored, test the motion sensor switch by moving in front of it. The light should turn on automatically in response to movement.
Adjust the motion sensor’s sensitivity and timer settings to optimize performance based on the room’s needs. If your switch has a manual override function, test it to ensure it operates correctly.
By following these steps, you can successfully install a motion sensor light switch for enhanced lighting control and energy savings.
Troubleshooting Common Issues
Even after proper installation, motion sensor light switches can sometimes experience issues. Below are common problems and their solutions to help you troubleshoot effectively.
Motion Sensor Not Turning On
If the motion sensor light does not activate when motion is detected, first check the power supply and wiring. Ensure the switch is receiving power and verify that all wiring connections are secure. If the circuit breaker has tripped, reset it.
Another possible cause is an obstructed sensor. Objects such as furniture, decorations, or even dirt and debris can block the sensor’s field of view, preventing it from detecting motion. Clean the sensor and remove any obstacles to restore its functionality.
Light Stays On Constantly
If the light remains on without turning off, adjusting the sensor’s sensitivity may solve the problem. Most motion sensor switches have an adjustable sensitivity setting. If it is too high, the light may be triggered by minor movements. Lowering the sensitivity can help the sensor detect only intended motion.
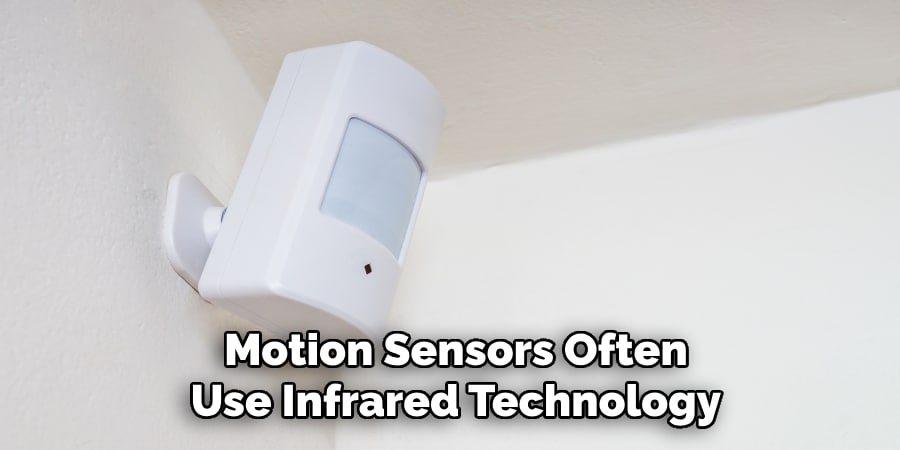
Another reason the light might stay on is the presence of nearby heat sources. Motion sensors often use infrared technology to detect changes in heat. If a heating vent, an appliance, or even direct sunlight is within the detection range, it may continuously trigger the sensor. Relocating the sensor or eliminating unnecessary heat sources can resolve this issue.
Flickering or Intermittent Lighting
If the motion sensor light flickers or turns on and off sporadically, the first thing to check is the wiring connections. Loose or faulty wiring can cause an inconsistent power supply. Turn off the power and inspect the wiring to ensure it is properly secured.
Additionally, some motion sensor switches are not compatible with all LED bulbs. If flickering persists, check the manufacturer’s specifications and replace the bulb with a compatible one if necessary.
Additional Tips and Maintenance
- Clean motion sensors periodically to prevent dust accumulation.
- Adjust settings based on room usage.
- Replace the motion sensor switch if it becomes faulty.
Frequently Asked Questions
Q: Why is my motion sensor light not detecting movement?
Ans: If the light is not detecting movement, check for obstructions blocking the sensor, ensure the sensitivity settings are correctly adjusted, and clean the sensor lens. Also, confirm that the power supply and wiring are properly connected.
Q: How can I adjust the sensitivity of my motion sensor light switch?
Ans: Most motion sensor switches have a sensitivity dial or button that allows you to increase or decrease the detection range. Refer to the manufacturer’s instructions to adjust it according to your preference.
Q: Why does my motion sensor light turn on randomly?
Ans: Random activations can be caused by high sensitivity settings, small moving objects like pets, or heat sources such as air vents. Adjusting the sensitivity and repositioning the sensor can help prevent false triggers.
Q: Why is my motion sensor light flickering?
Ans: Flickering can occur due to loose wiring connections, incompatible bulbs, or issues with the power supply. Inspect the wiring, and ensure you are using bulbs that are compatible with the motion sensor switch.
Q: Do motion sensor lights use a lot of electricity?
Ans: Motion sensor lights are designed to save energy by only turning on when motion is detected. They typically use less electricity compared to traditional lights that remain on all the time. However, the overall energy consumption depends on the type of bulb used and how often the light is triggered.
Conclusion
Installing a motion sensor light switch enhances energy efficiency, security, and convenience. By following safety measures and step-by-step installation instructions, you can successfully wire your motion sensor switch. Regular maintenance ensures optimal performance, making this a valuable upgrade to any home lighting system.